GD08 calling unit
The GD08 is a specialized device that can be used as a calling unit with the help of a touchscreen. (With different, appropriate firmware, it can also be used as a customer satisfaction feedback device.)
Firmware configuration
The feedback device configuration can be done either through the control panel displayed on its screen or remotely through a web browser. In both cases, you need to enter a password on the interface, which is "qnet1234".
After the device connected to the network it will show its current IP address on the top of the screen. (It is shown only until waiting for the connection to the server.) Enter this IP address to a browser to open the control panel remotely.
Main screen
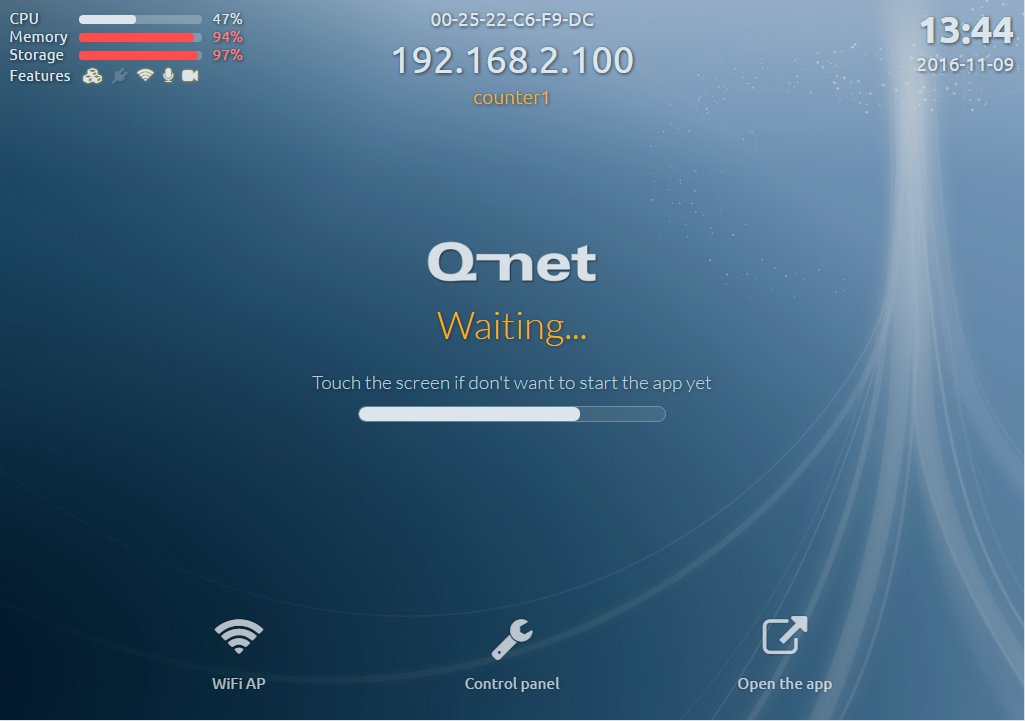
After the device starting, this screen will appear. In this screen the system will wait 10 seconds to any touch event, then it tries to connect to the server and start the application. If any touch event occurs, the timer will stop and it will be possible to access the Control Panel.
items on the screen:
upper left
Here are the resource details of the device. The CPU, memory and storage usage. Below the small icons displays the status of the device (from left to right):
- DeviceController is installed and running
- Ethernet cabel connected
- Onboard Wi-Fi available
- Microphone connected
- Webcamera connected (ticket dispenser)
upper middle
From top to bottom:
- The device’s MAC address
- The device’s IP address
- The device’s WSID
The WSID is automatically generated at the first start. The ID is user-friendly, includes the code of the running software module and the IP address received at first start. This WSID can be change on the setting tab.
The device controllers WSID generated the same way, but with a “dc-“prefix.
upper right
The device’s actual date and time.
function buttons on the bottom
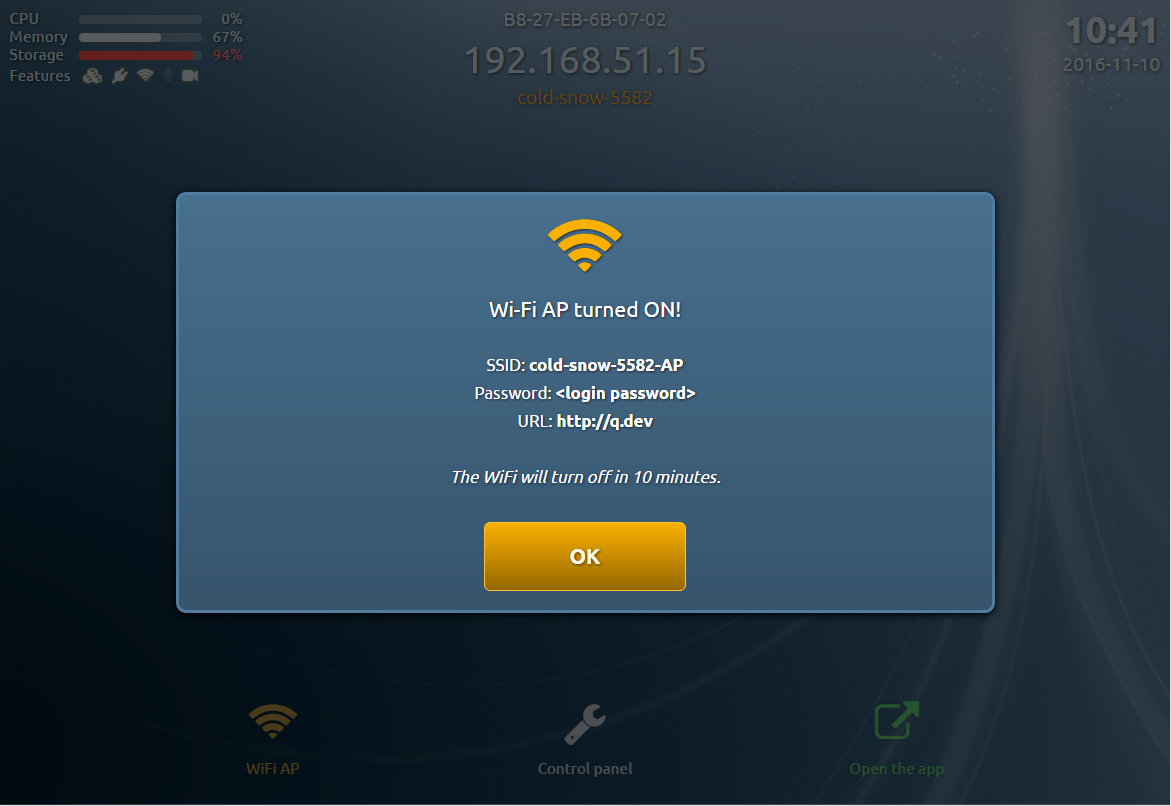
If the device has onboard Wi-Fi, a Wi-Fi button on the right will appear. It is possible to turn on the Wi-fi in AP (Access point). This option might not available on some device! More information about this can be found at the configuration section. The button on the right opens the application’s page. If the server is available, the button will turn to green.
waiting for the server
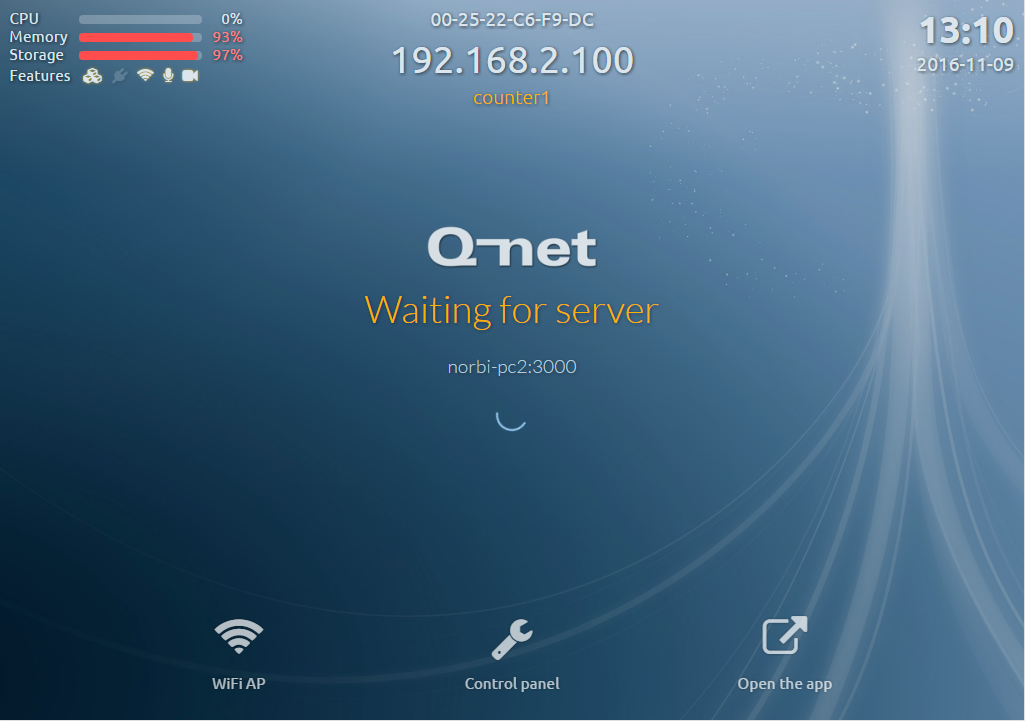
This screen will appear, if the timer expired on the Main screen or we press the “Open the app” button. In this case the firmware checks, that the previously configured server is online (the server address should be visible at the middle of the screen), if yes, it will jump to the application screen. If the connection is not yet available, the device will show this screen, and will continuously try to establish the connection.
Control Panel
The control panel menu is to configure the device, monitor the resources, test the hardware devices and check log files.
Login
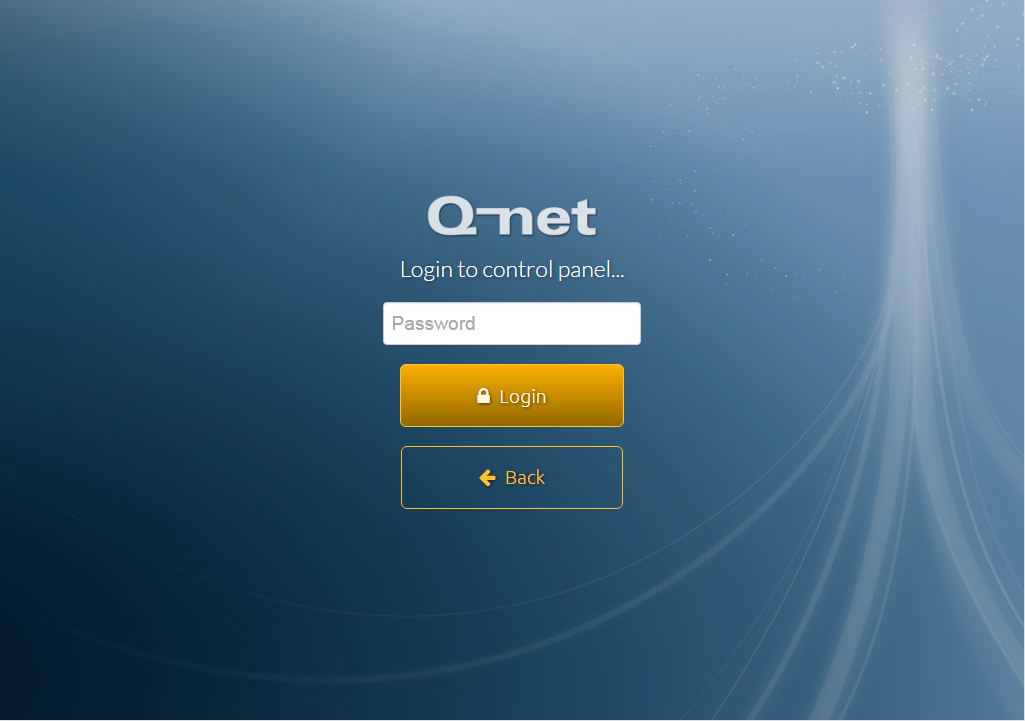
Before you can access to the Control Panel, login is required. You must enter the password here, to prevent unauthorized logins. The default password is: “qnet1234”
Control panel
Dashboard
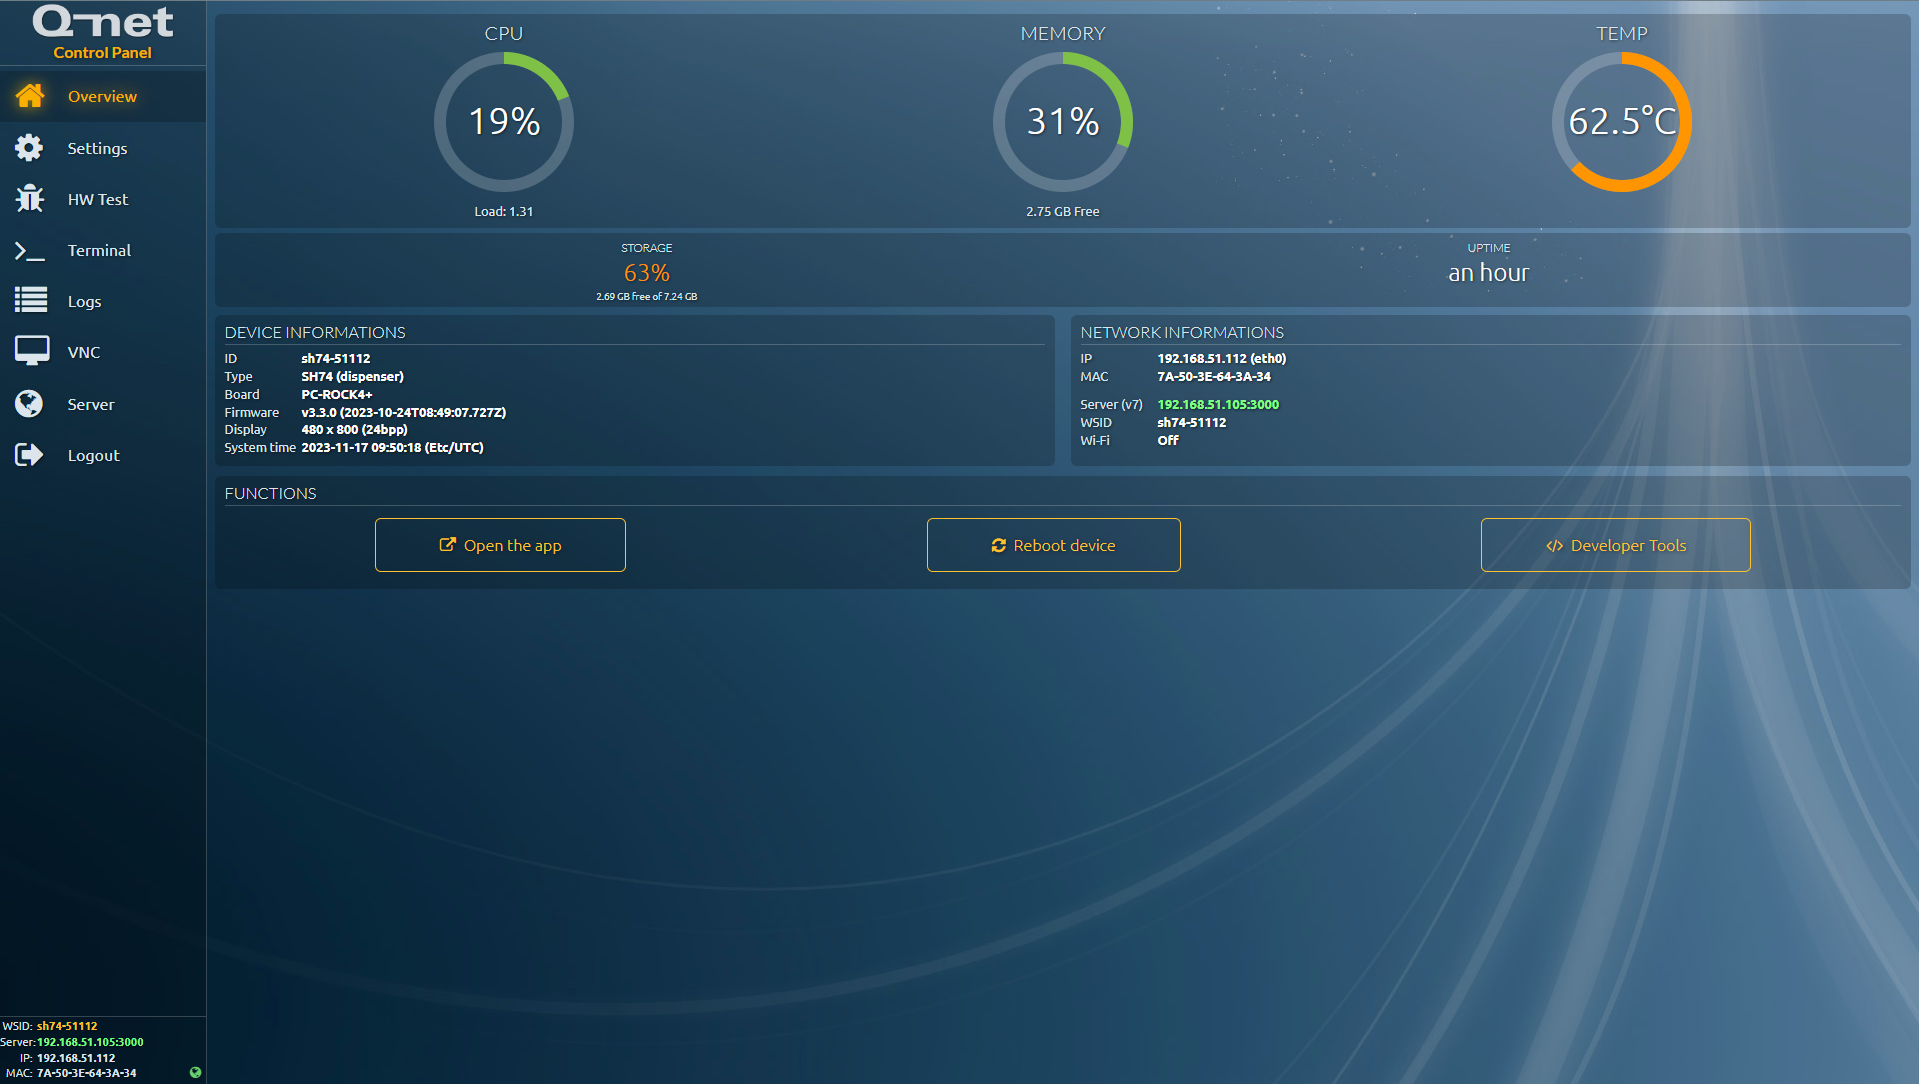
After successful login, this screen will be shown. This page includes summarized information about the device and we can reboot it. („Reboot device”) The "Developer tools" button opens a developer console on the screen of the device for troubleshooting purpose.
On the bottom left, we can see additional information. The green globe means, that the device has working internet connection.
Settings
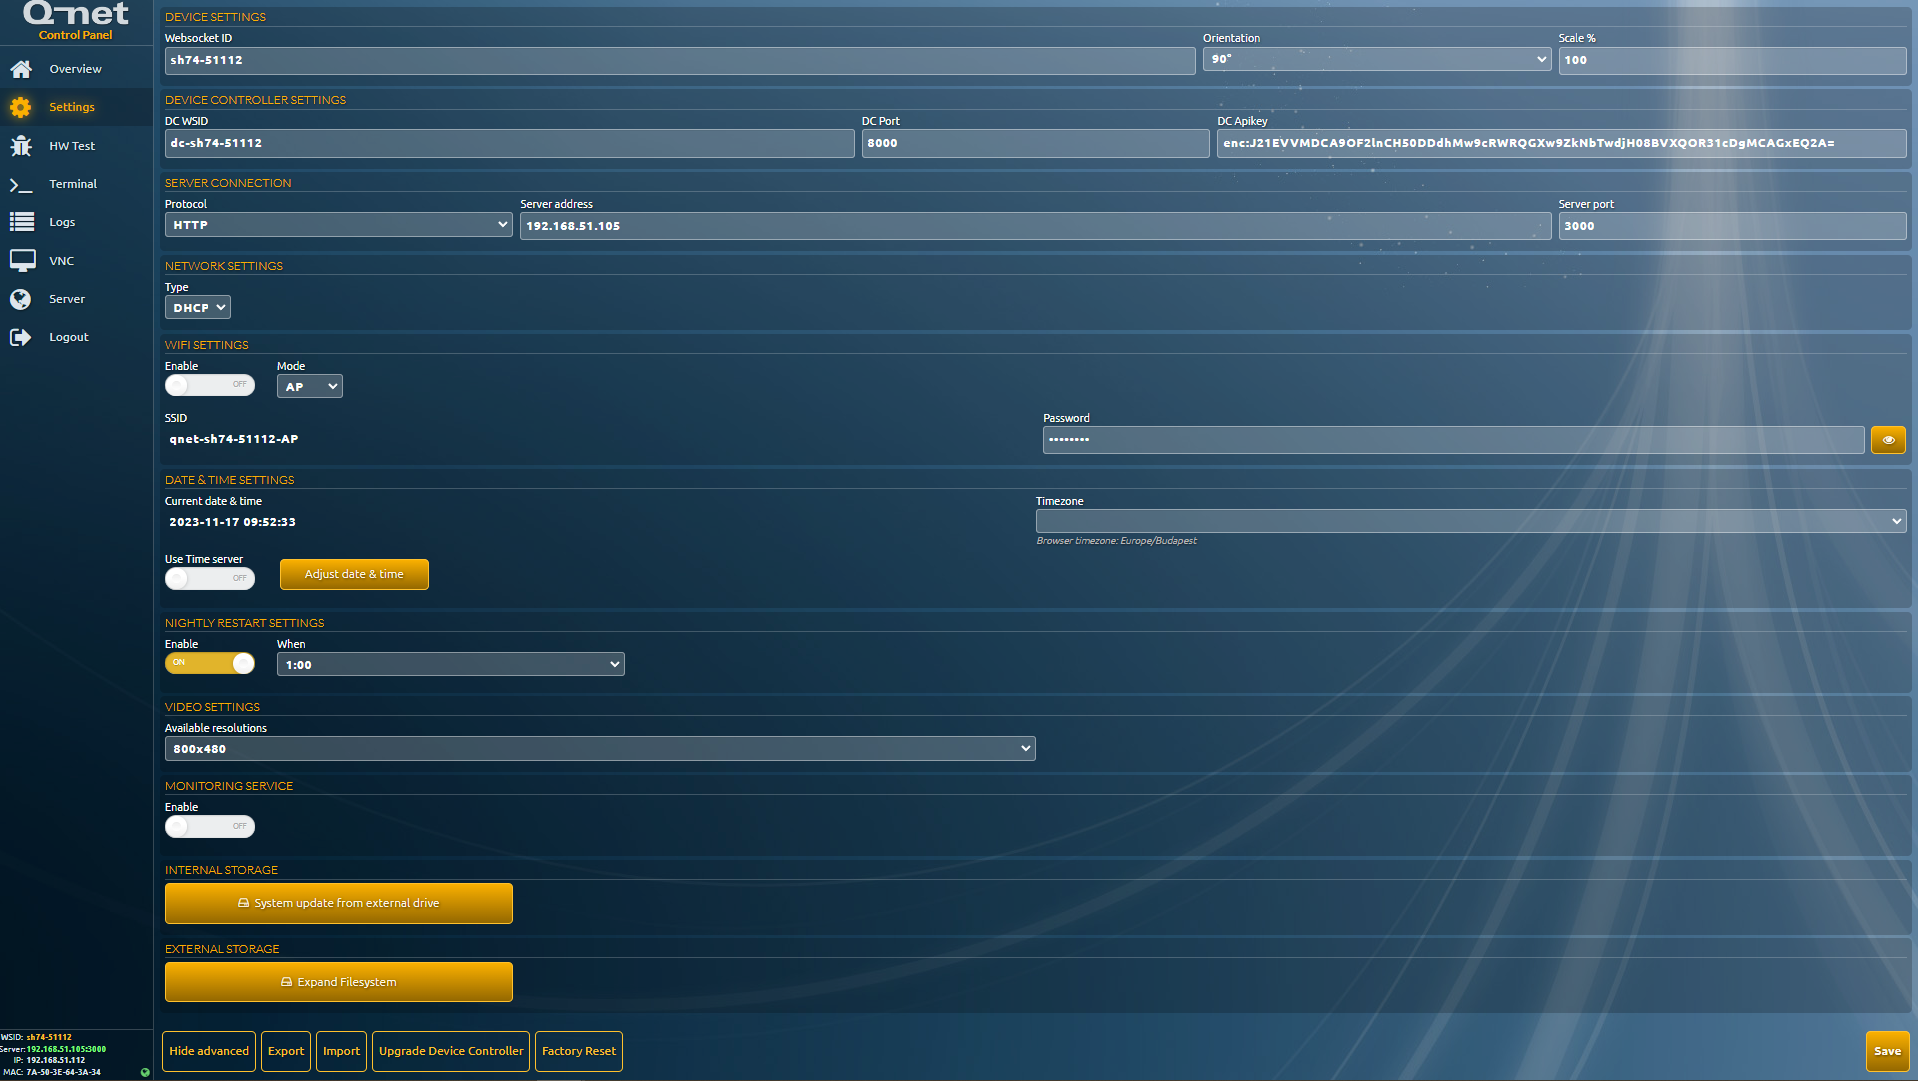
You can set up the device’s parameters here. The „Basic” and „Advanced” buttons can hide and unhide additional options.
From top to bottom:
- Websocket ID, and screen rotating
- Device Controller WSID, the listening port(for SD20) and Apikey used for the server connection
- Server connection settings (protocol, Q-net server IP address or host name, Q-net server port)
- Network settings (DHCP or static)
- Date and time configuration (timezone, time server or manual date and time settings)
- Nightly restart. Due to the long term usage of the browsers, in order to avoid having any memory leak, it is recommended to restart the device periodically. This function restarts the device at the previously set time. Best time for this is before the opening hours.
- Video settings - allows to adjust the screen resolution. Depending on the device type the list might be limited, including only the supported values.
- Monitoring service - opens TCP9100 port for node exporter, which you can use for external monitoring system, e.g. Grafana.
Press "Save" button to keep the modified settings. The device will reboot using the new configuration parameters.
After restart you'll get the below screen on the device.
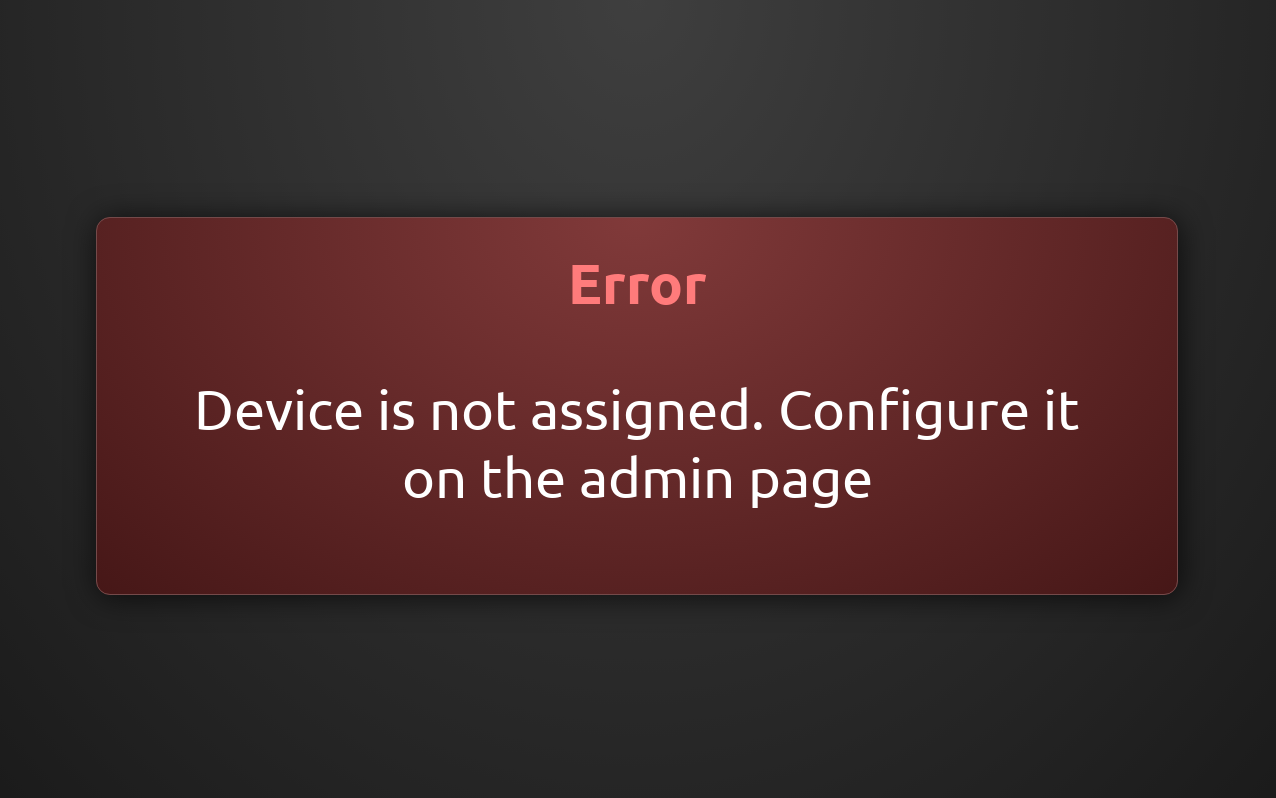
That means, the device is not configured yet on the server side. First find your device at "Central view", "Unassigned devices". Select the device, and move it to the your branch, by choosing the correct one in the drop-down list:
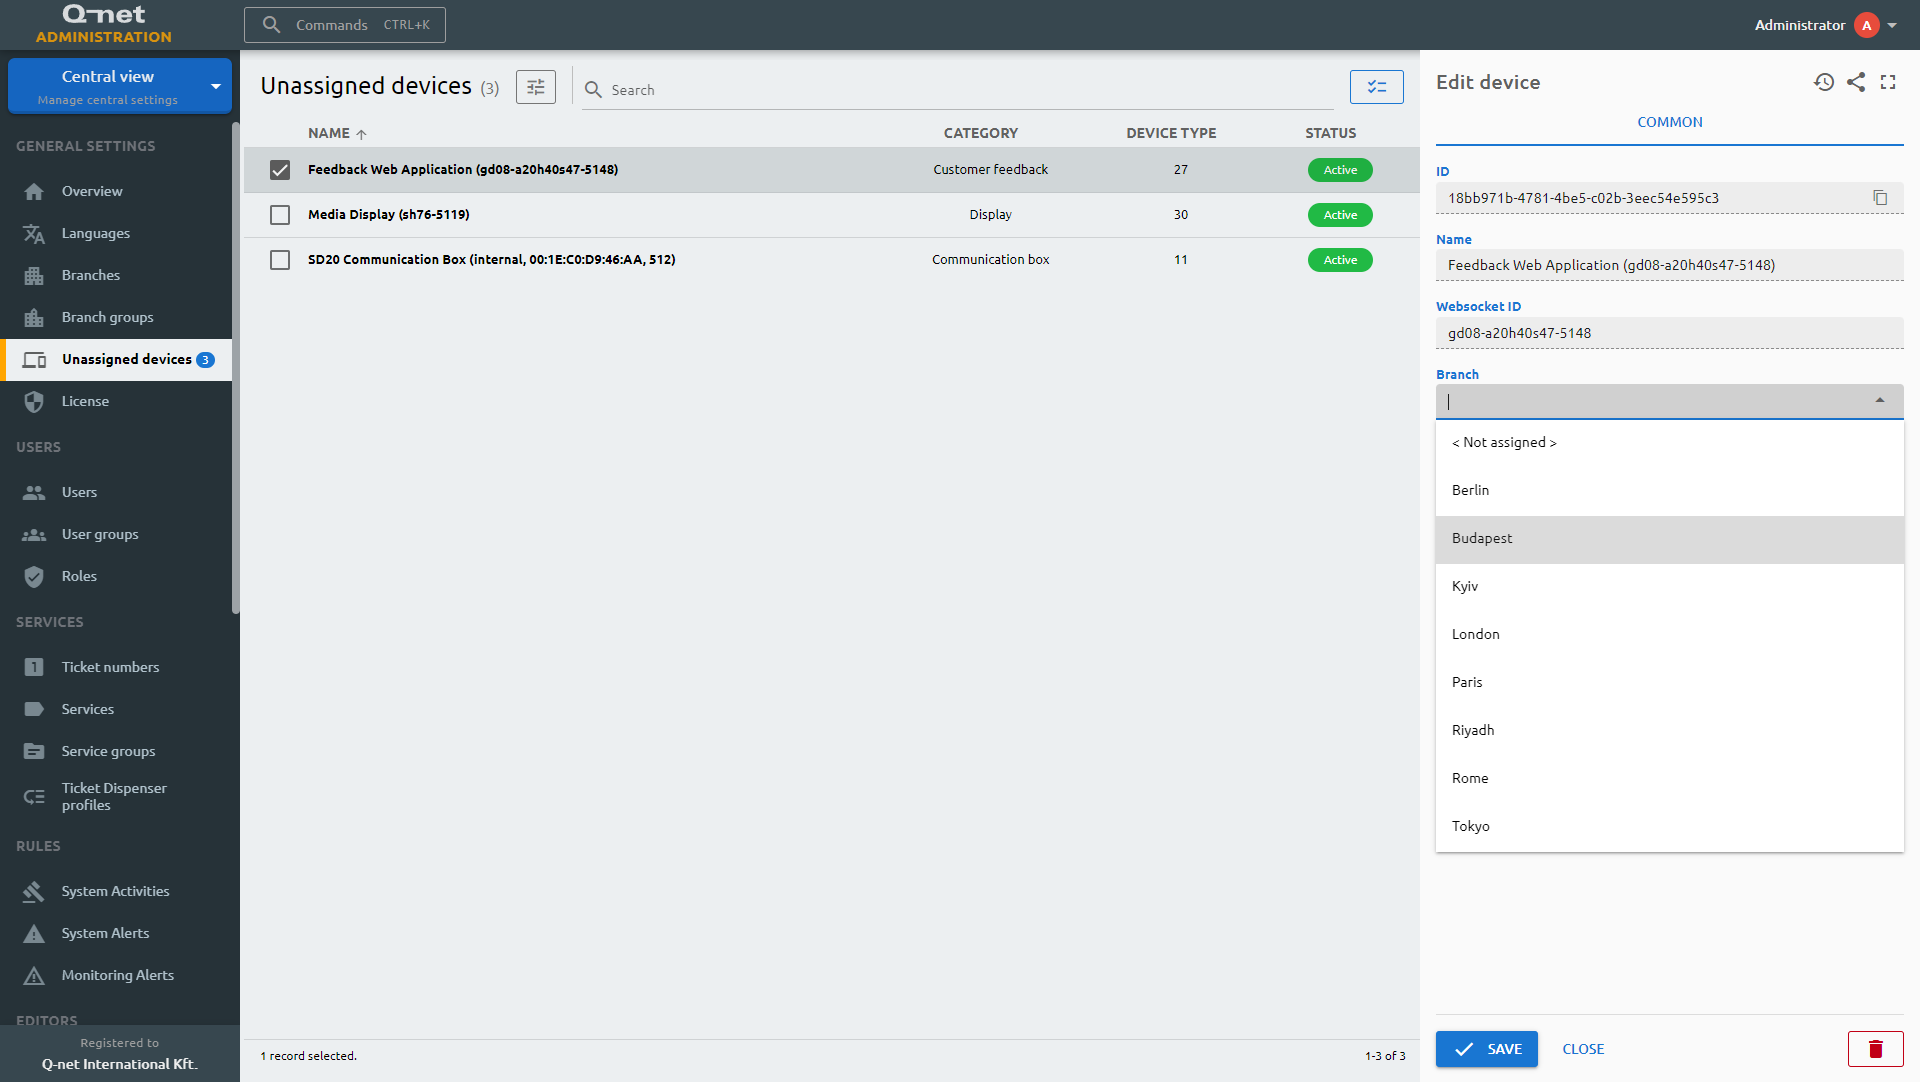
After that finalize the configuration in "Branch view" as described here
HW test
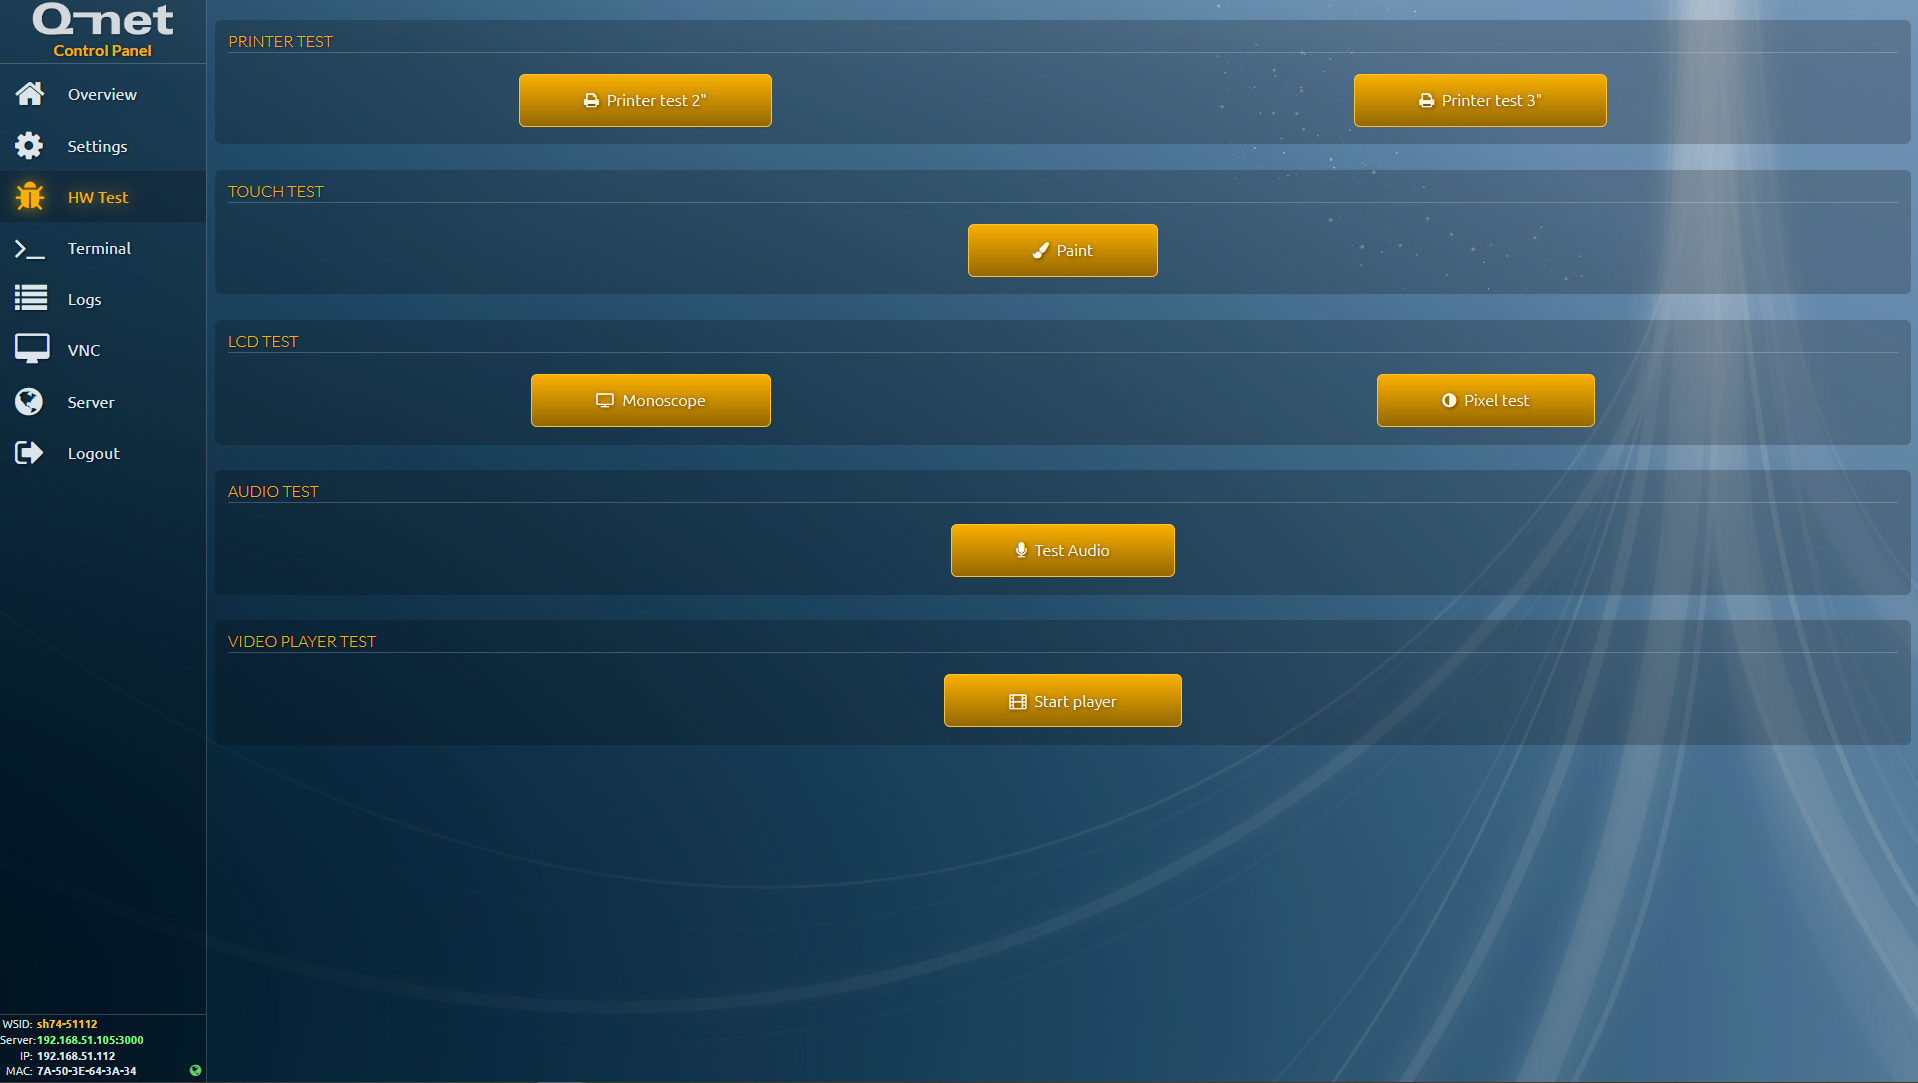
In this page it is possible to test every connected device. Some of these options only available, if the hardware is connected to the device.
- Paint – testing touch panel with Paint (exit with double touch)
- Monoscope (exit with double touch)
- Pixel test – For testing LCD pixels. Red, green, blue, white and black screens are switching (exit with double touch)
- Test record test – microphone test (record, then play). It is recommended to try this on PC.
- Start player – video player test. It can be useful in case of media player. Omxplayer will be started with a sample video. (exit with double touch)
Logs
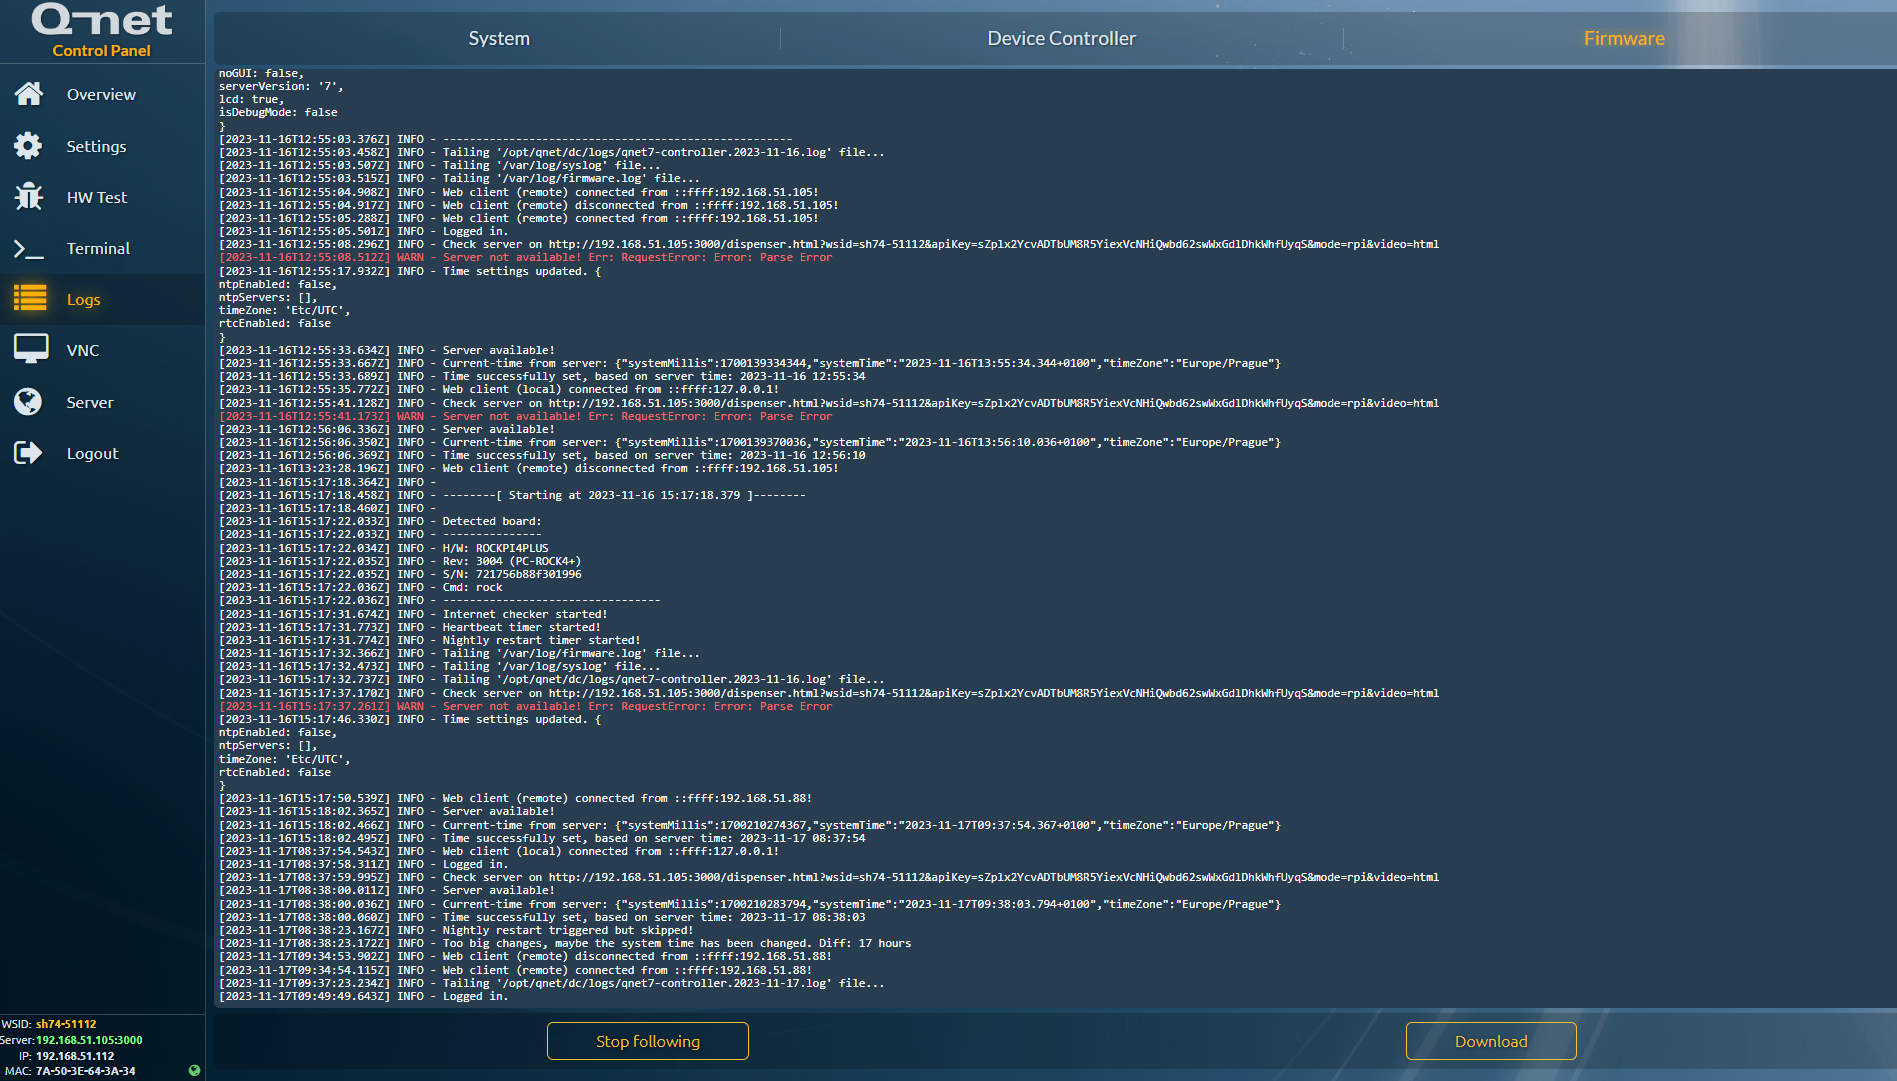
It is possible to check the device log files here.
- System – log of the operation system. Messages, alerts and errors regarding the operation system (/var/log/syslog)
- Device Controller – log file of the Device Controller service. It always shows the logs of the last day (opt/qnet/dc/logs/*.log)
- Firmware – the log of the firmware (that provides this surface) itself. (/var/log/firmware.log)
In case a new event written to the log file, it will automatically show up here, no need to refresh. Due the limited resources, only the last 1000 lines are visible here.
The „Stop following” button turn off the auto refresh. With remote access it is also possible to download the whole log file with the “Download” button.
Remote screens
The below options are available in remote access mode only.
Terminal
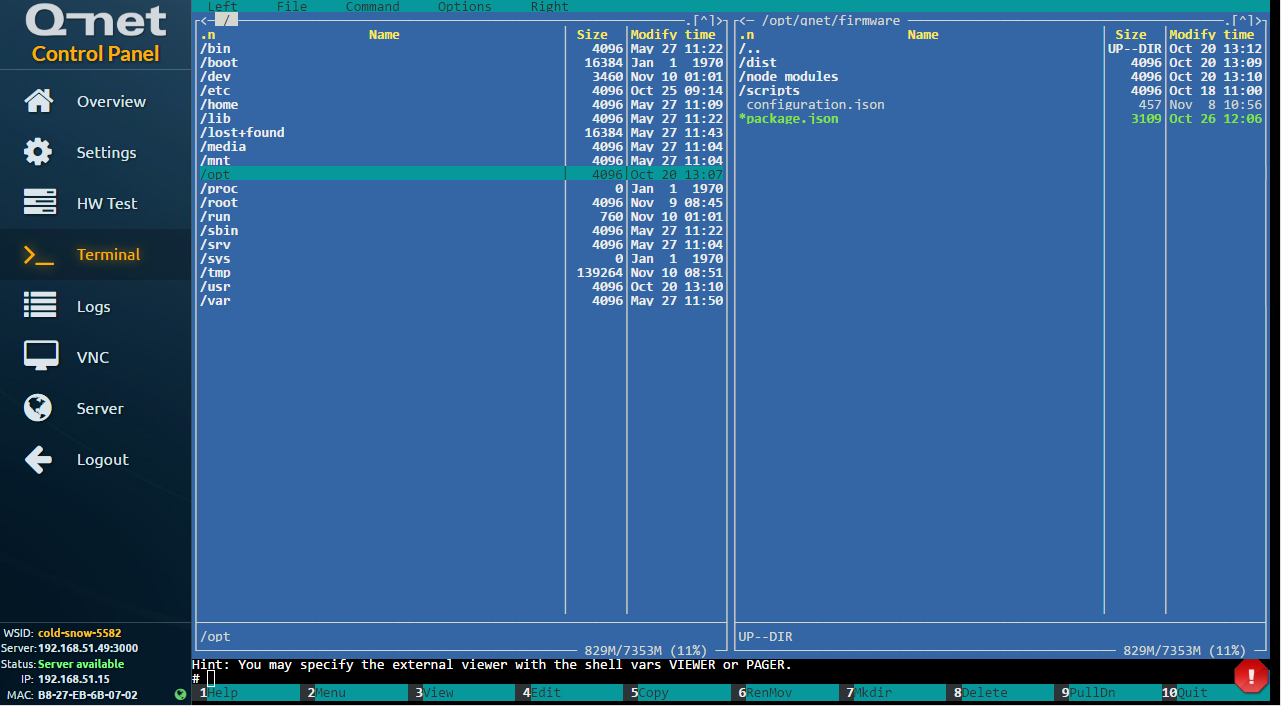
In this surface, we get a remote terminal in the browser, logged in with “root” user! Every command is usable, same like an SSH connection. If an another menu is selected on the left, the terminal will close automatically.
VNC
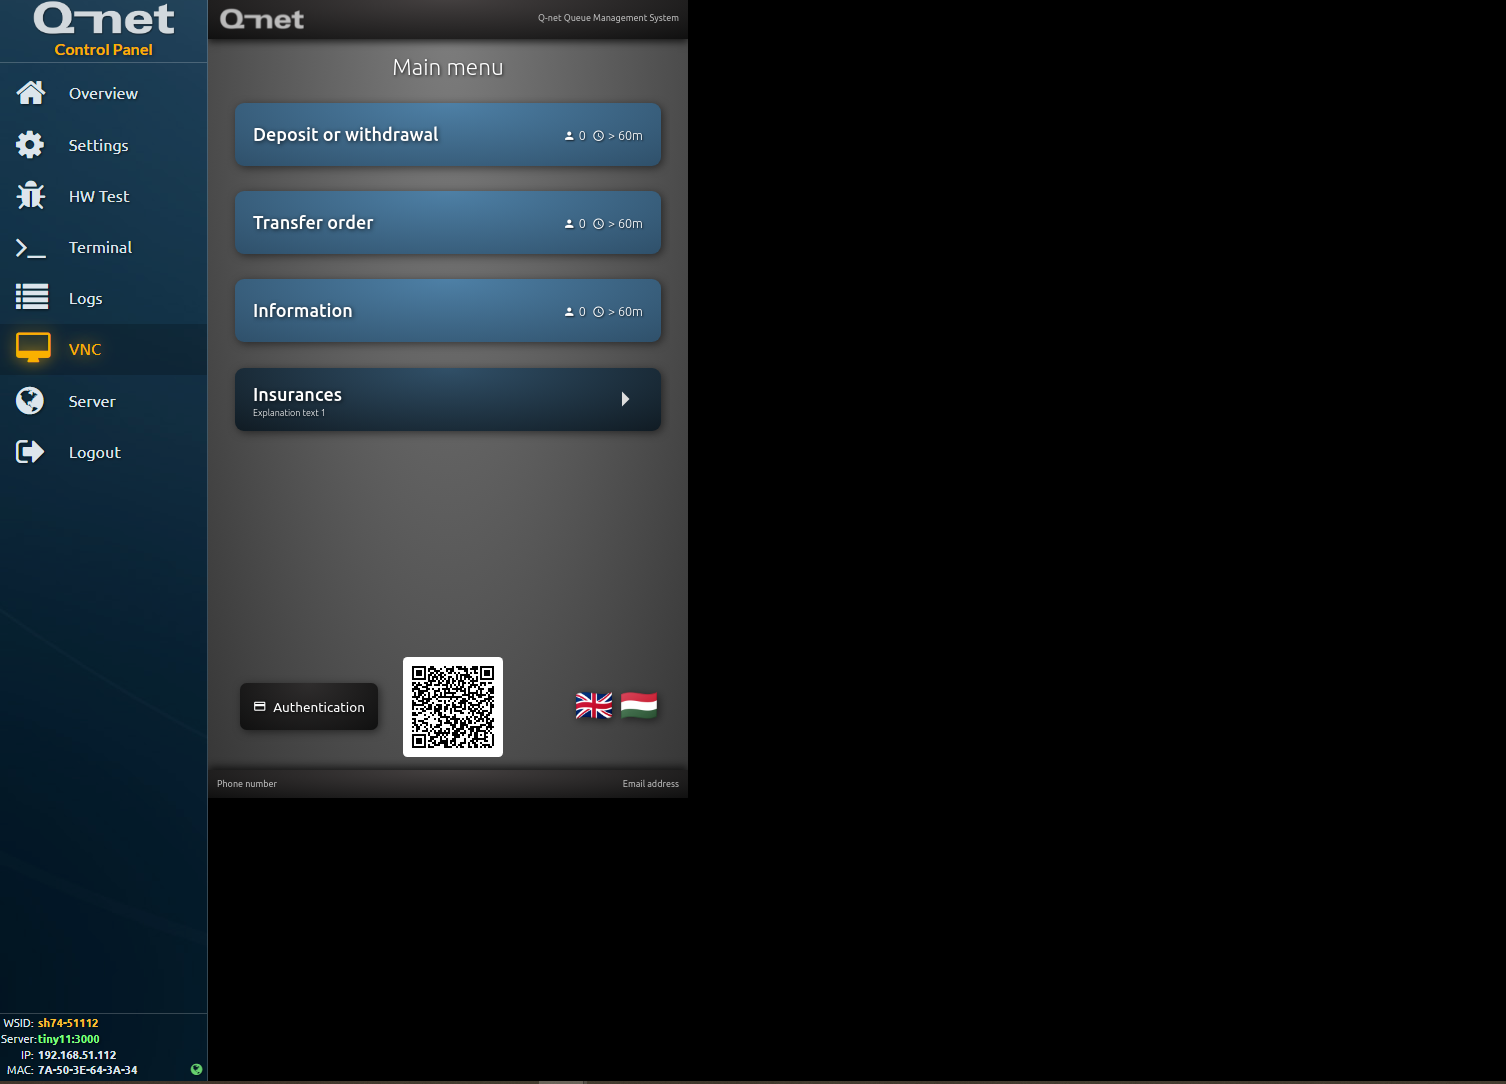
Provides remote view to the screen of the device. It can be useful for a ticket dispenser or media player in otder to check if some configuration changes were really applied.
Important! The video player’s screen might not be visible through VNC! It is possible to check that the video player is running, in the terminal, type “htop” command and check”omxplayer” process is running.
The VNC transfers keyboard, mouse movement and clicks as well. The F5 and F12 buttons are useable as well. These buttons will be transferred to the device and not run in the local browser.
The VNC is also accessible via vncviewer, on the standard way. The password is “qnet1234”.
Server
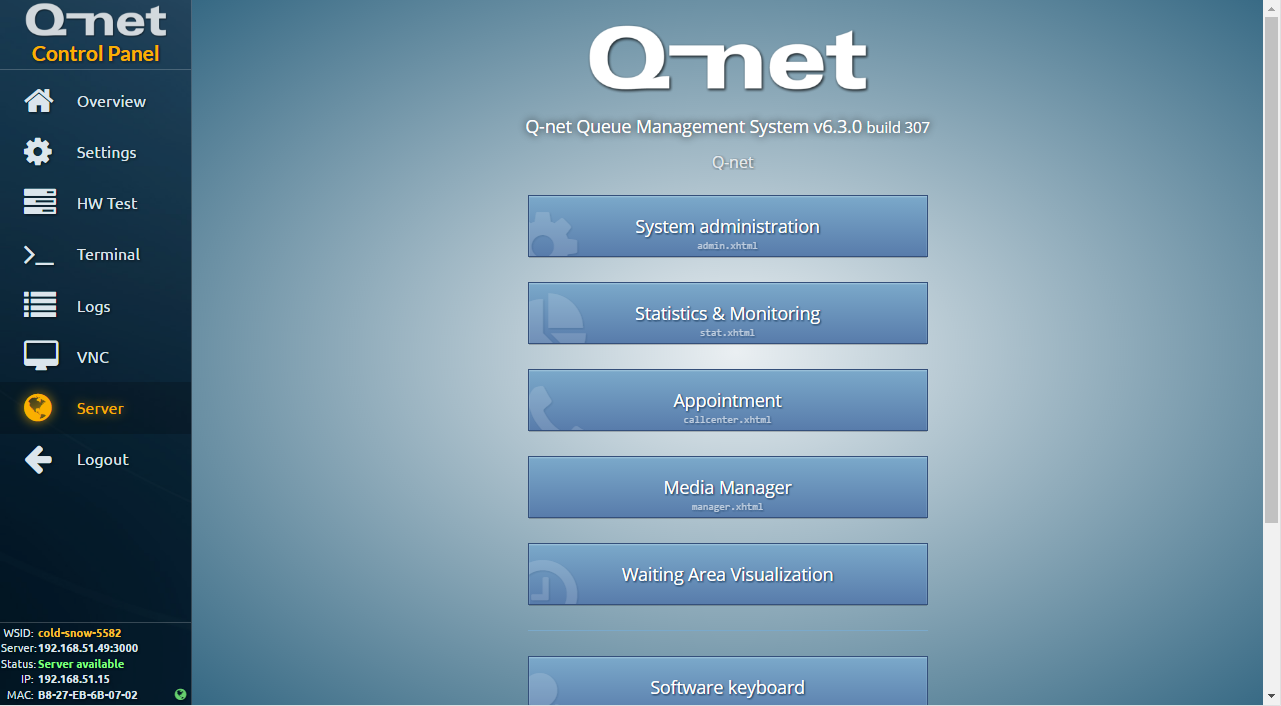
This menu opens the server start page, allows to reach the admin page, statistics, etc. It is accessible only if the server is configured and online.
Q-net v7 application screen

After the configuration is done, the firmware should forward us to the application itself.(ticket dispenser, media player, feedback). The application can be closed by touching the top-left, bottom left, top-left, bottom left corner of the screen within a few seconds, after this you will be returned to the firmware’s main page.
This exit method works with all application (feedback, software keyboard, media player)
The following hotkeys are also available:
- F5 – refresh screen without cache
- F12 – open developer tools
configuration options
configuration locally
In case of touchscreen devices, the configuration is the easiest locally, on the device. After the device starts, it is possible to enter the Control Panel by touching the screen. A virtual keyboard can be used to fill text fields.
Tutorial video: https://youtu.be/Eb7gZwwy4fA
remote configuration
The control panel also accessible remotely on a PC or notebook. To remote access, enter the device’s IP address to a browser.
Tutorial video: https://youtu.be/MWxSyYSKXY8
useful commands
- htop – check running processes
- df –ahl – show free space
- arecord -l | grep Sound – microphone connected
- ls /dev/video0 – webcamera connected
- netstat -tulpn | grep 80 – checking port 80
- cat /boot/config.txt | grep rotate – read screen orientation
- sudo touch /forcefsck – check filesystem at next start
Voice recorder
The GD08 devices is equipped with microphone. This way it can be used to record the conversation between the customer and the clerk. These records are stored with the ticket, and the statistics page allows to listen what happened during the transaction. In order to use the option, the system must have the necessary license for this module and for the number of devices.
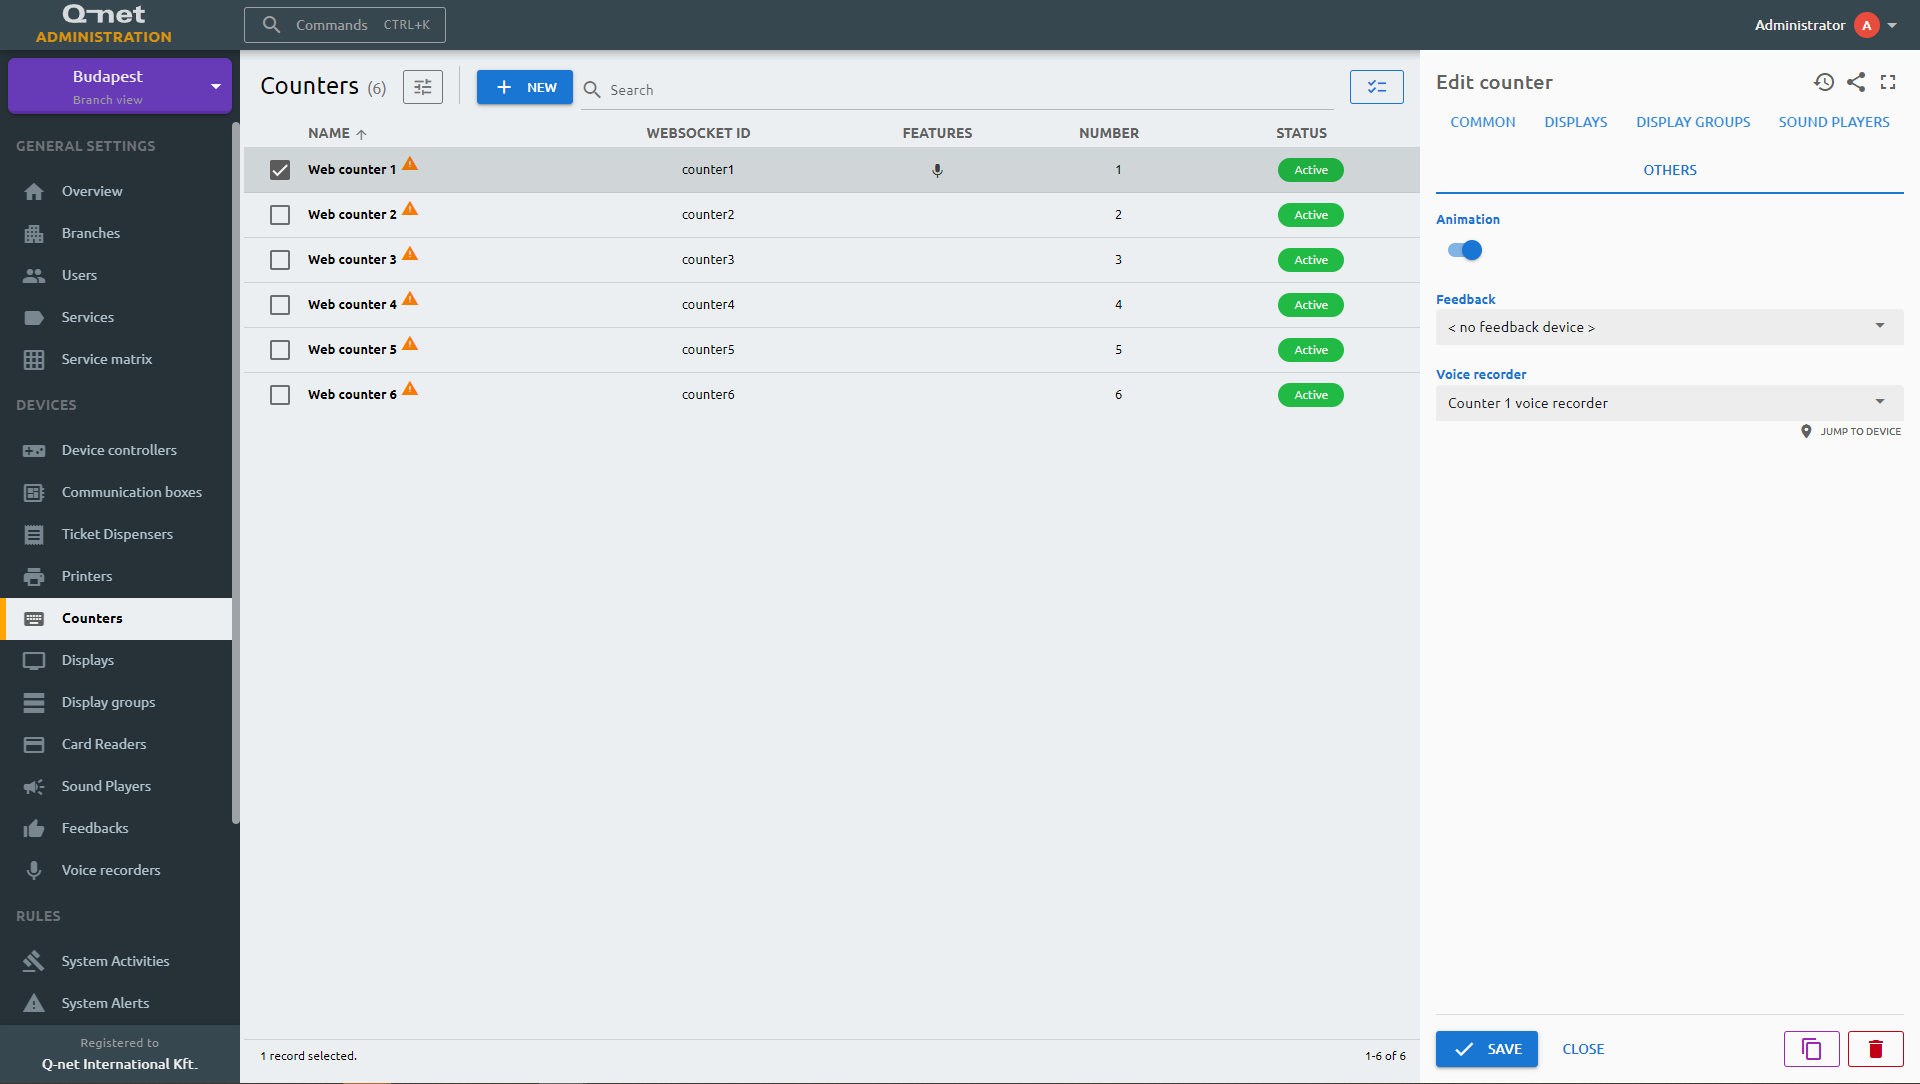
The voice recorder has to be added by adding the device controller runs on the particular device.
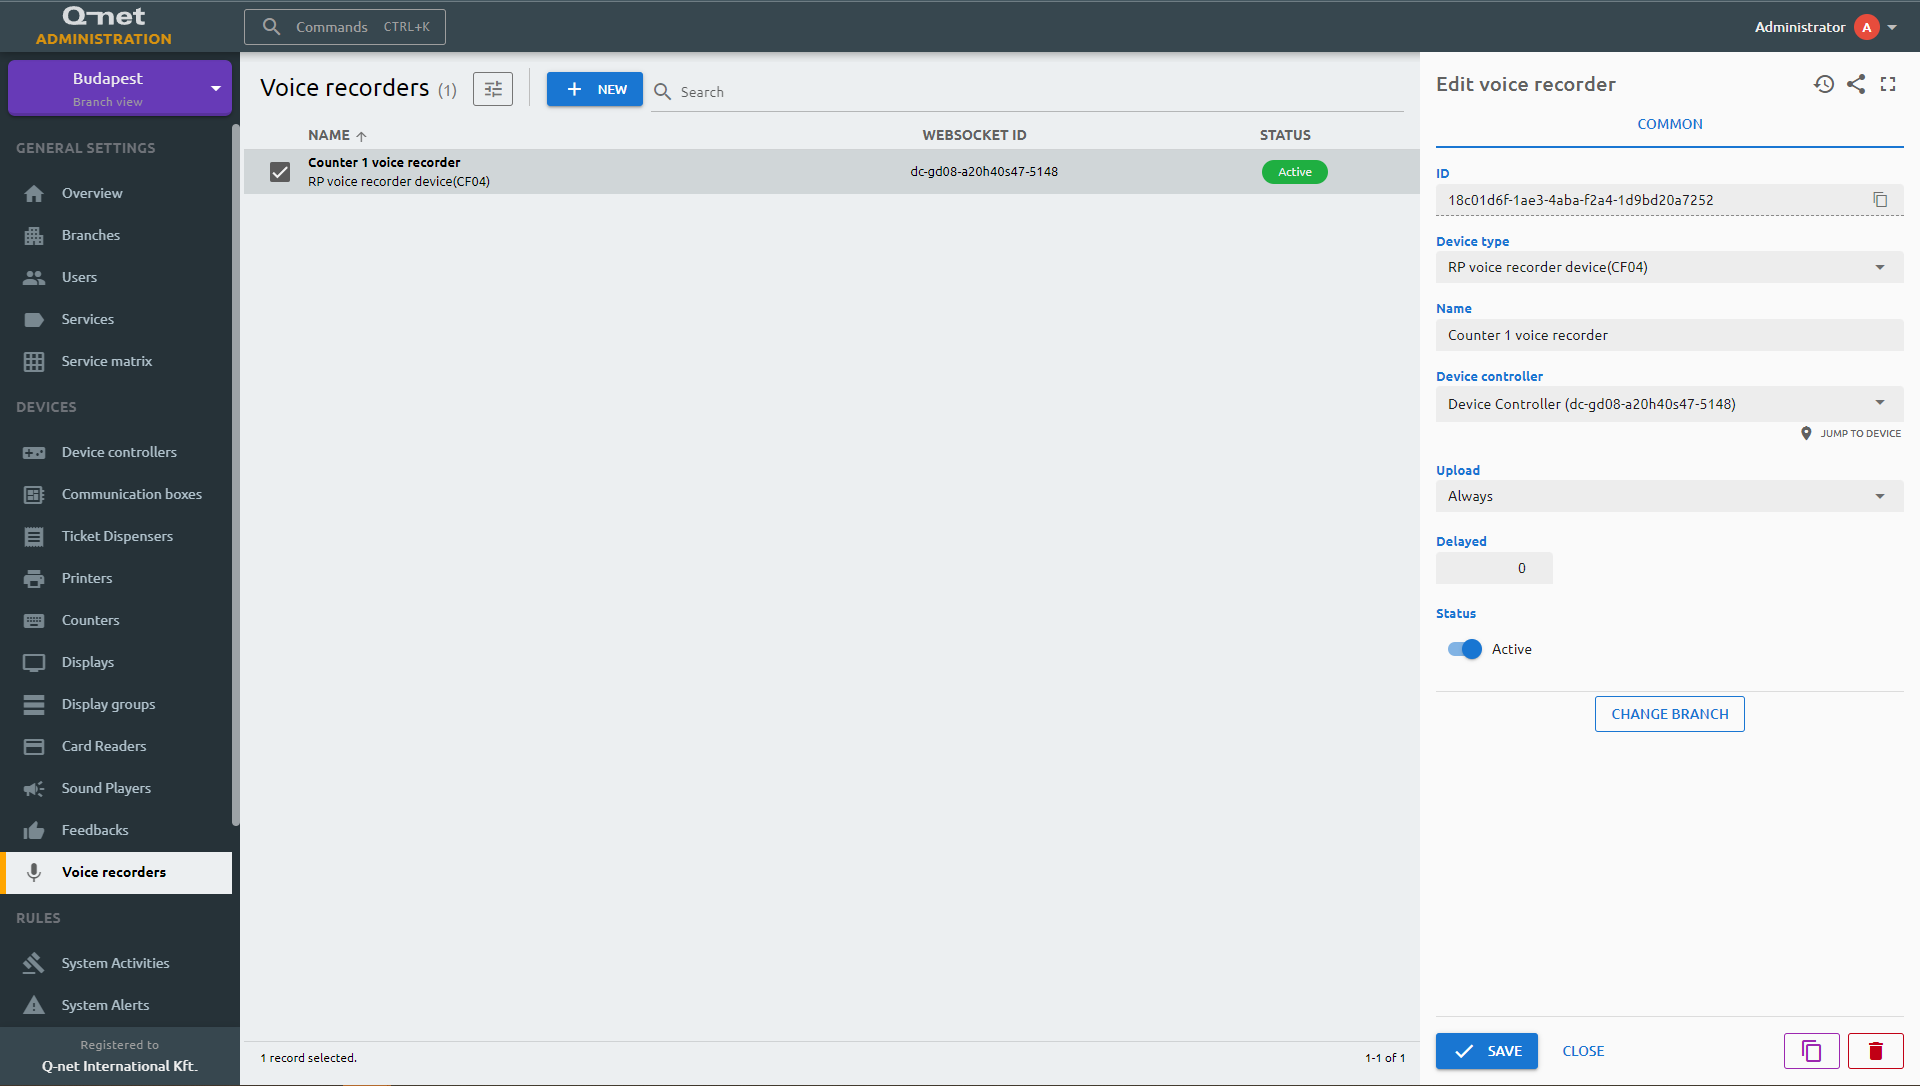
Also it is necessary to assign the voice recorder device to the counter where it is located.