Windows based ticket dispenser
There are wide range of Q-net ticket dispenser models available, among them some models are equipped with regular PC. These models are usually used with Windows OS (the OS license should be purchsed locally). These type of ticket dispensers are requiring two applications to be installed: a Ticket dispenser application - which is actually a kiosk-mode browser to open the web page of the ticket dispenser, and a Device controller application.
Install ticket dispenser
- Run the Q-net Pro 7 ticket dispenser setup installer as Administrator.
- Choose the installation path
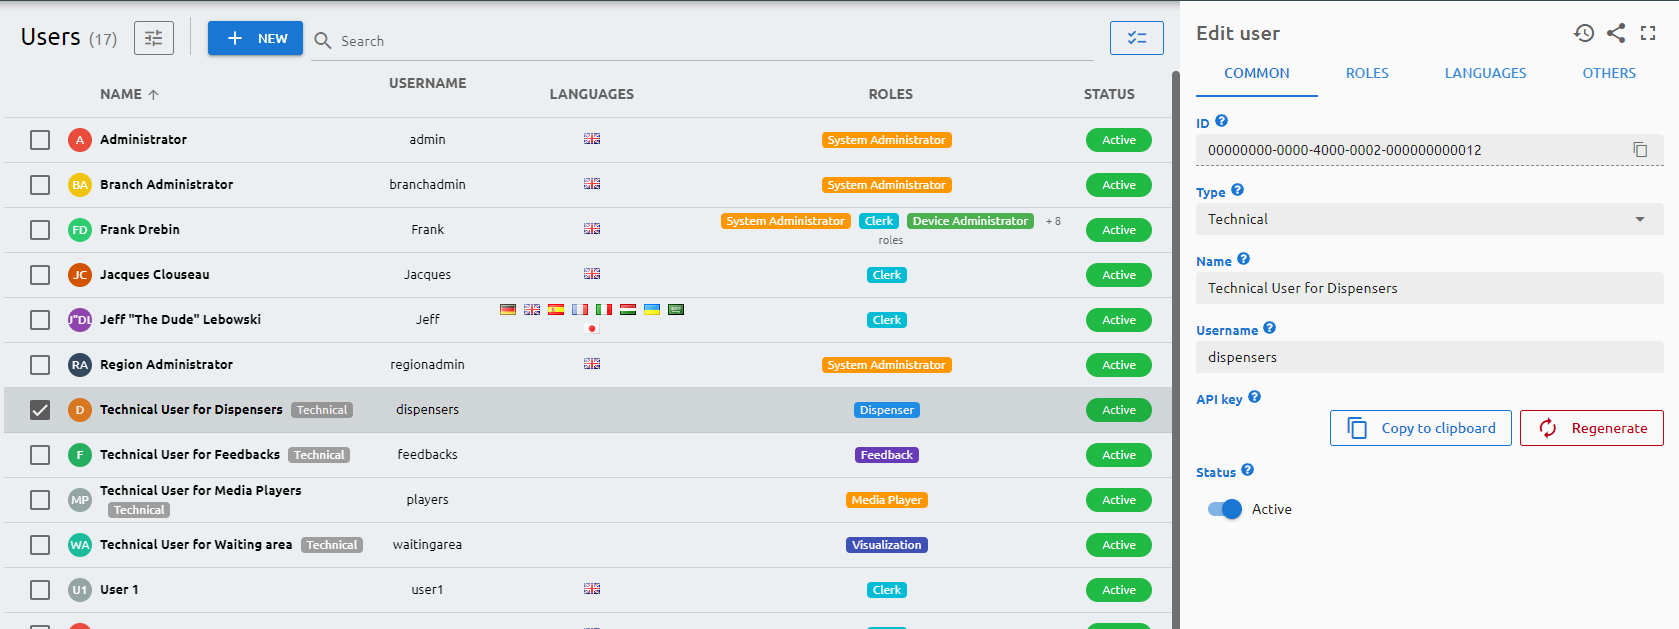
- Enter the server connection parameters (http or https, the server hostname or IP address and the required WSID) Enter the APIKey of the ticket dispenser technical user.
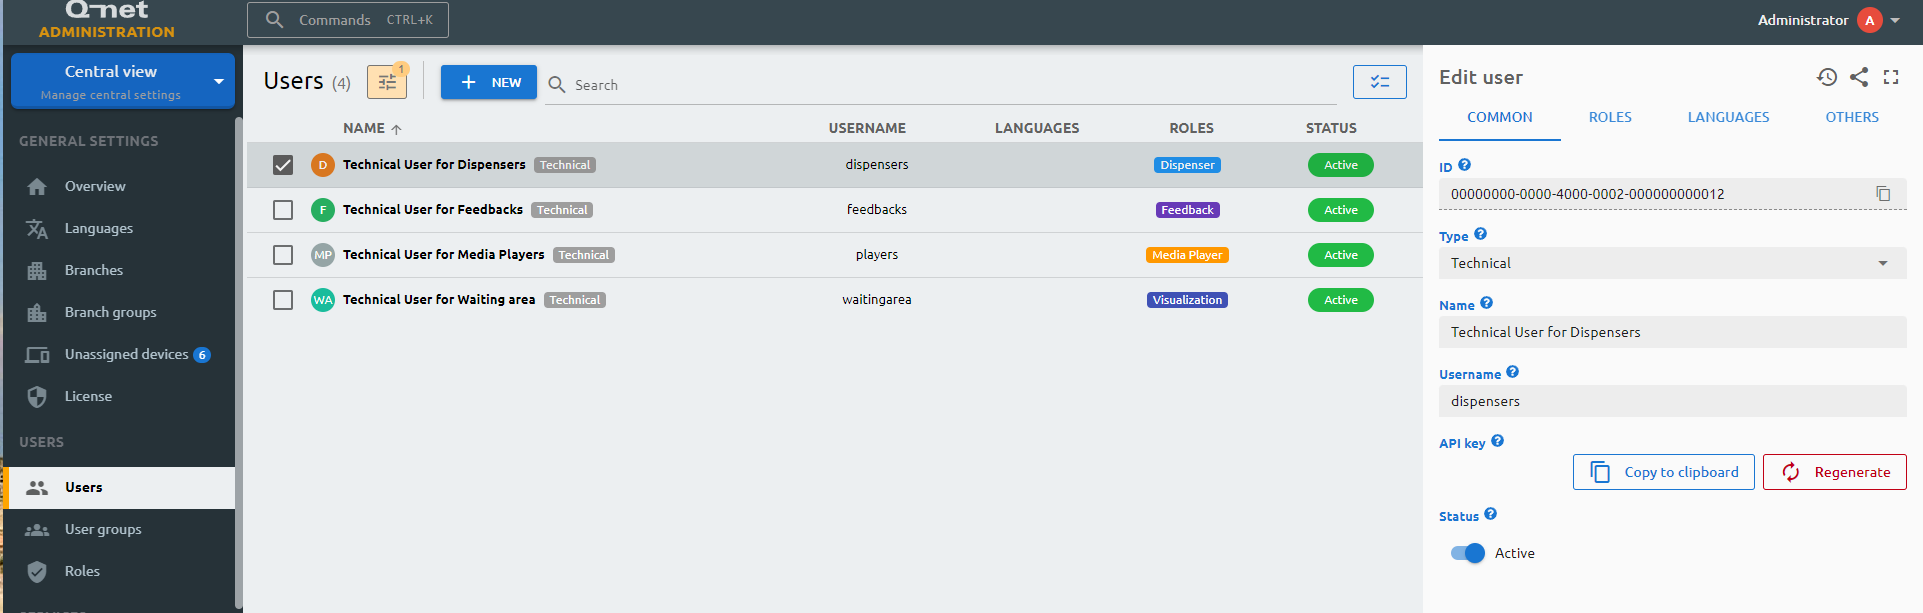
(You can find it on the administrative page at "Central view", "Users", "Technical User for Dispensers", "Common tab" )
- Click "Next"
- Click "Install"
Install device controller
- Run the Q-net Pro 7 Device controller setup installer as Administrator.
- Choose the installation path
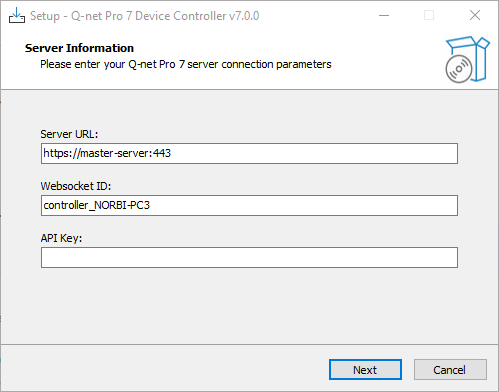
- Enter the server connection parameters (http or https, the server hostname or IP address and the required WSID) Enter the APIKey of the ticket dispenser technical user. (You can find it on the administrative page at "Central view", "Users", "Technical User for Dispensers", "Common tab" )
- If you'd like, select the "Start Q-net Pro 7 Device controller service" checkbox.
- Click "Next"
- Click "Install"
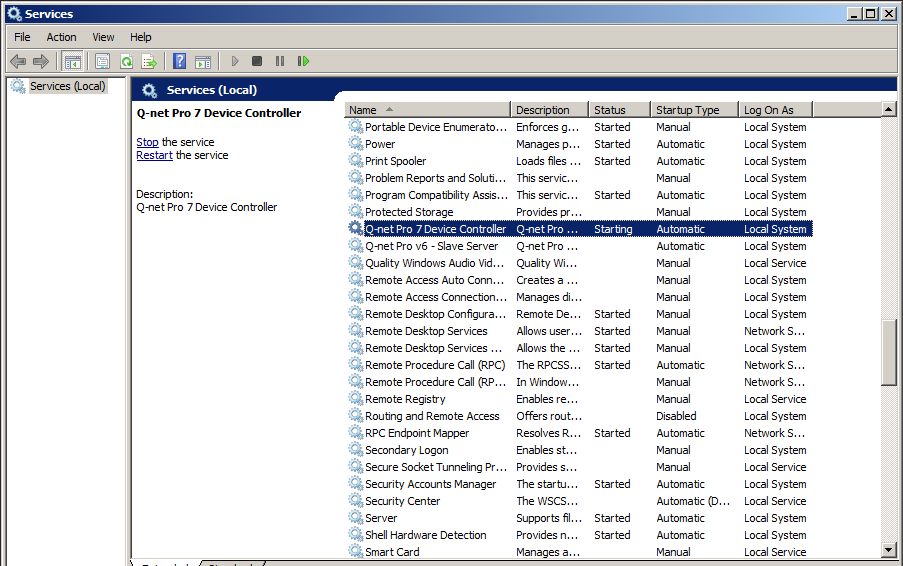
After installed, you can start or check the running status of the Device controller service and Windows services (enter services.msc into search or run field), select the service, and click "Start" if necessary:
Printer configuration
After the Device Controller connected to the server, it will appear automatically on the Adnministrative page, under "Unassigned devices":
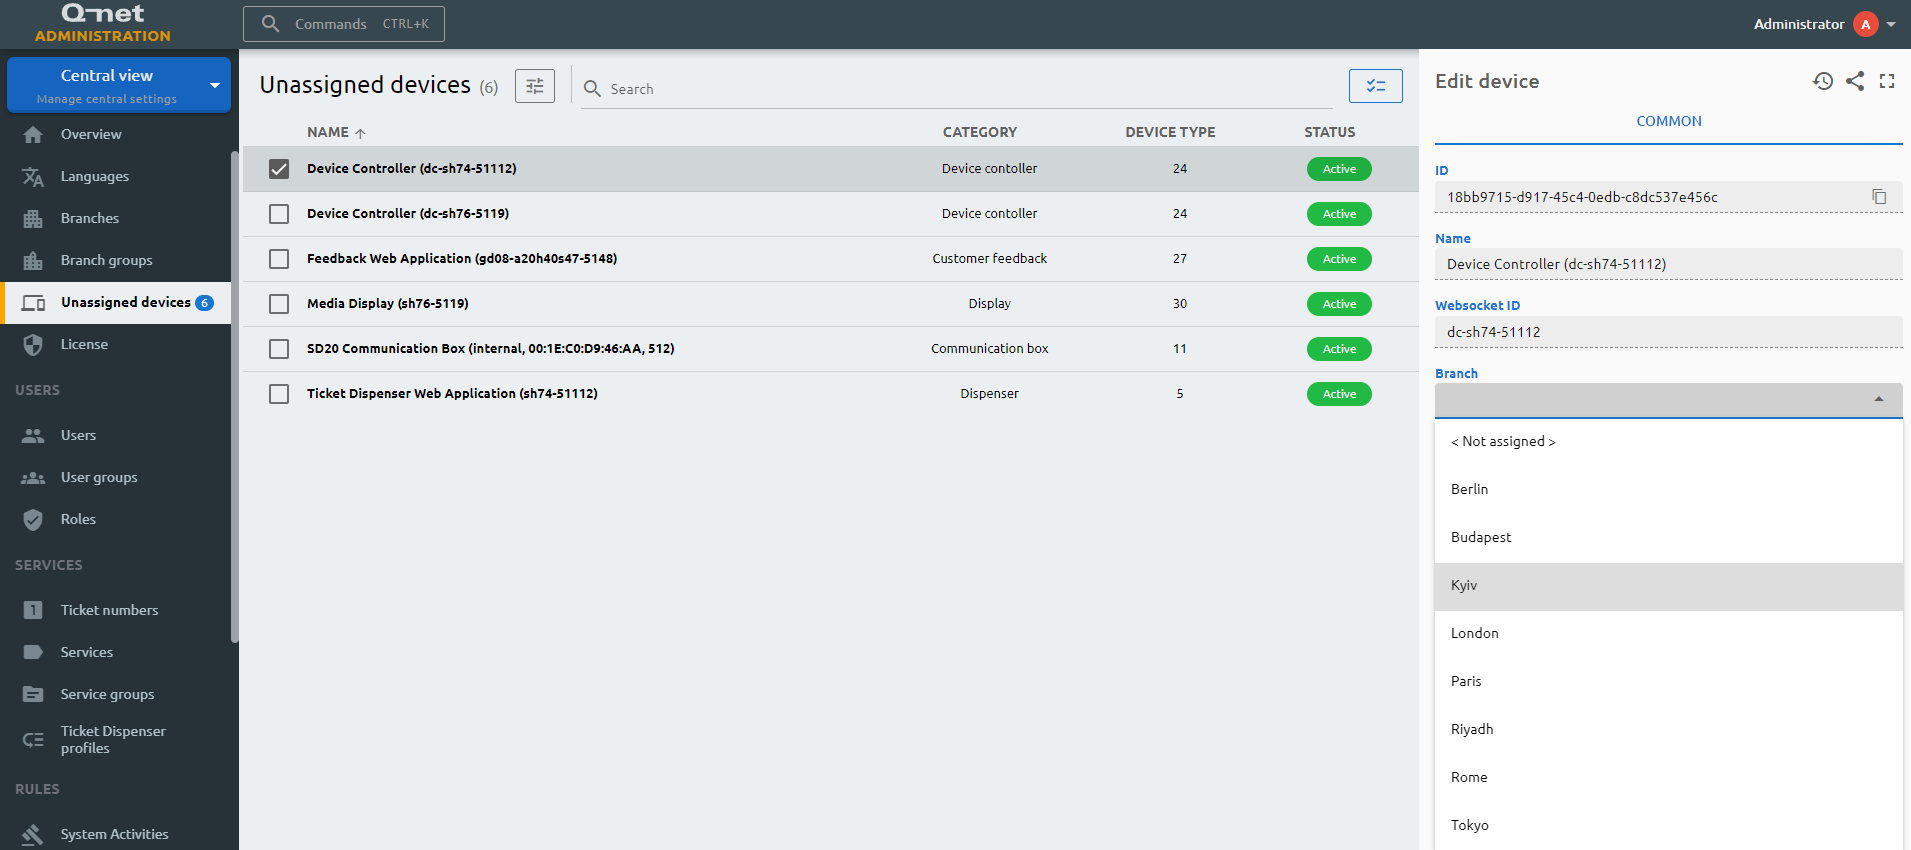
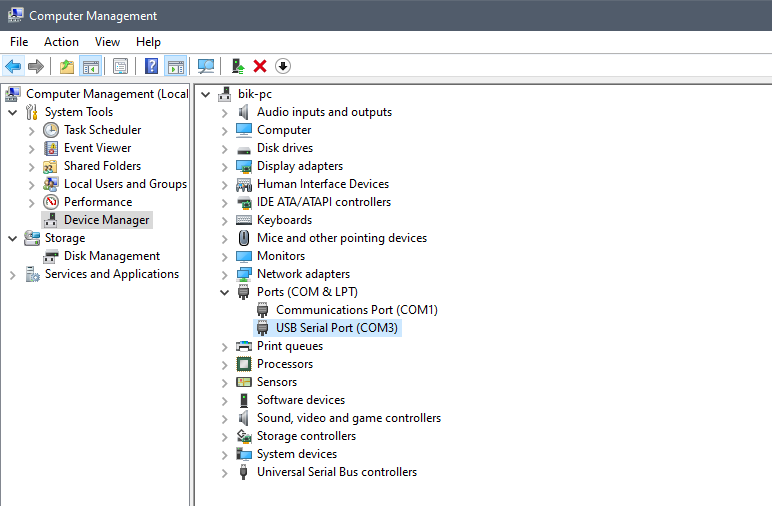
Select it, and on the right side choose the branch from the drop-down list which the Device controller belongs to. On the ticket dispenser's Windows device manager check the COM port number number of the printer.
In case there is no "USB Serial port" in the device manager, then probably the device driver is not installed. In case of Windows 10 or newer OS the driver should be found and installed automatically - if Internet connection is available. In case it is not possible or other operating system installed, the driver can be downloaded and installed manually from the official FTDI page: https://ftdichip.com/drivers/vcp-drivers/
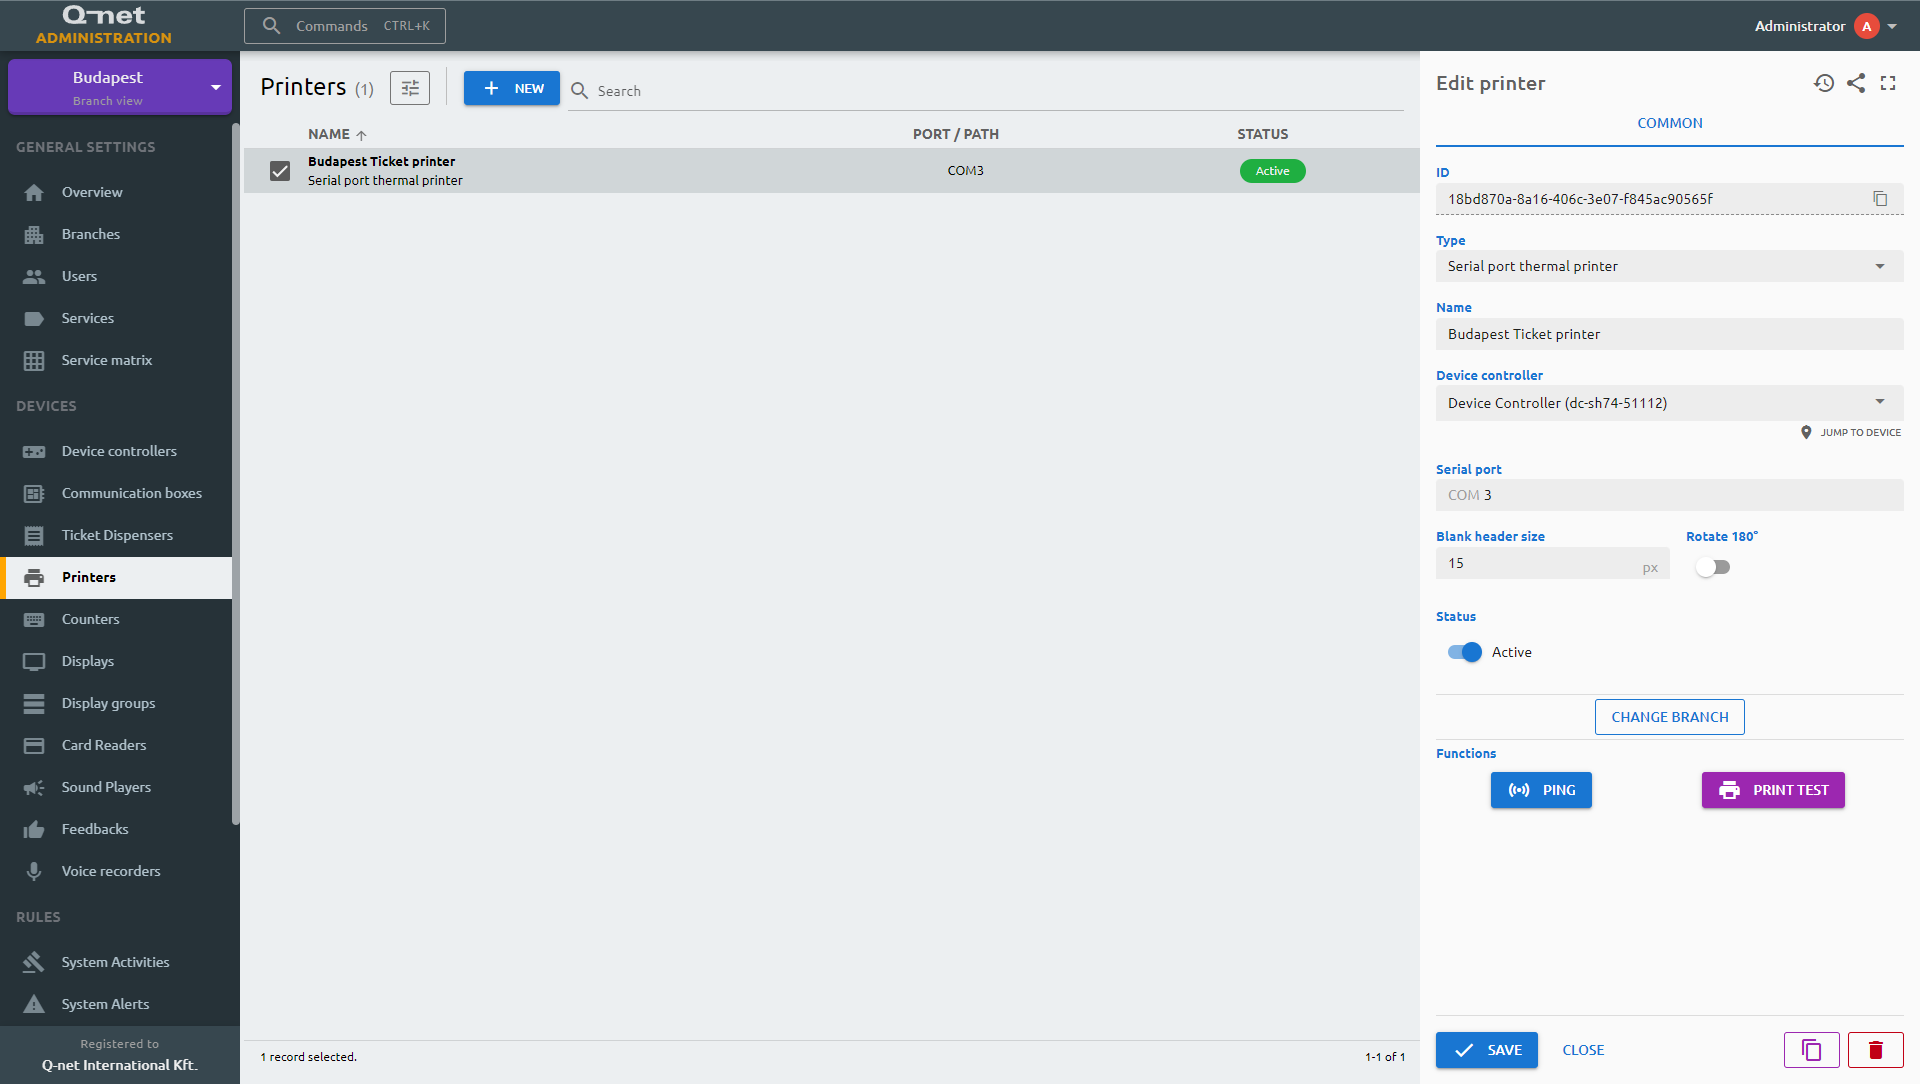
After that continue the configuration on the administrative page: Select the branch you are configuring on the top-left corner, and click on "Printers" menuitem under "Devices". Click on "New" button to add the printer. Choose "Serial port thermal printer" at the "Type" field, enter a name for the printer. Select the Device controller by its ID. You should use the one which you just installed on the ticket dispenser machine. Enter or adjust the COM port number of the printer. At "Blank header size" you can define a value which will be a top margin of the ticket. (Without it the top of the ticket might be cut by the printer). In case of this printer type about 15px is the proper value. Click on "Save" to keep the adjusted parameters. With the help of "Print test" button you can check if the settings are OK.
Pos printer desktop
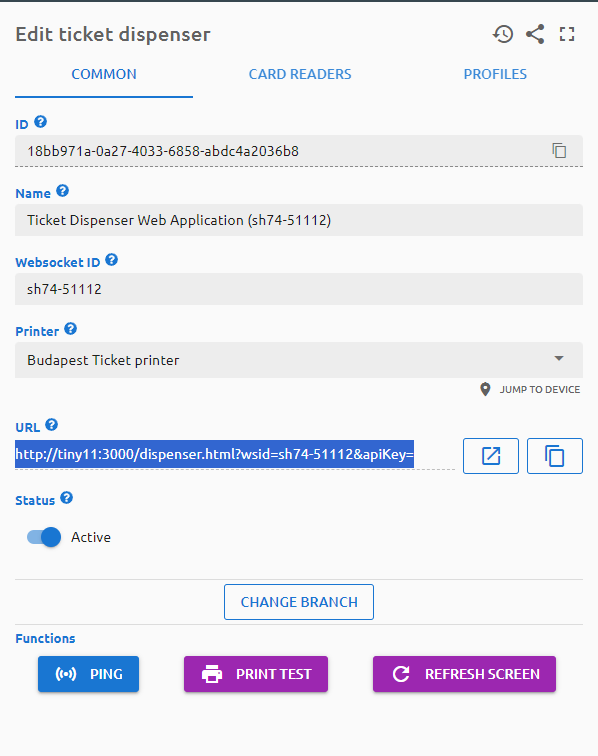
In some cases - especially in hospitals - instead of a public ticket dispenser device, a receptionist prints the ticket for the customers / patients. For this, they are using their workstation PC and a thermal POS printer. The driver of this printer should be installed on the workstation. The printer should be shared on the network or a Device controller has to be installed. If the device controller is on a remote machine, the printer should be added on this machine as well. After that, select this particular device controller and click on the Start scan button. The printer should be detected and should appear in the branch were the devoce controller belongs to. Add the ticket dispenser manually with a unique WSID. Assign its profile and the detected POS printer. Then the ticket dispenser page can be opened in any browser by using the URL extended with the APIKey of the Technical user for dispensers: