Appointment
This page allows to adjust the parameters for appointment reservations.
Common tab
On the "Common" you can change the appointment type and edit the following parameters:
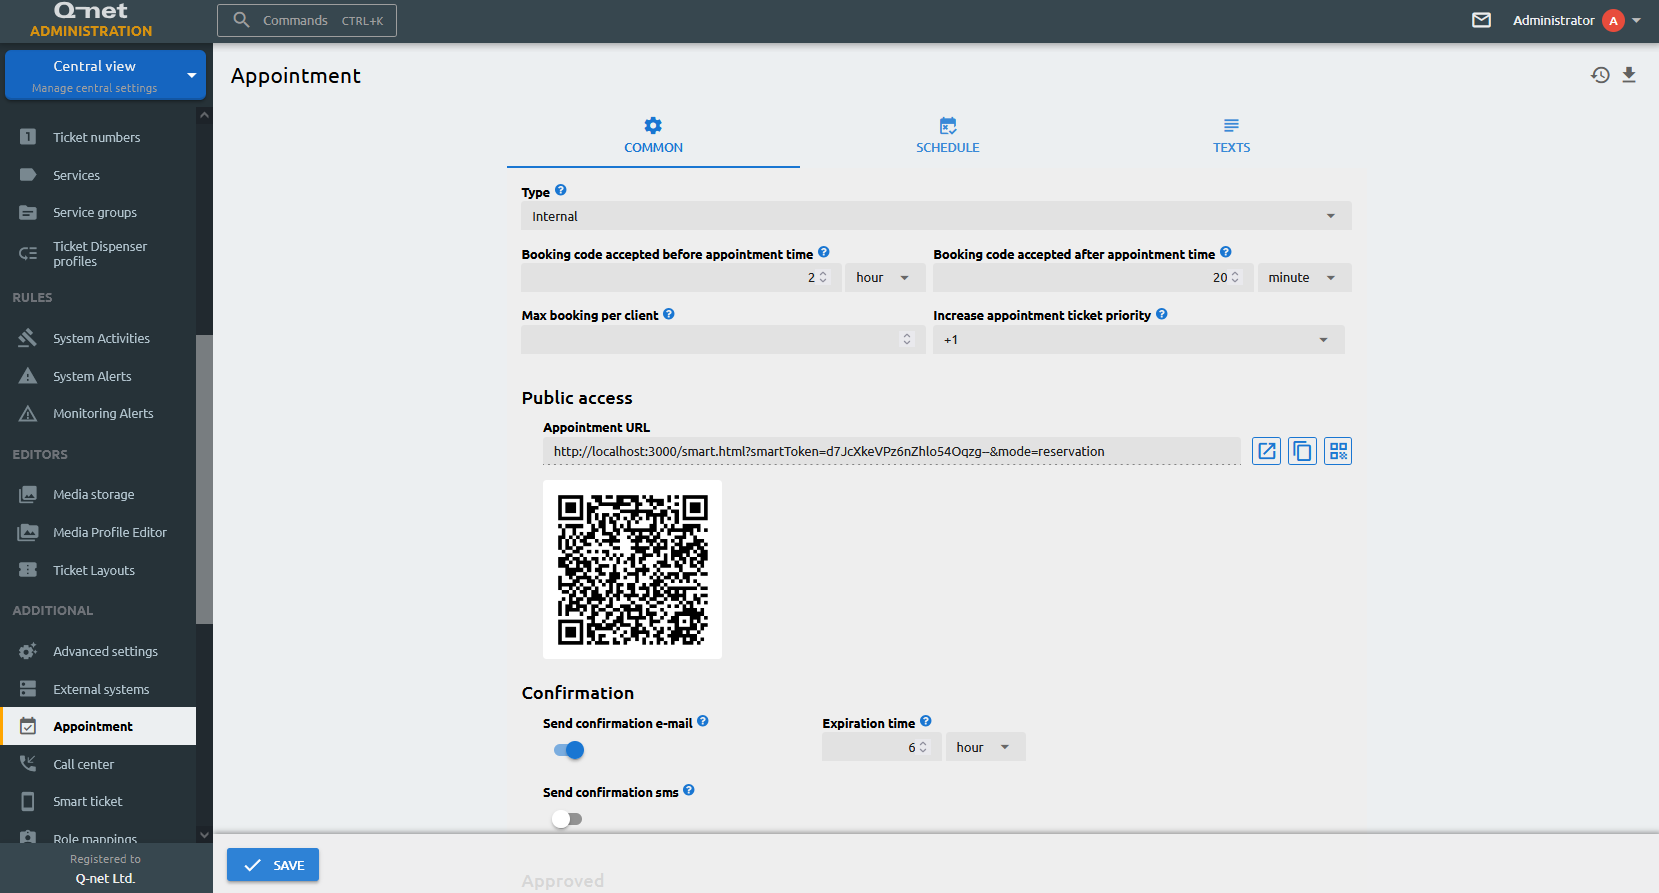
Type
- Internal: the appointment procedure is handled entirely by the Q-net service and database.
- REST Query: when the customer data related to the appointment is handled in a 3rd party CRM service.
- REST Full: when the customer data and the appointment service is handled by a 3rd party software.
Booking code accepted before appointment time
Booking code accepted before the appointment time is when the customer arrives to the selected branch with the booking code – selects the appointment button (as s/he arrived to a booked time ) – and gives the code which s/he received.
Booking code accepted after appointment time
Booking code accepted after the appointment time is when the customer arrives to the selected branch with the booking code – selects the appointment button (as s/he arrived to a booked time ) – and gives the code which s/he received.
Max booking per client
Limits the amount of appointments that a client can have
Override booking availability
When enabled, authorized operators can book an appointment into a time slot that is already full, overriding the normal availability limits. This only applies to the Internal appointment type.
Increase appointment ticket priority
Increases the priority of the booked ticket to enable to call the customer with appointment earlier than any other customer.
Requested client data
For each piece of client data collected during booking (full name, e-mail address and phone number) you can set whether it is Required, Optional or Disabled, and optionally map it to a stored customer data field. When the phone number is requested, a phone number mask can also be configured.
Appointment URL
URL of the appointment site
Send confirmation e-mail
Enable it to send confirmation e-mail about the new appointments. If it is disabled, every appointment will be automatically verified.
Expiration time
Validity period of the sent out url.
Send confirmation sms
Should the system send confirmation sms
Send approval e-mail
Should the system send approval e-mail
Send approval sms
Should the system send approval sms
Send reminder e-mail
Should the system send reminder e-mail
Send message X hour before appointment
How many hour before the appointment will send the system reminder
Send reminder sms
Should the system send reminder sms
Profile
Root URL
Authorization
Method
URL
Send cancelling e-mail
Should the system send cancelling e-mail
Send cancelling sms
Should the system send cancelling sms
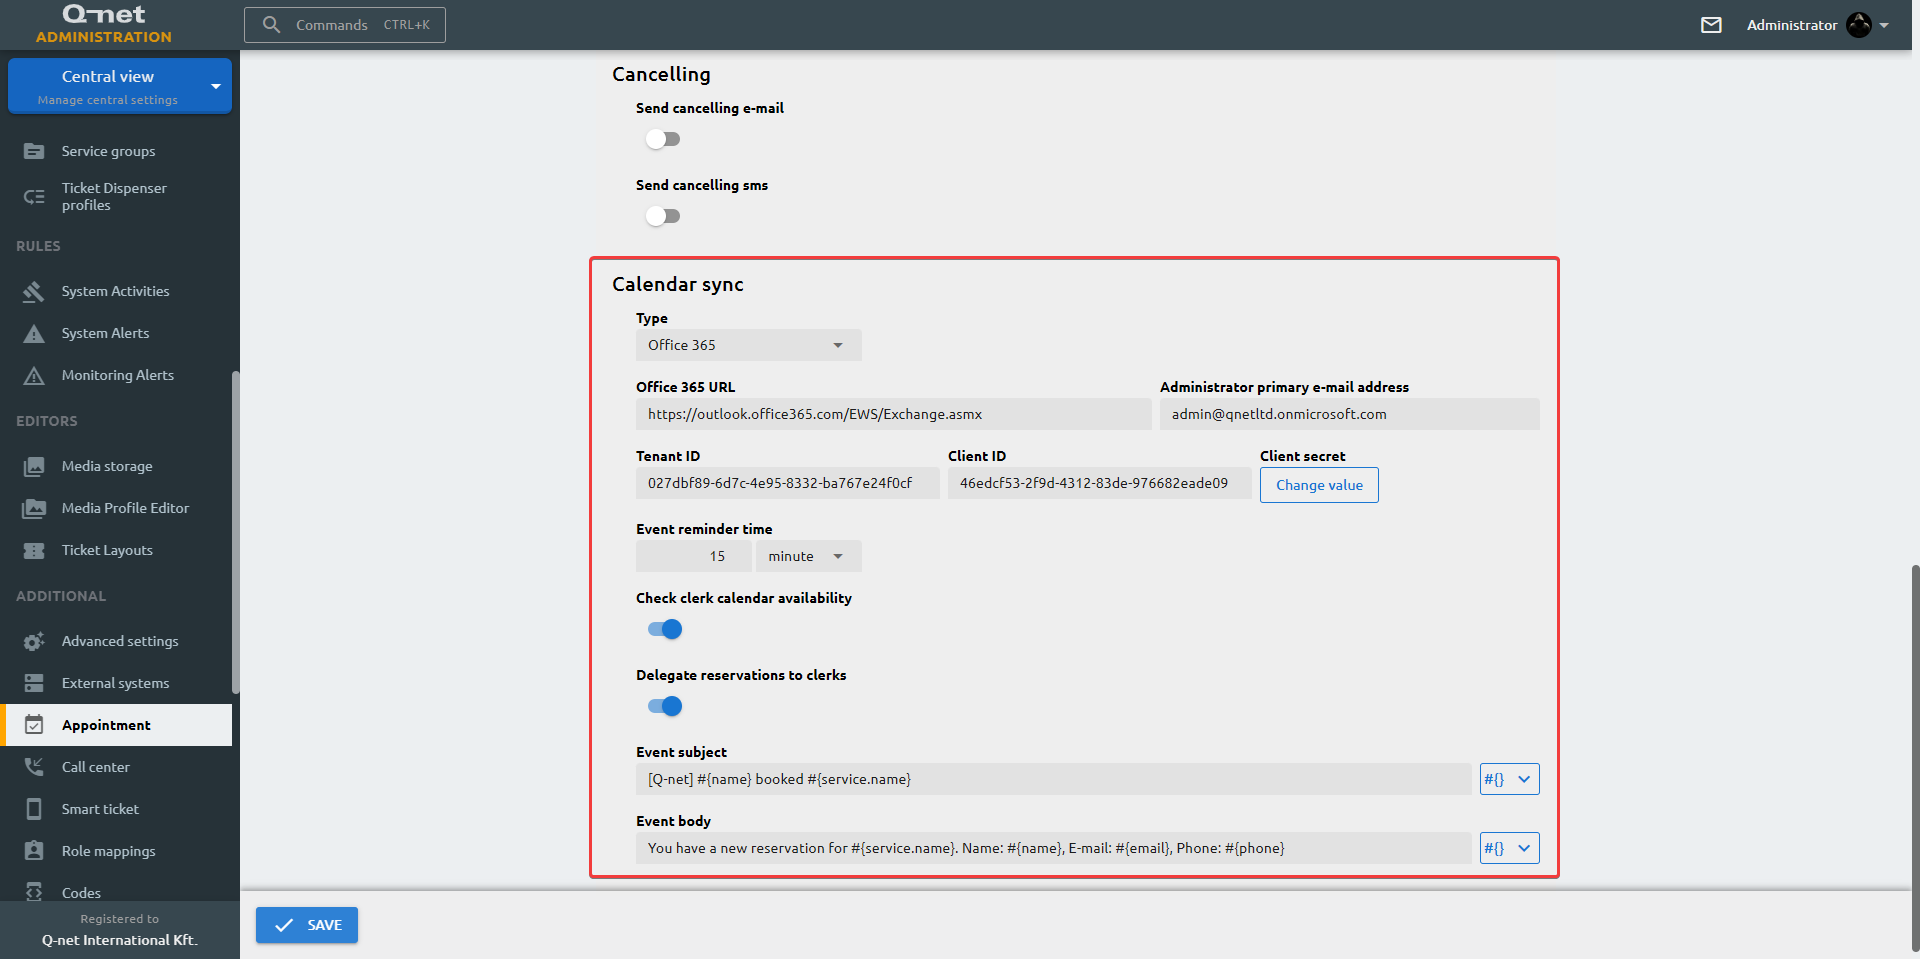
Type
You can configure calendar synchronization between the V7 server and on-prem Exchange server users or Office365 cloud tenant users.
Exchange / Office 365 URL
Configure Exchange Web Service endpoint URL or the Office 365 Exchange
Administrator primary e-mail address
Configure the e-mail address of the user which will have access to the calendars.
Domain
The domain of the account used to access the on-premise Exchange calendars.
Password
The password of the account used to access the on-premise Exchange calendars.
Tenant ID
The Tenant ID of the Office365 subscription.
Client ID
The application (client) ID of the registered application.
Client secret
The cloud-side generated client secret of the application.
Event reminder time
The appointments will be placed into the clerks’ calendars with the set reminder time.
Check clerk calendar availability
If turned on, the appointment tool will check the clerks’ calendars and exclude the dates that are booked or busy in these calendars.
Delegate reservations to clerks
If turned on, the reservations will be placed into the clerks’ calendars.
Event subject
The appointments will be placed into the clerks’ calendars with the following subject.
Event body
The appointments will be placed into the clerks’ calendars with the following text body.
Schedule tab
Profile
Profile that is assigned to the appointment feature
Time slots
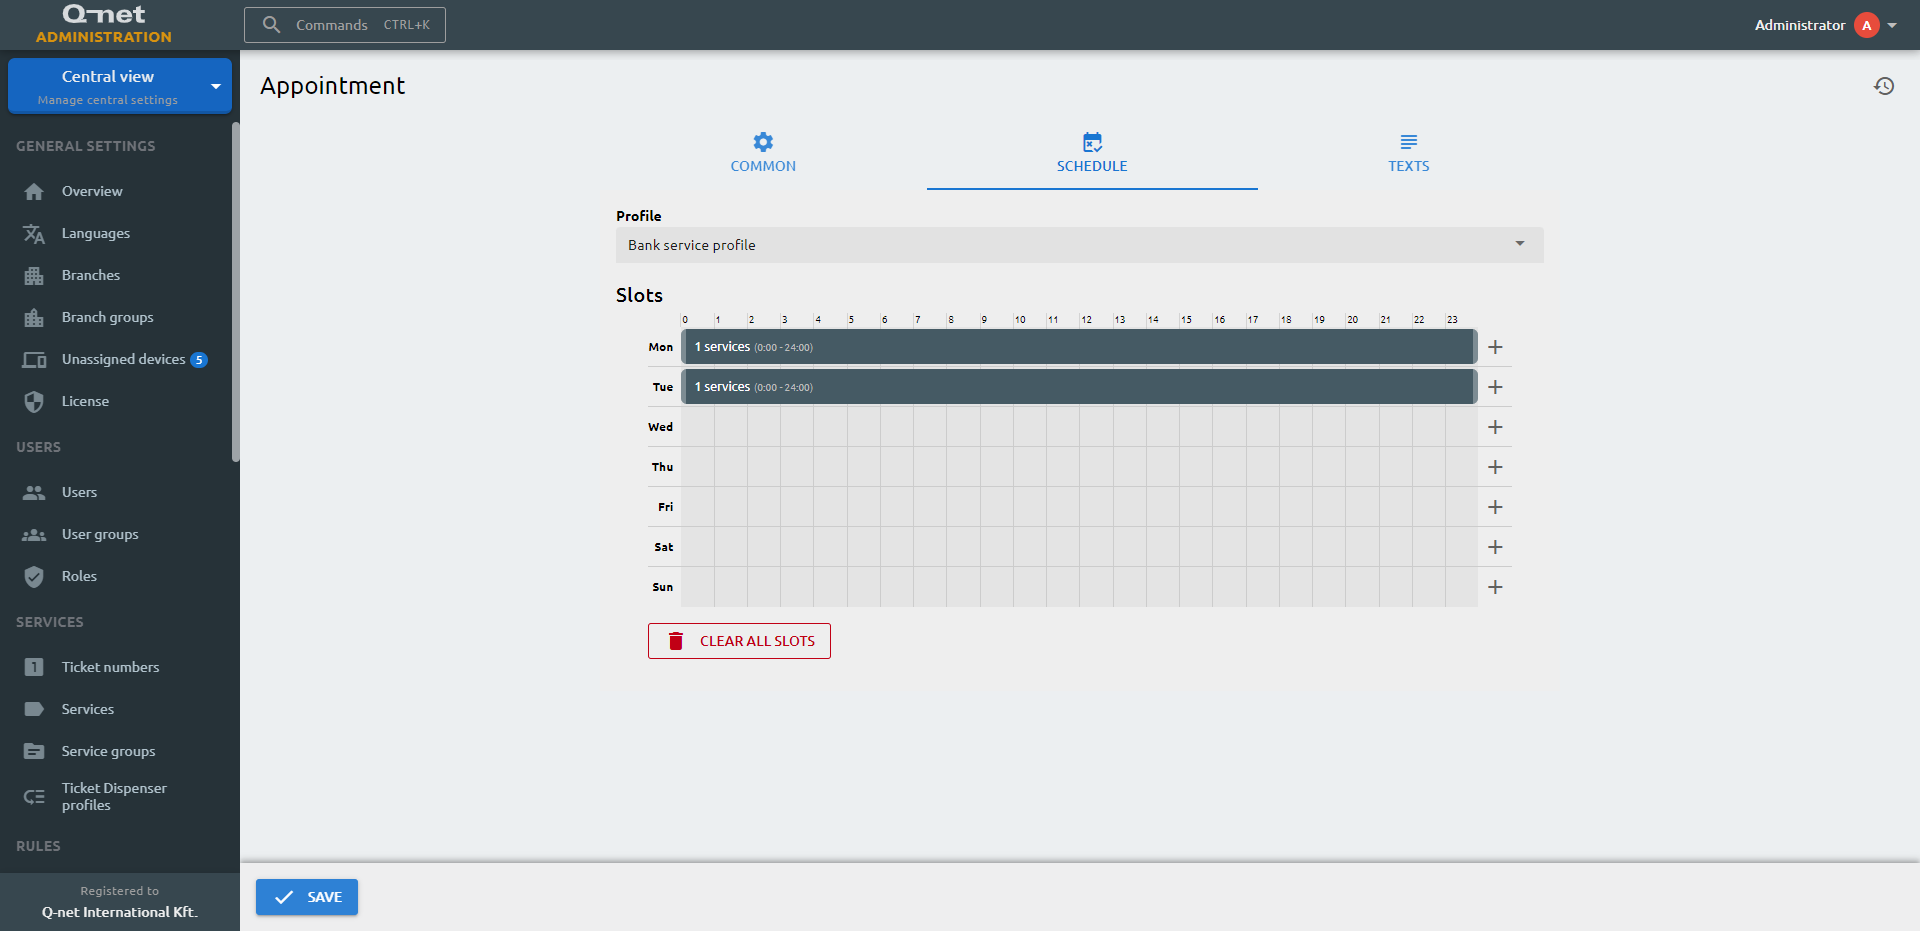
Select the time-slots during which the clients can make an appointment with the selected available services.
Under the Slots section you will find the appointment scheduler. In this view every line represents a day of the week and at the top the hours of the days are appearing. The colored lines are representing the time slots. The label of the time slot shows the starting and the ending time of the slot and the numbers of the services assigned to the slot. The timing can be changed by dragging the end of the lines.
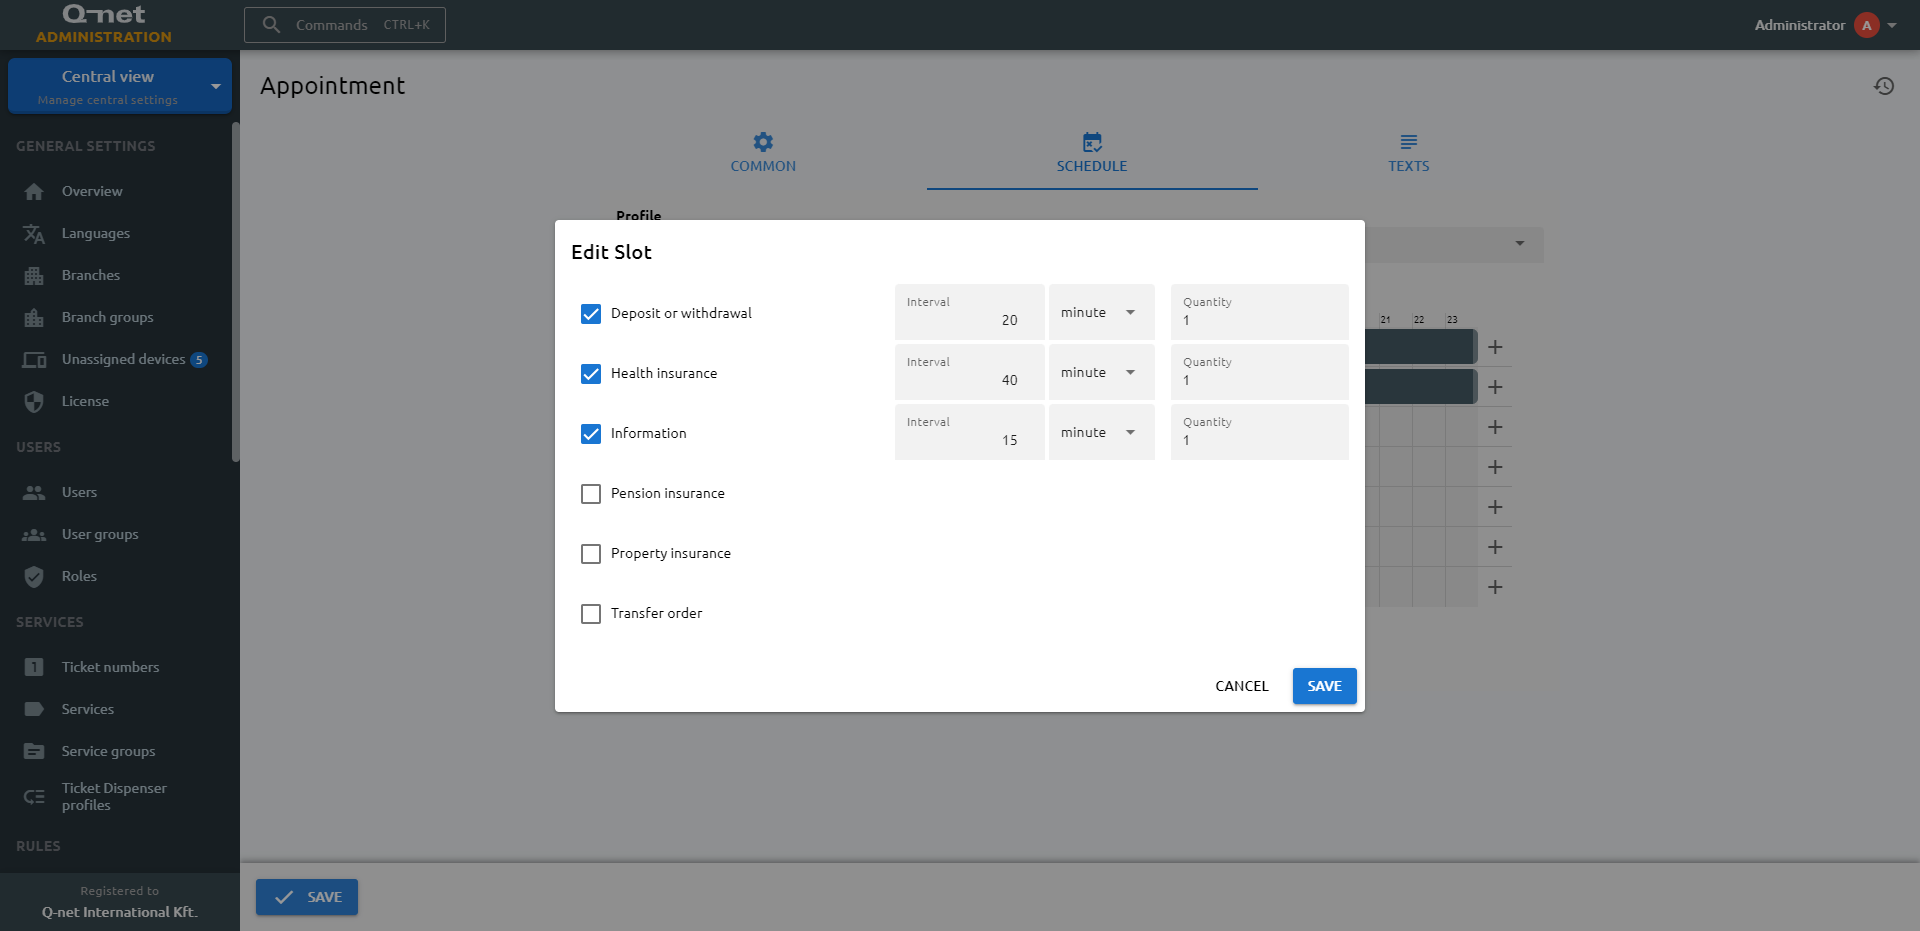
By clicking at the + sign at the end of the lines the time slot editor will appear or double click an existing slot to edit it. The dialog will list the available services. Clicking the checkbox will add the service to the slot, then the time interval, and the number of the slots for the selected interval can be entered. Clicking the Save button will save the current state and close the dialog.
Texts tab
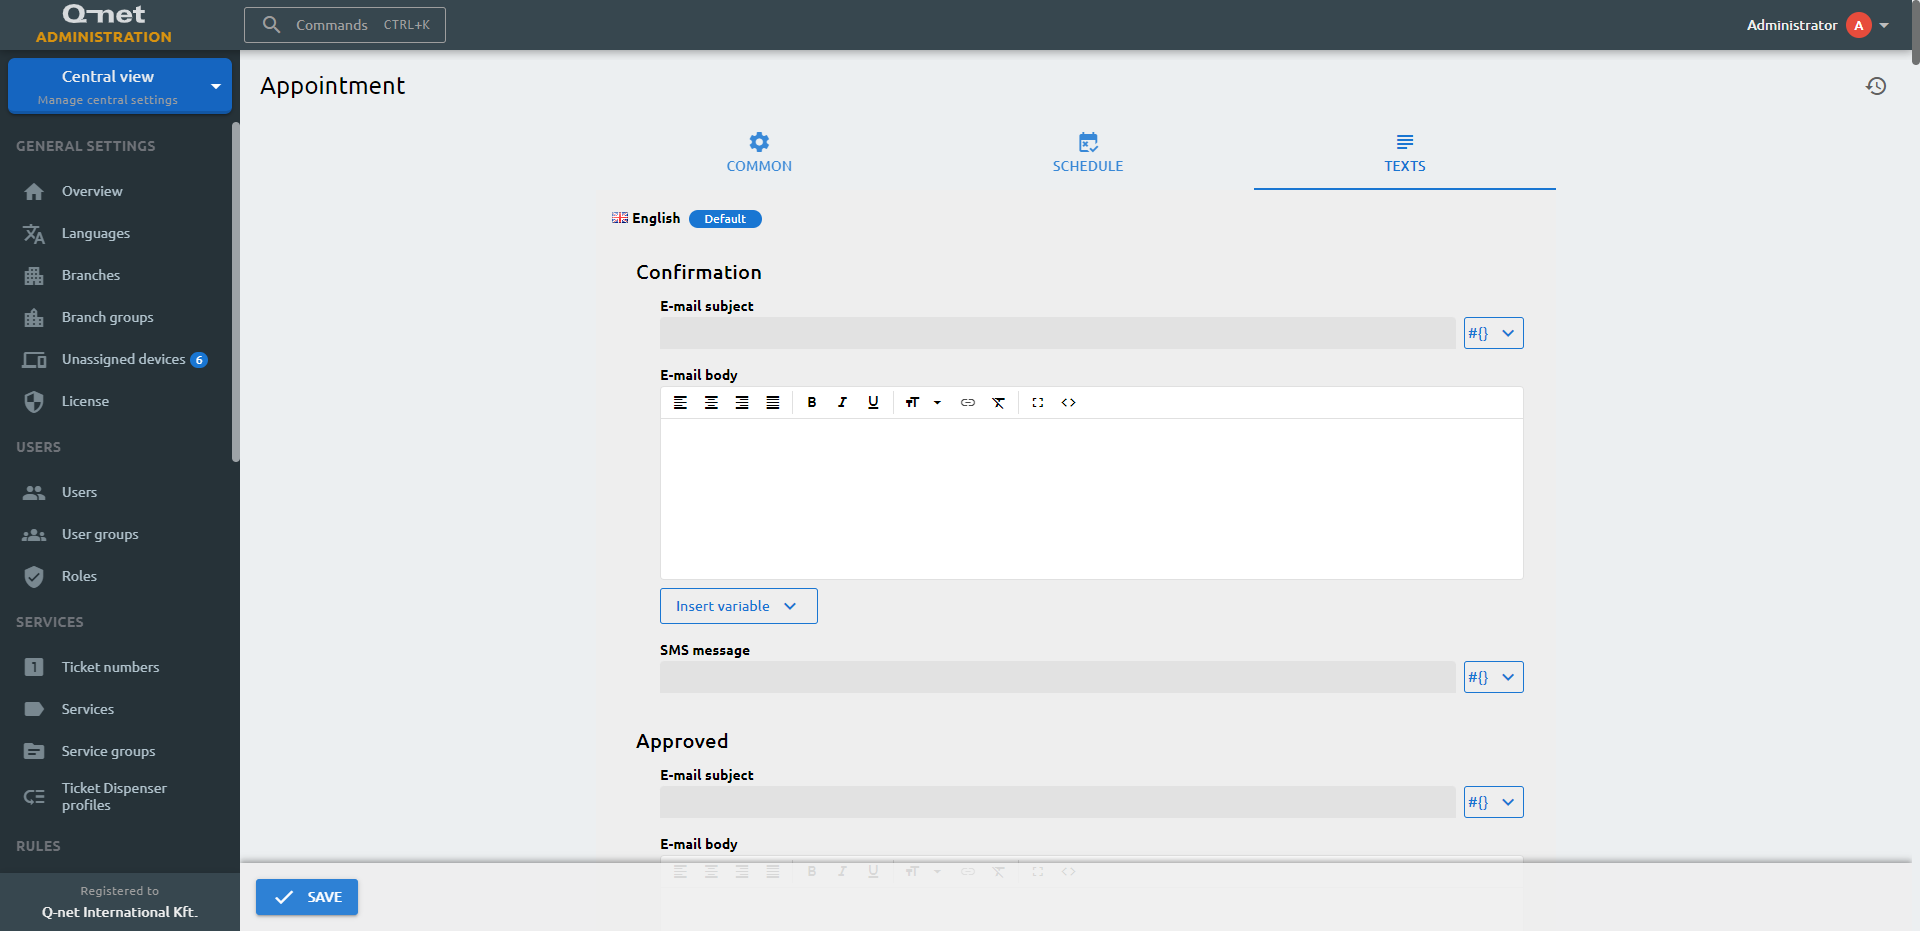
Text content of the different notifications
Here you can edit the confirmation, approve and reminder messages on different languages
E-mail subject
Subject of the confirmation email
E-mail body
Content of the confirmation email
SMS message
Content of the confirmation SMS
E-mail subject
Subject of the approval email
E-mail body
Content of the approval email
SMS message
Content of the approval sms
E-mail subject
Subject of the reminder email
E-mail body
Content of the reminder email
SMS message
Content of the reminder SMS
E-mail subject
Subject of the cancellation email
E-mail body
Content of the cancellation email
SMS message
Content of the cancellation SMS
Appointment calendar integration (Exchange / Office365)
Connect the Q-net Pro 7 Appointment with an on-premise Exchange server or an online Office365 subscription. It checks the availability of clerks' calendar and considers the busy time intervals. After the reservation, it delegates the reservation to a random clerk in the branch and saves the event into clerk's calendar.
Appointment CAPTCHA protection
Cloudflare's Turnstile protection can be configured on the Appointment reservation page. To use it, you should register the Turnstile solution on Cloudflare and copy the Site key to the External Systems page in Administration.