Administration - Branch - Optional Modules
If you are within the selected branch you will see that the left hand side menu bar changes items. This is happening because the central settings and the branch level settings differ. Branch level setup has also some optional modules.
Media players
Q-net Pro Media players (SH26, SH46, or DM22) are optional software modules that can handle video advertisements and waiting area display services at the same time. This module is usually used when the client doesn’t want to have separate waiting area displays or display groups and wants to make advertisement in a central area where a lot of waiting customers can see them while waiting for their ticket number to be called. On the other hand end users can show moving text, RSS feeds, TV programs, websites, slide shows, further video content, etc. besides waiting area display information.
Before installing the media player application itself, it is important to install the newest device controller on the media player pc. In case you have purchased the SH26 media player application there is going to be a separate “qnet6-sh26-setup-x86-v6.0.X.exe” or “qnet6-sh26-setup-v6.0.X.exe” installer available. This installer needs to be installed onto the PC that is going to be connected to the media display. During the installation it will request to give the Q-Net V6 server parameters like the host IP or hostname and the unique identifier for the media player.
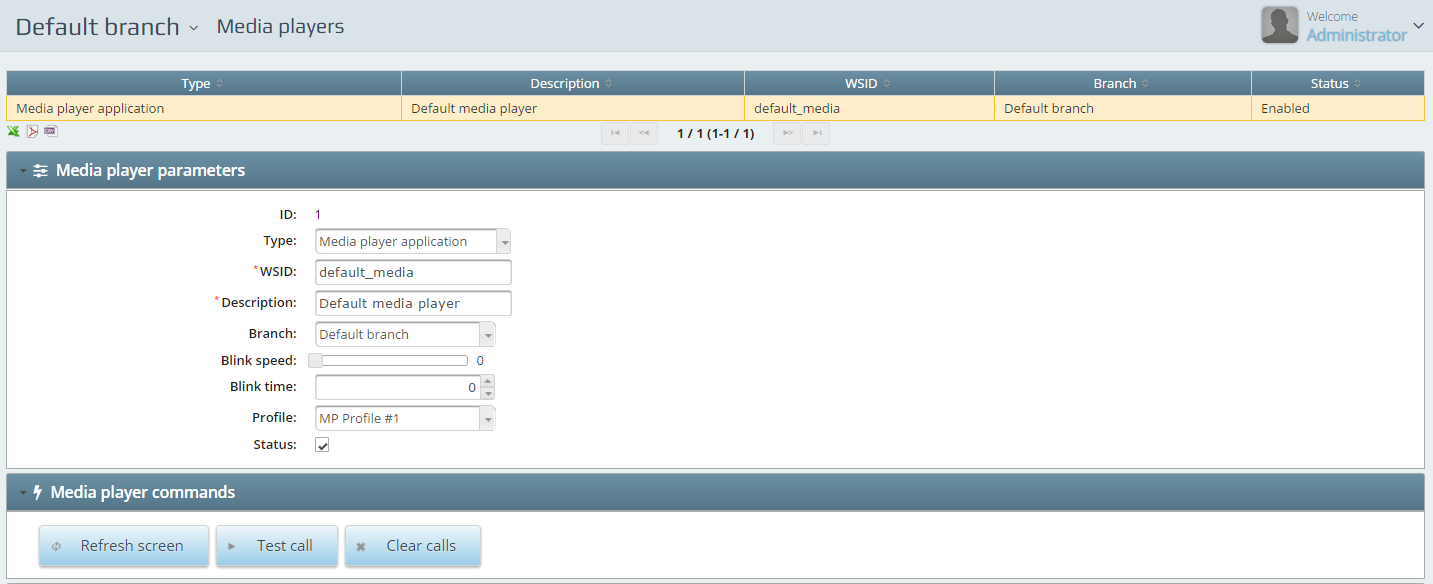
Media player parameters
The Type can be Media player application which is the SH26 or SH46 coded software package with separate manager and player apps. WSID will identify the module on the network and the Description will be the so called name of it. You have to assign it to a Branch and select a Blink speed with the help of the slider bar. Blink speed sets the called ticket numbers blinking speed. Blink time sets the timeframe of the blinking. Standby time is set to turn the called ticket numbers off on the display. Profile is the configured profile on the SH26.
Media player commands
You can Refresh the screen of the media player if you like also can make Test calls or you can swipe the numbers off by pressing Clear calls.
Feedback devices
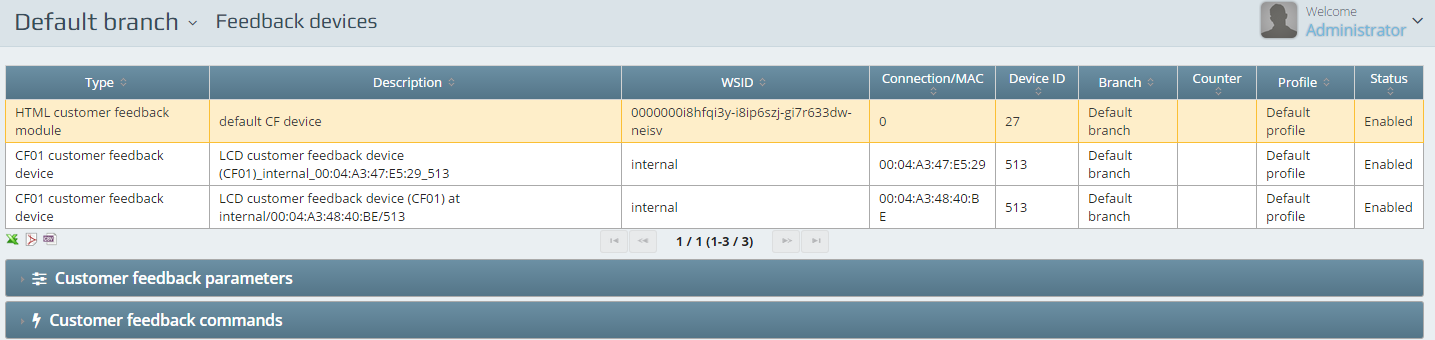
Customer feedback devices are listed here or you can add them on this page
Customer feedback parameters
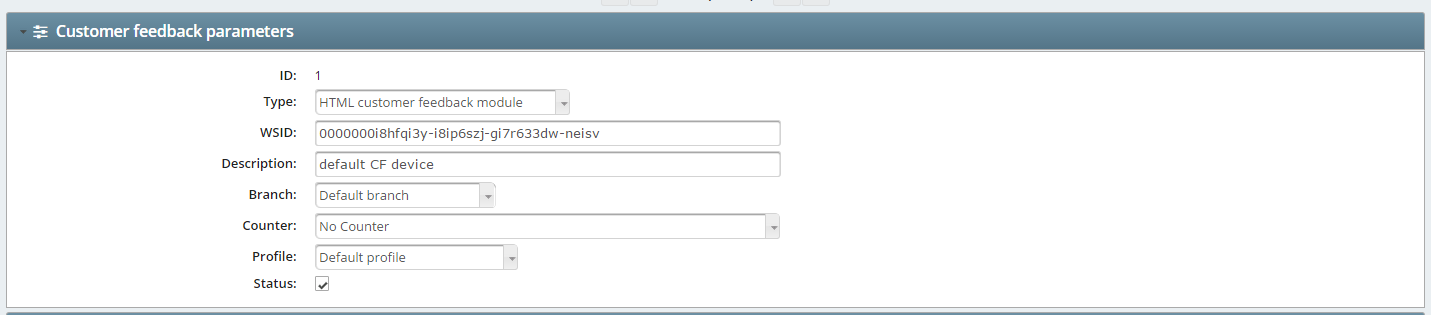
If you modify or add a feedback module you need to select the Type of it. It can be HTML customer feedback module – CF01 customer feedback module or CF11 customer feedback module. WSID is the network identifier of the device. Description is the name of it: you can add a logical name as you can call it. You have to assign it to a Branch and also to a specified Counter within that branch. A Profile needs to be selected to specify the questions and answers.
Customer feedback commands
You can Ping the device from this area and Refresh screen.
Appointment
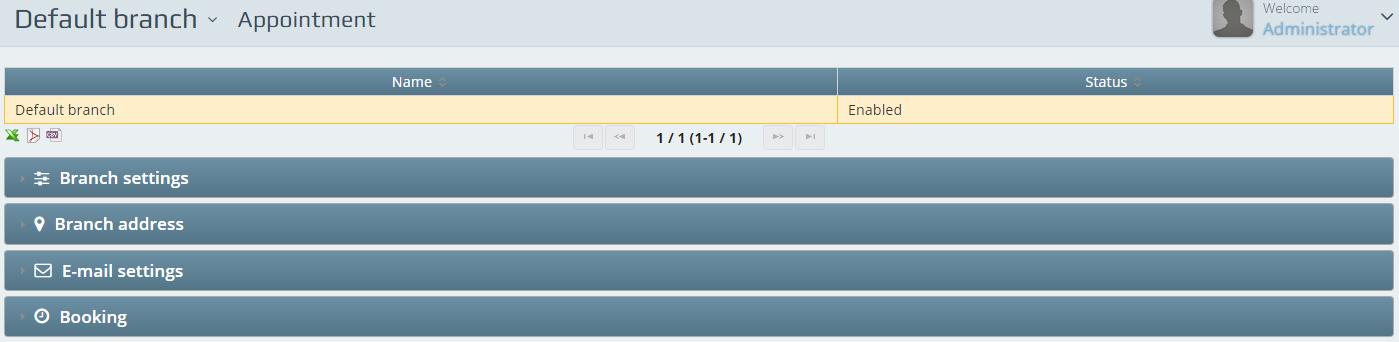
You can configure every details of the optional Q-net Appointment software module here.
Branch settings
As seen in section 2.5.1. Booking code accepted before appointment time (min) is when the customer arrives to the selected branch with the booking code – selects the appointment button (as s/he arrived to a booked time) – and gives the code which s/he received. This code is accepted before the appointments time within that timeframe which you set up with the help of this option and the Booking code accepted after appointment time (min). This last option is for customers who may be late from the appointment. Client missed the appointment is a time value which after the system won’t accept the booking code for the selected appointment but within the value the booking code is accepted but the priority level will remain on the level of the walk-in customers. It is important to Increase appointment ticket priority to honor the appointed customers and if this value is big enough it will enable to call the customer with appointment earlier than any other customer.
Branch address
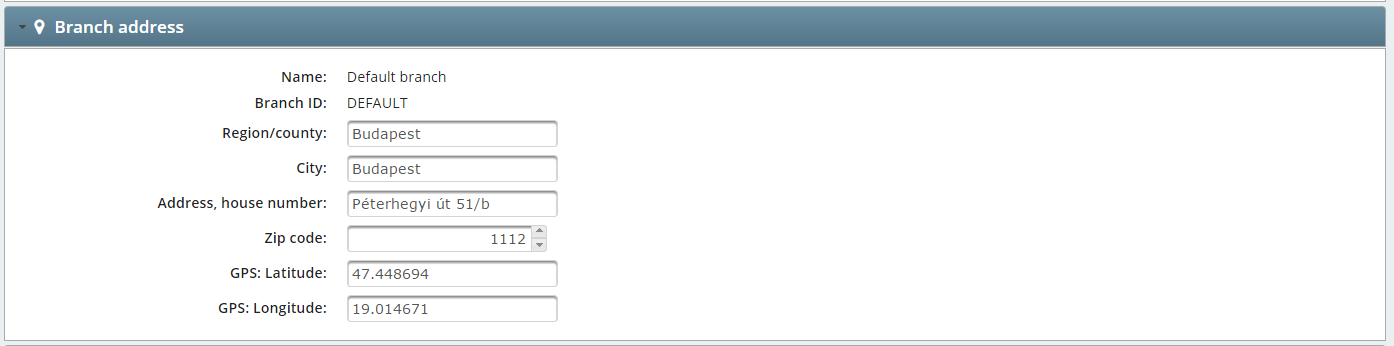
You have to fill all the necessary info about the branch address here so that customers will easily find their way to it and on the other hand based on these GPS info the location of the branch can be seen in the website of the end user on the Google Map!
E-mail settings
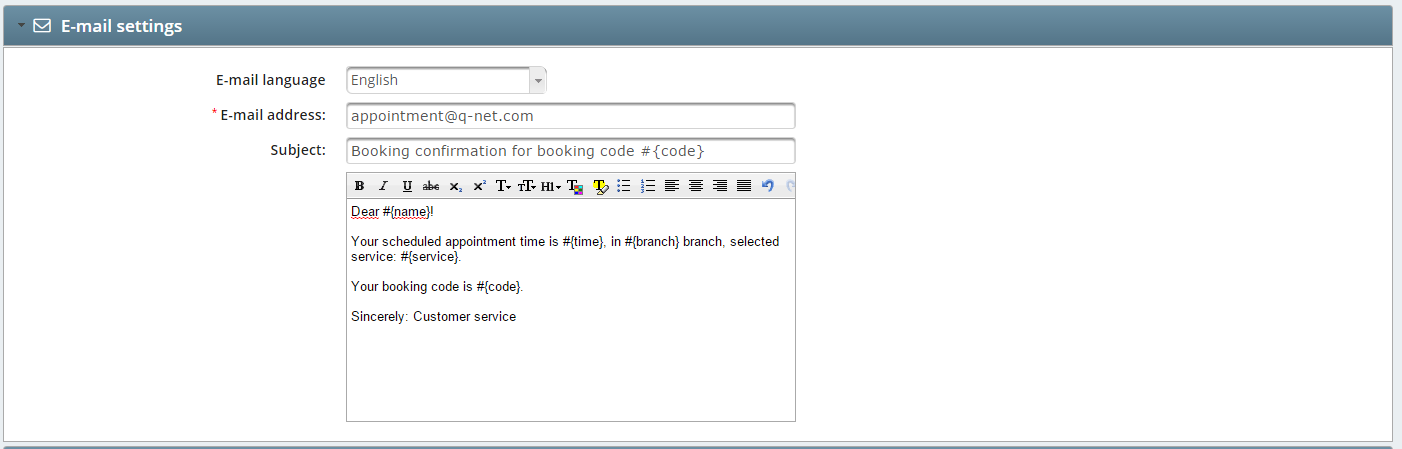
The page is going to ask you to select the E-mail language first from the dropdown box. Every added and enabled language appears in that list. Best is to fill all the languages after each other for various native speaker customers’ satisfaction. E-mail address is the e-mail address of the sender. Set the desired Subject and you are free to change the predesigned text to finalize the confirmation mail.
Booking
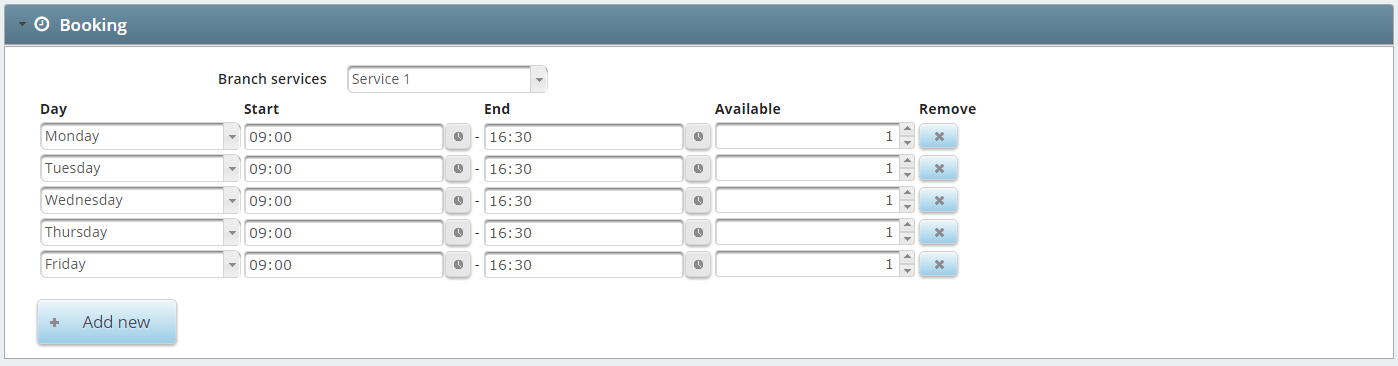
If you select a service from the enabled service list – from the dropdown selection box – you can edit the booking period for it. Day is the service availability day. The Start and End times are the timeframes when selected service can be booked. The number next to the starting and ending parameter is the numbers of the selected services Available for the given time. It may be that the service rather takes more time – in this case less booking availability should be entered.
Alerts
Alerts can give much information for the users about the operation of the system. They are covering partly events connected with customer-flow issues, partly system malfunctions, partly system availability issues.
With set up alerts you could be aware of every movement of the system.
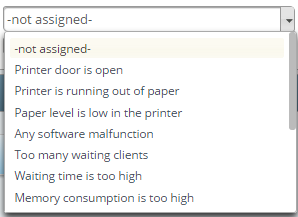
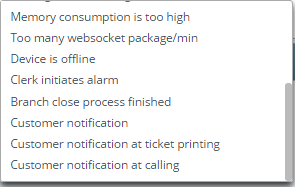
Alert
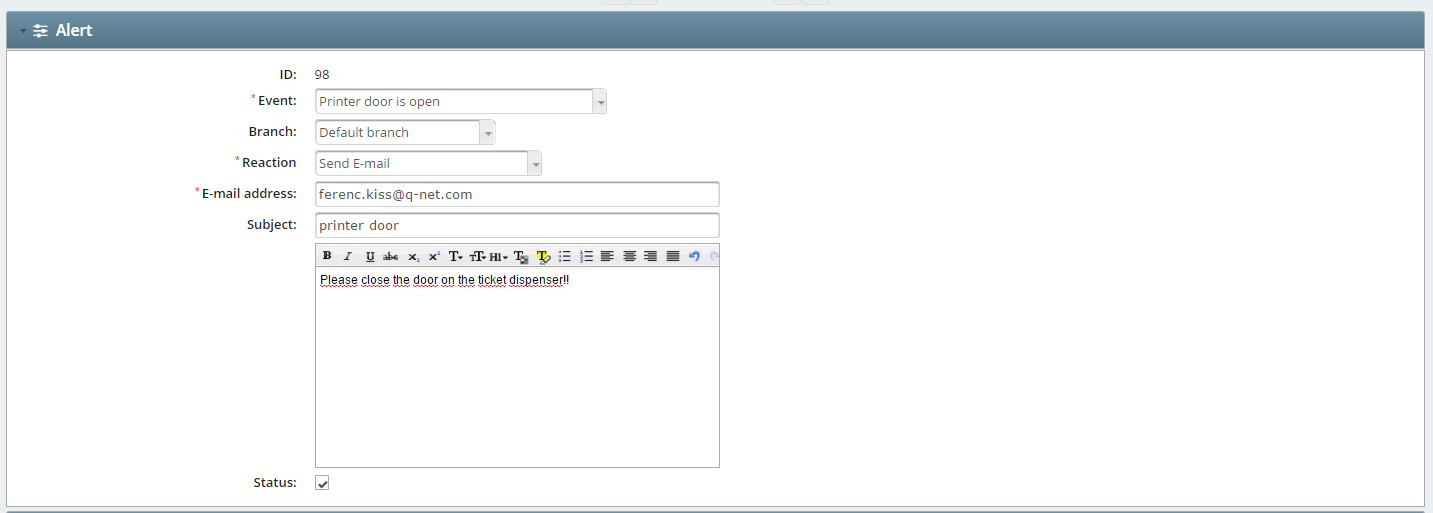
Events of the system can be selected with numerous reaction setups. Your selection will enable all the other set up parameters. As you make the selection the proper fields needs no be selected or filled. Currently we are prepared for the following Events:
And the following Reactions are prepared:
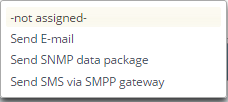
The Reaction list shows the possible way to inform a certain person with E-mail or SMS.
In case e-mail reaction was selected you also need to fill the E-mail address with a valid e-mail address of an account. Fill the Subject field as well or you can leave or edit the preconfigured ones.
In case SMS was selected please fill / configure all the mandatory fields.