Getting Started - Device installation
After successful cabling of your new device/s you should run a scan on your SD20 communication box/es, in case they are those devices that are connected via the SD20.(LED displays, HW keyboard, Sound devices)
Devices like: Ticket dispensers and Media players are communicating on port 3000,8000 by default so it is recommended to open these ports on your firewall.
Read more about cabling, here.
Admin page of the Q-net software: http://IP:3000/qnet6/admin.xhtml
On the top side, you have to select YourBranch(Deafult branch) instead of central settings. From the menu on the left side, navigate to DEVICES/Communication boxes. Here, select your communication box(SD20), then Communication box commands. In this submenu you have to click on Start scan.
NOTE: In case of LED displays, HW keyboard, Sound devices: before performing a scan on the SD20 communication box, set the device’s ID manually on the given device. The procedure depends on the hardware:
There is a hole on the backside of the device and a small button in it. This can be reached with a thin screwdriver or anything similar which is thin enough to fit this hole.
The other option if you have a hardware which has buttons to navigate in it’s menu to set it’s ID etc.
If you managed the cabling well, and the setting up of your SD20, your connected devices should have appeared under DEVICES/”device type” submenu.
Counters basic setup
To modify a counter’s permissions go to YourBranch/Service matrix option.
There are two types of counters: Web-based counters and Hardware counters.
Hardware counters
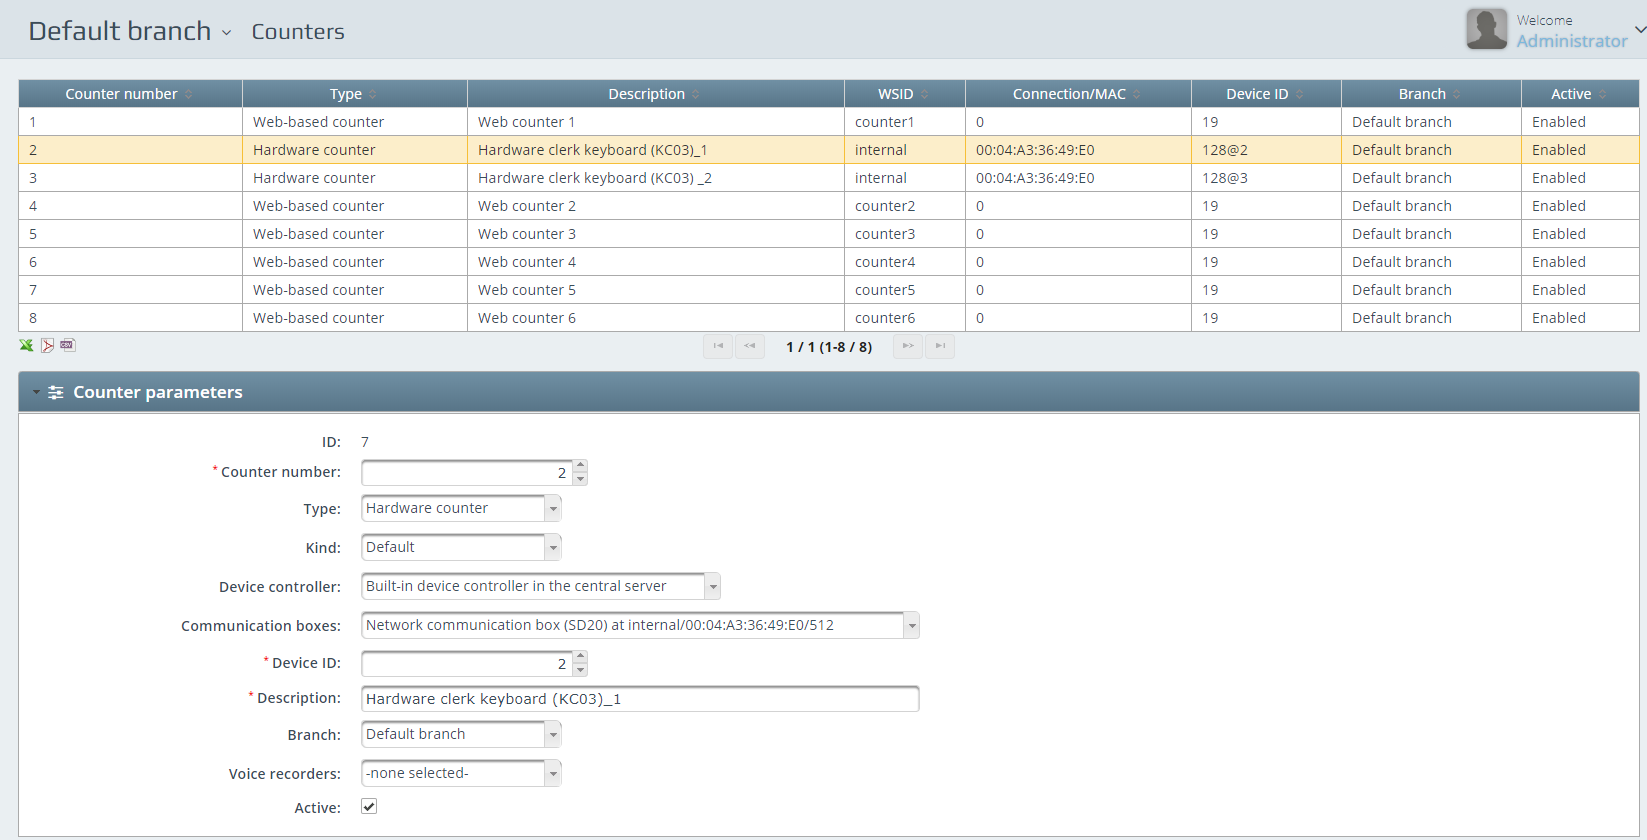
Has to been cabled and scanned like mentioned before. After that procedure your hw(hardware) counter should appear under YourBranch/DEVICES/Counters tab.
The options under Counter paramters are depends on your layout and system, feel free to customize them on your will.
NOTE: If you change the hardware’s ID on the admin site, you have to change it phisically on the device too, then re-scan with the option at Communication boxes(Start scan). This procedure applies to all of these kind of devices(LED displays, HW keyboard, Sound devices).
As default, pre-created users has not got previlige to access hardware counters, so you have to enable it.
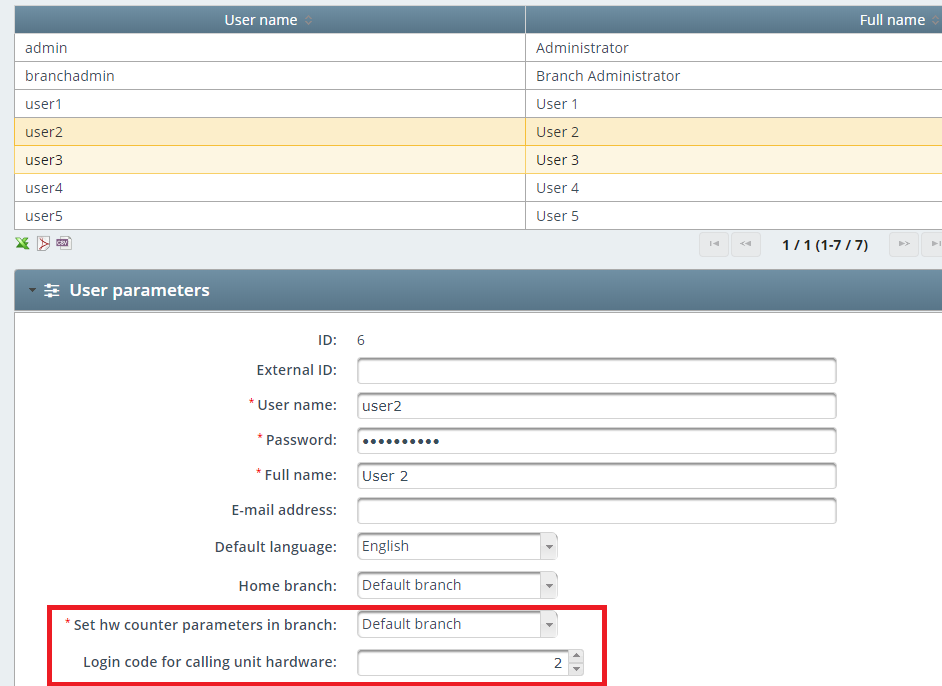
Navigate to YourBranch/Users tab, select a user then go to User parameters:
- Set hw counter parameters in branch: select your branch
- Login code for calling unit hardware: select a number what the user can use to login into the device
So in this scenario, user2 can log into a hardware counter with the login number 2.
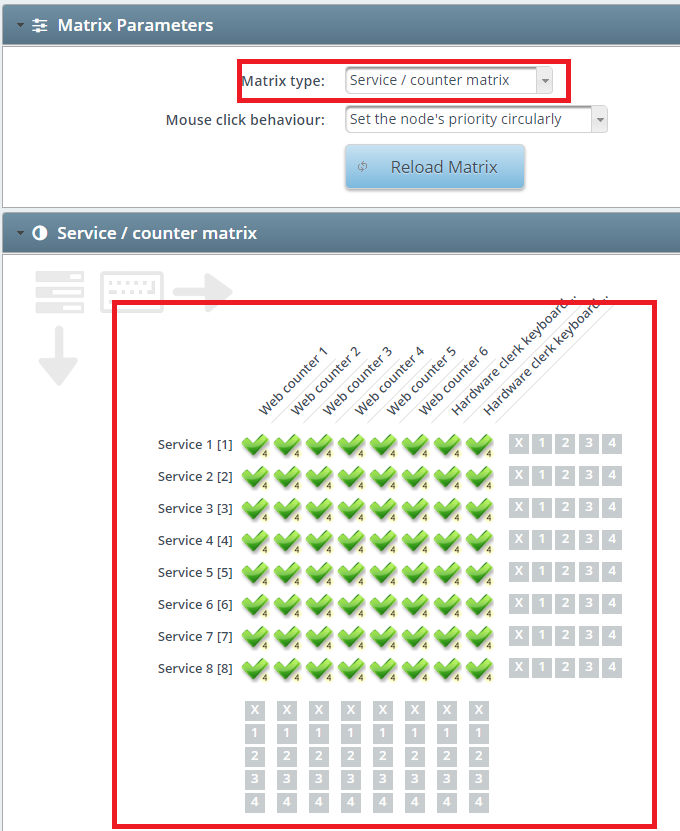
Secondly, you have to navigate to YourBranch/Service matrix menu and make sure that the newly installed hardware keyboards have the rights to handle your services:
Web-based counters are enabled in default for the users/services.
Web-based counters
Can be used from any device which are capable of running an internet browser.
In default you have pre-created web-based counters, what you can customize on your will.
You can also create more counters manually with the New option at the bottom of the page.
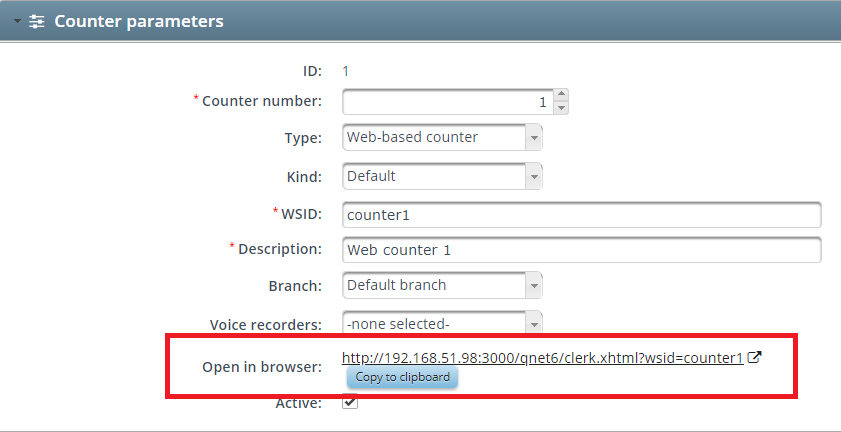
To open a web-based counter, use the link at Counter parameters tab after selecting the counter you want to run:
Counter displays basic setup
Under your branch settings, in this case ‘Default branch’ , chose Displays under DEVICES. Here you can see if your scanning was successful or not. If yes, your newly installed devices can be seen here.

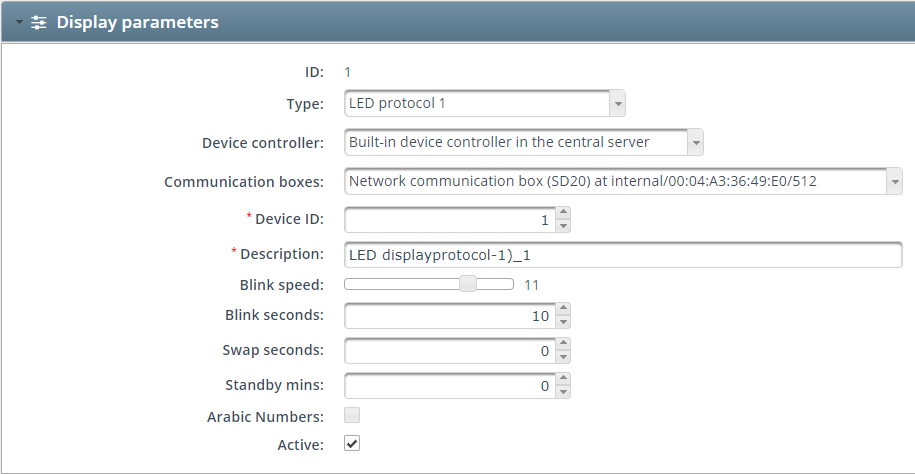
To customize it’s parameters click on the chosen display device and then you can open the options below, Display parameters.
Note: If you change the hardware’s ID on the admin site, you have to change it phisically on the device too, then re-scan with the option at Communication boxes(Start scan).
Options are depending on your layout and system, feel free to customize them on your will.
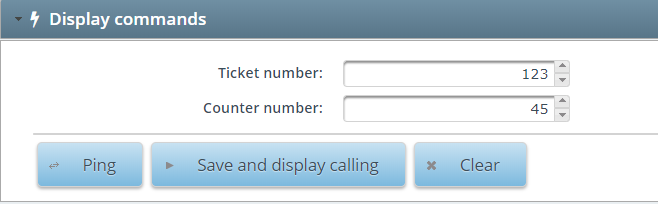
Under the Display commands tab you can perform a test on the device:
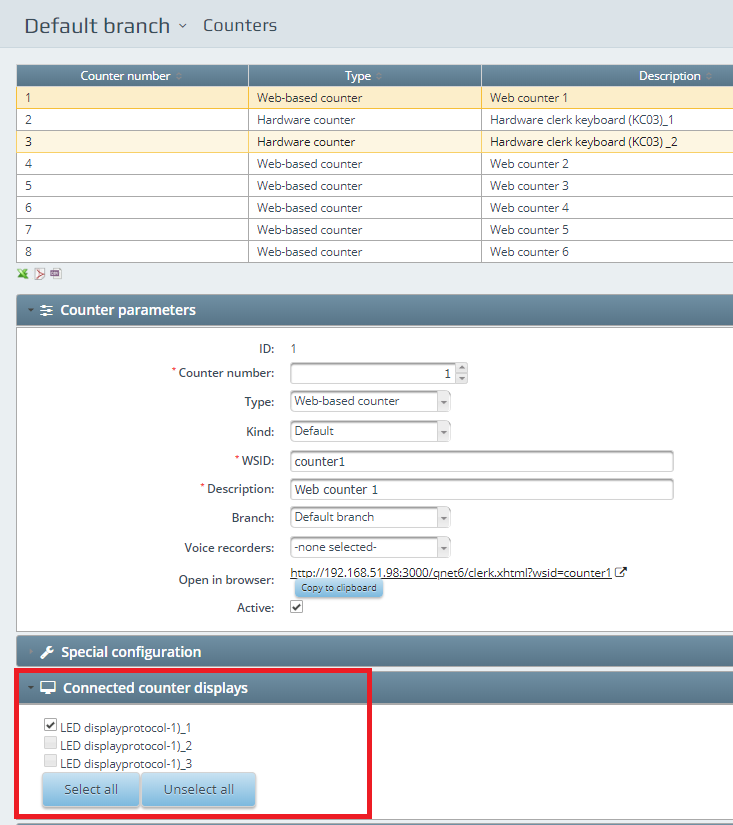
As a Counter display you want to assign a display to a counter.
Under Branch settings/DEVICES/Counters select the counter, then Connected counter displays tab.
Here you can select which display you want to assign.
Waiting area displays basic setup
These device’s installation is the same as the Counter displays. The difference is that you have to create a display group for them, then you can assign counters to this group.
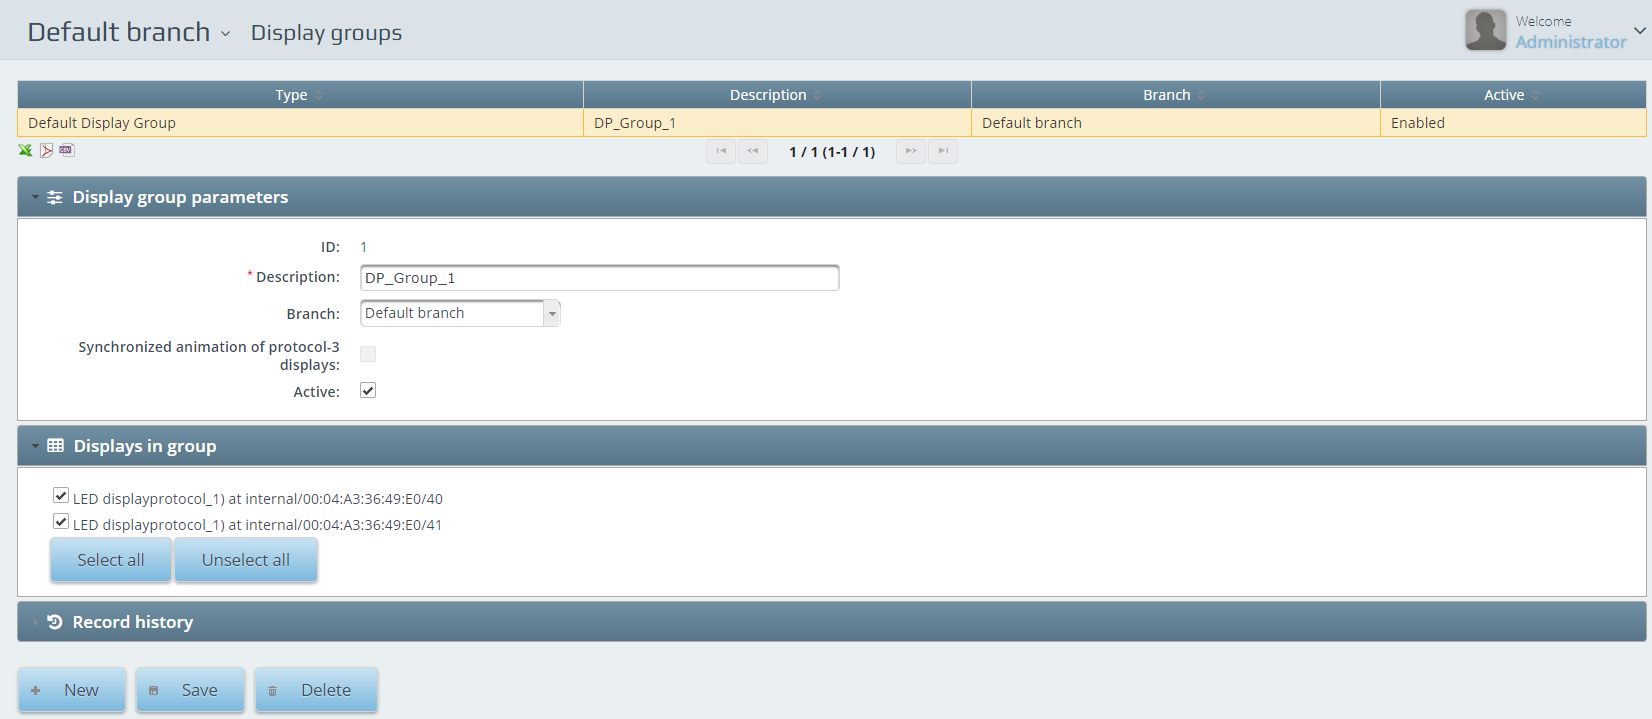
To create a display group, navigate to YourBranch/DEVICES/Display groups. Here you are able to create a new group including your freshly installed waiting area displays:
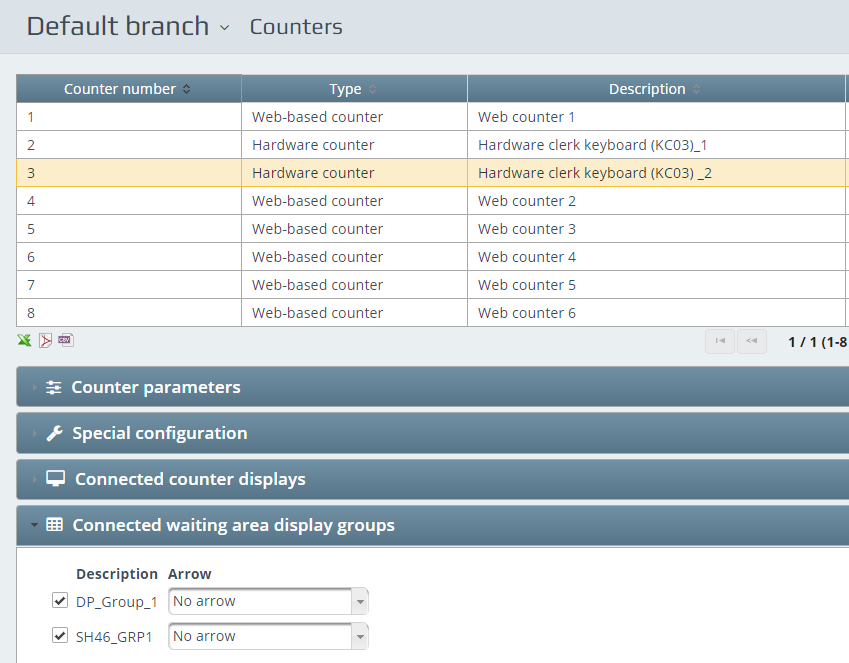
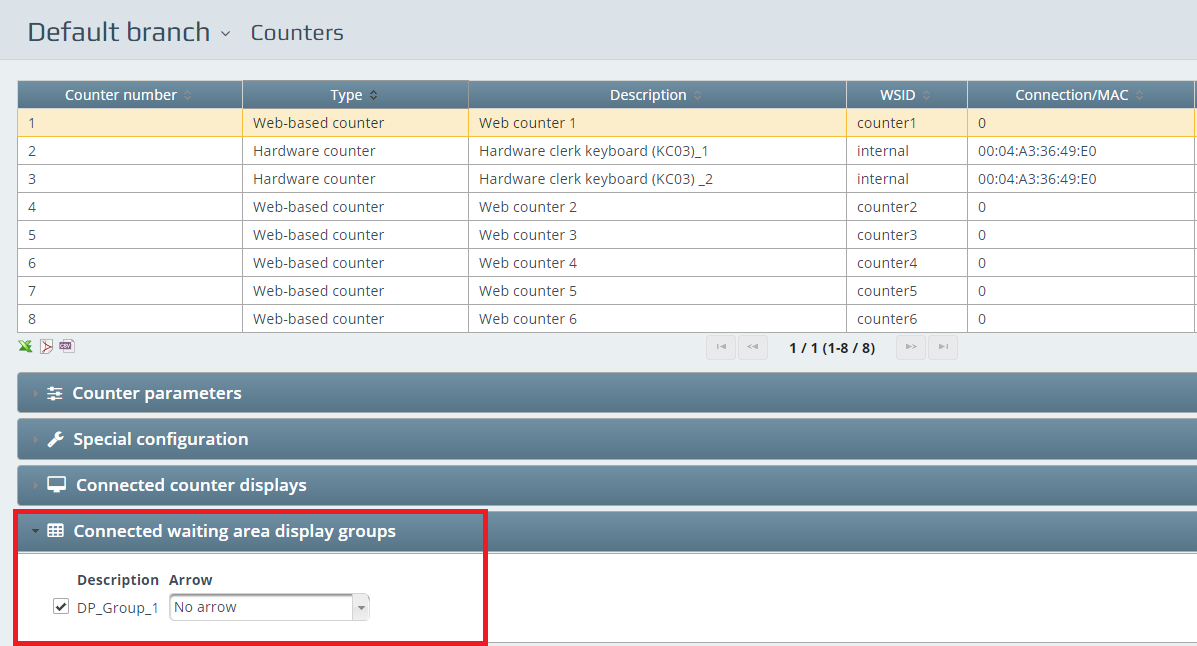
After this is done, you can add this group to the counters. You have to go to YourBranch/DEVICES/Counters , select a counter then under Connected waiting area display groups you can chose your previously created display group:
Sound players basic setup
Your sound player device has to be in F-1 mode to perform a succsessful scan. You can check on it’s display when you turn on the device.
Sound player’s options are similar like the other devices. After a successful auto detection, you will see your device under YourBranch/DEVICES/Sound players . Here you can edit the hardware’s details:

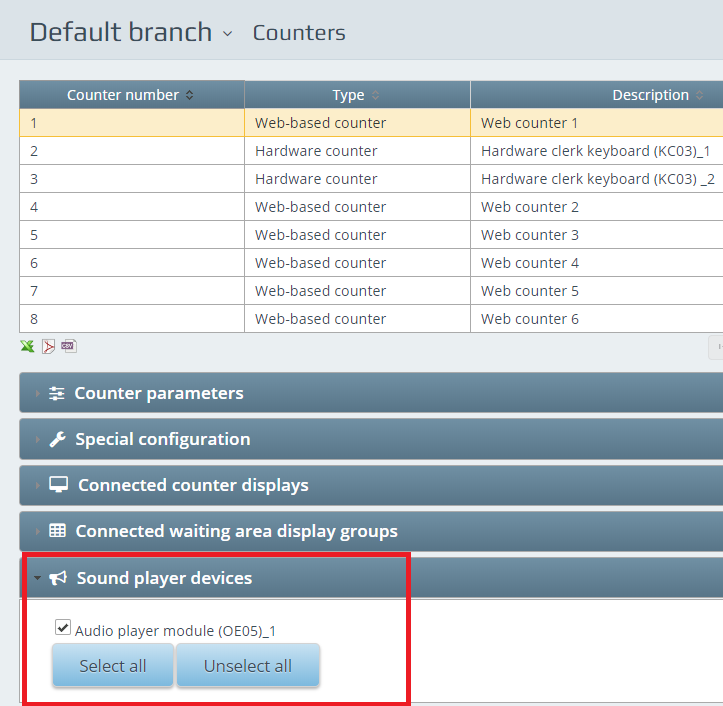
Just like at the counter displays section, you can assign sound players to a counter of your choice. To do this go to YourBranch/DEVICES/Counters, select a counter then open the Sound players devices tab:
Feedback devices
Before the setup of this device you will need to create a feedback profile to assign it to the feedback device.
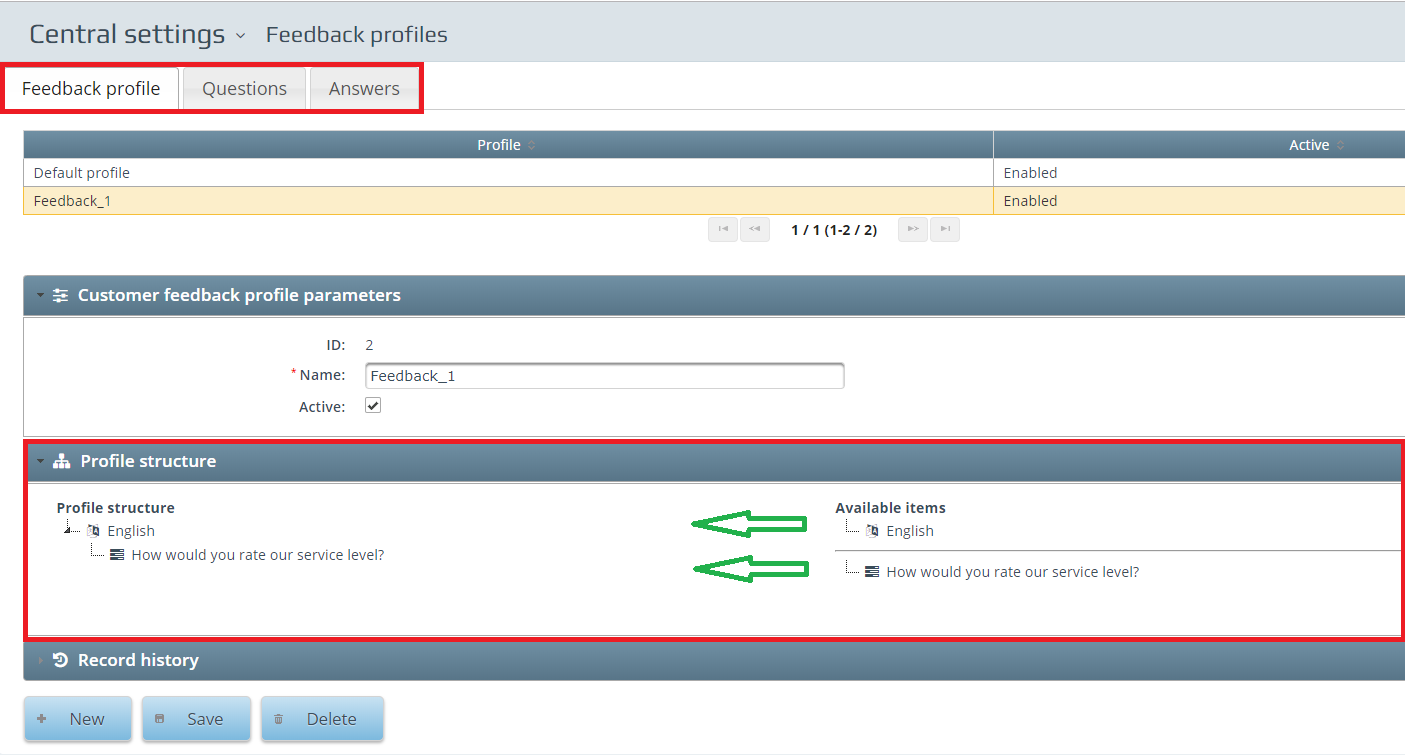
To do it navigate to Central settings/OPTIONAL MODULES/Feedback profiles .
There’s a default profile here what you can edit on your will or create a completely new one.
You have to name your new profile, add questions and the possible answers for them.
Either you created a custom Q&A or use the default one, under the Feedback profile, you have to drag and drop these questions into your profile structure.
After you managed the cabling, the hardware should start to boot up. After the boot screen, you have to select Control panel option. The default password is: qnet1234
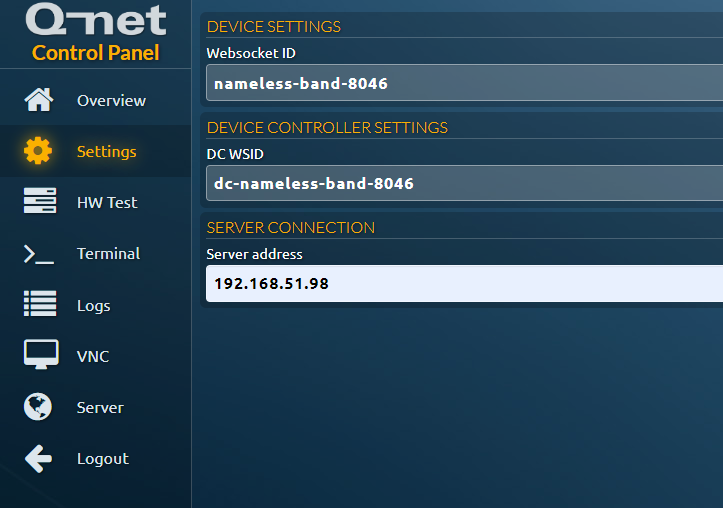
At the Settings menu you have to enter your server’s IP address:
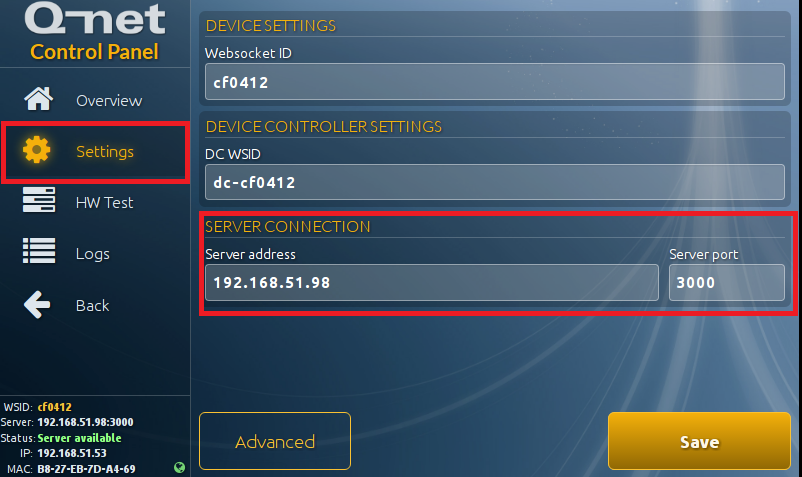
Note: From now on, you can access your device’s admin page from a browser with it’s IP address what you can see on the bottom left side.
Save, then reboot. The application is going to start automatically and you will see the default Q-net feedback screen.
Web-based feedback device
In case you are not using a physical device, you can access the feedback software through the link at the Feedback devices tab, after you selected the one you would like to open.
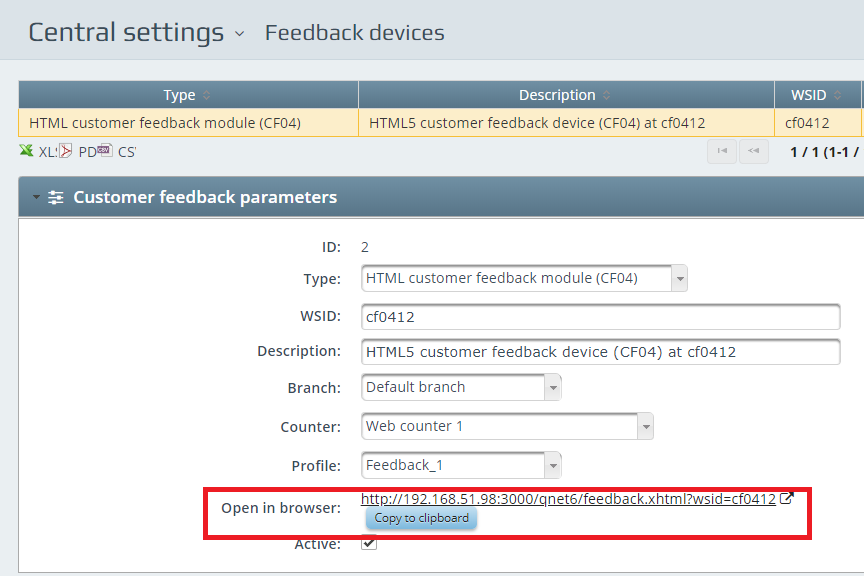
If you did everything as described, you should see your device/web-based at Central settings/OPTIONAL MODULES/Feedback devices.
Here you have to set which branch/counter/profile you want to use this device in/at.
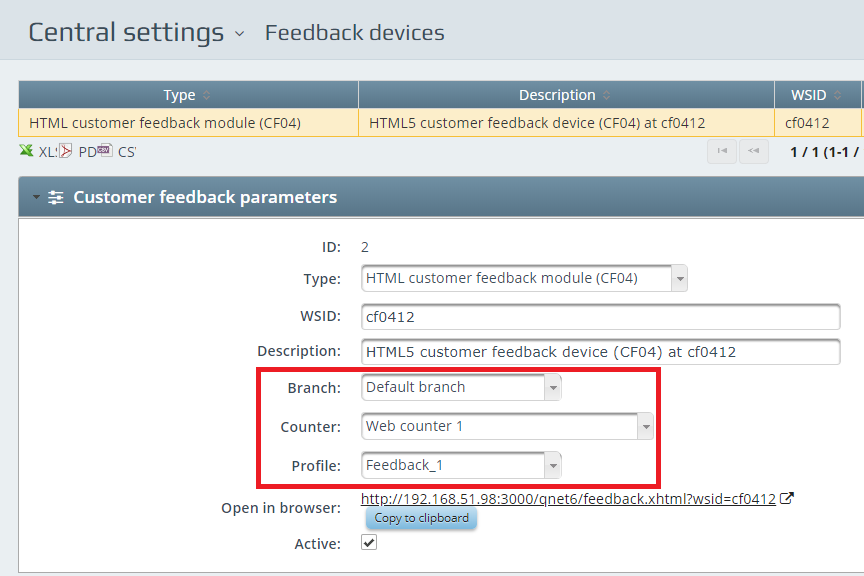
If you would like to use a centralized Feedback device, choose NO COUNTER, so it will be functioned as a central feedback device.
Ticket dispenser basic setup
Note: Branch is closed message will appear on your dispenser’s screen, as long as you have no Ticket dispenser profile assigned to the dispenser.
Windows based ticket dispensers
After you managed the cabling of this device, Windows operating system will boot up. You have to install the previously received Q-net Pro 6 Device controller and Q-net Pro 6 Touch dispenser application.
Installation
During the installation of device controller you have to set your server’s URL: http://IP:3000/qnet6 , otherwise it’s Next->Next->Finish at both software. Note your device’s WSID in case you have to manually add it later.
When finished, an icon should have appeared on the desktop called Q-net Pro 6 Touch Dispenser.
Secondly, you have to add a new printer to your branch, at YourBranch/DEVICES/Printers.
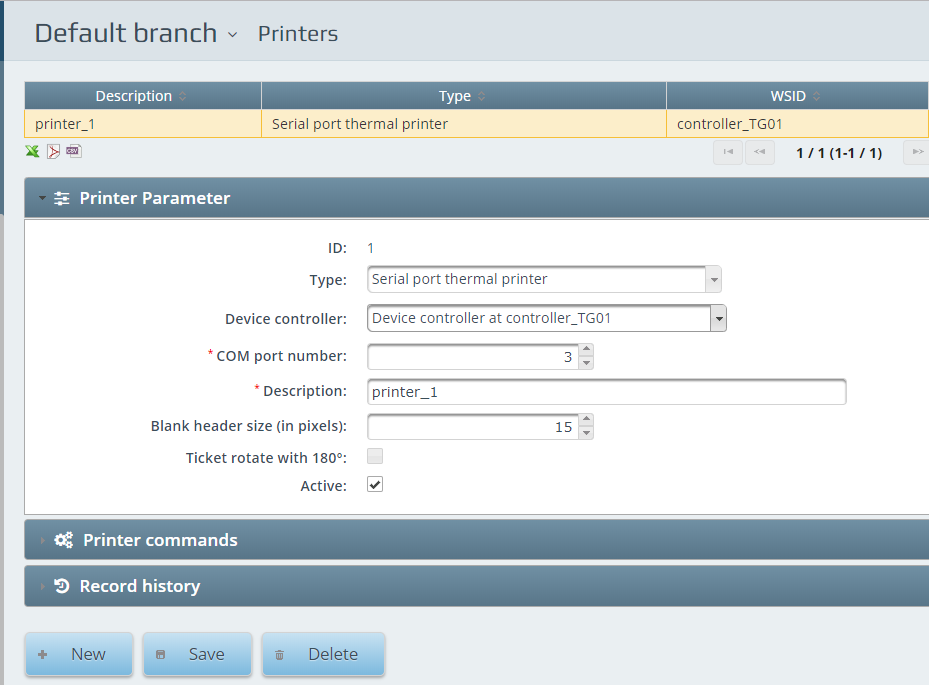
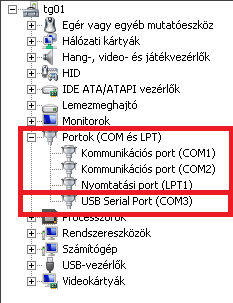
To find out which COM port is used by your printer, check the Device Manager on your ticket dispenser.
In this case we are using it’s COM3 port:
Blank header size value is recommended between 10-15 pixels with the default ticket style.
Thirdly, navigate to YourBranch/DEVICES/Ticket dispensers and select your previously added printer, your branch, then tick the box at Ticket dispenser profiles where you will see the default profile and/or your created one.
If you want to add/edit a ticket dispenser profile, go to Central settings/Ticket dispenser profiles.
If you want to add/edit a ticket dispenser style, go to Central settings/Ticket dispenser styles.
Example for setting up a dispenser:
Raspberry based ticket dispensers
First of all, you have to start your ticket dispenser device and after the boot screen, the IP address of the device will appear. Typing this address into a browser will open its admin page. Here you must add your server’s IP at Settings tab in order to use the ticket dispenser. Reboot will be needed.
In case of raspberry based ticket dispensers, you dont have to install any extra softwares, all you need is a micro SD card with the software already installed in the device.
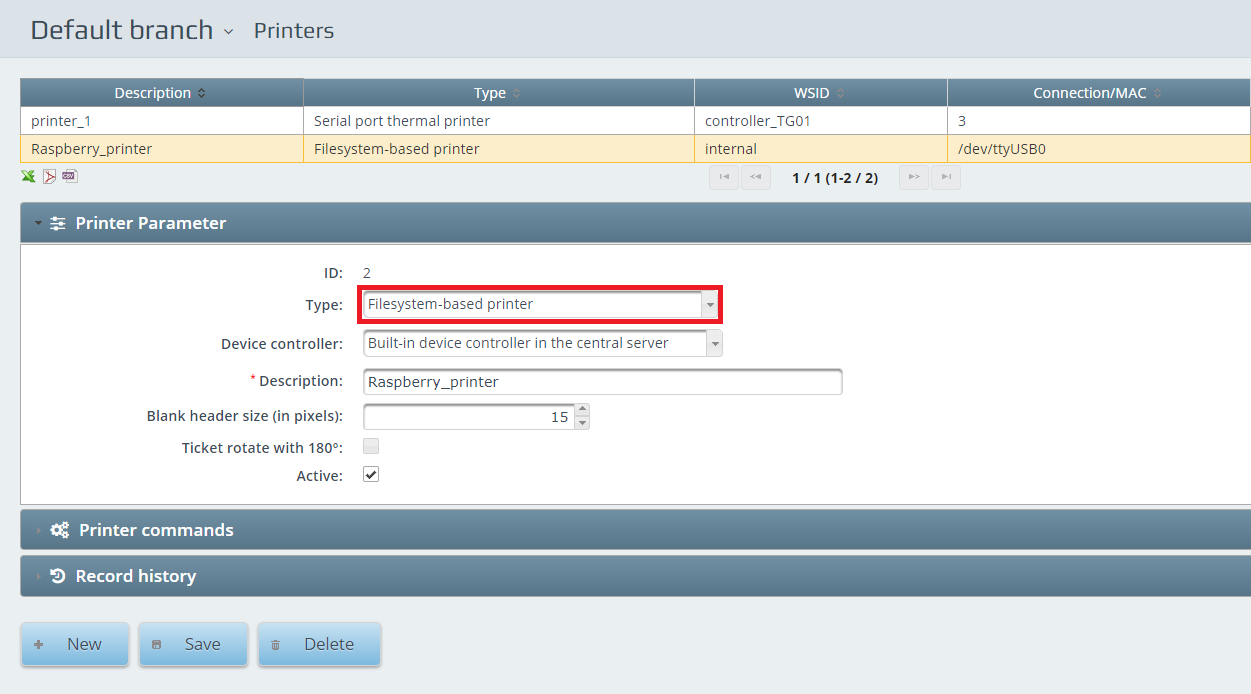
The setup is the same as at Windows-based ticket dispensers, except when you are adding a new printer on the Q-net admin site, it has to be a Filesystem-based printer.
Media player basic setup
First of all, you have to start your media player device and after the boot screen, the IP address of the device will appear. Typing this address into a browser will open its admin page. Here you must add your server’s IP in order to use SH46 software:
Note: An error message will pop up on the screen about “Invalid WSID”. This is normal, all you have to do is Refresh screen via Q-net admin page YourBranch/OPTIONAL MODULES/Media players/your device/Media player commands/Refresh screen or reboot.
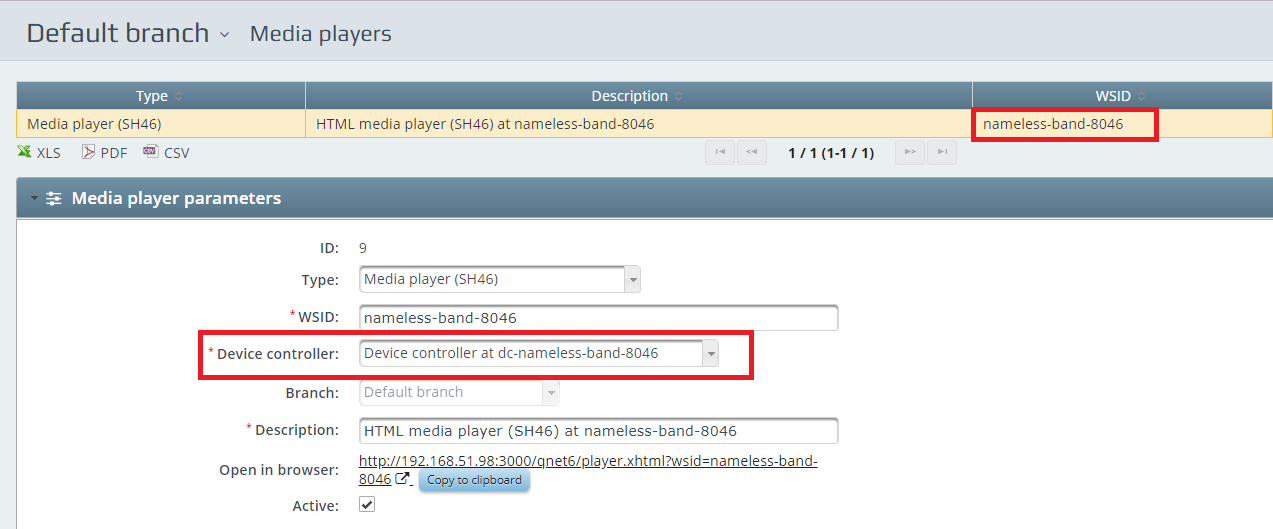
Now go to YourBranch/OPTINAL MODULES/Media players, here you will see the SH46 device. Make sure, that the device controller is set to the SH46 device!
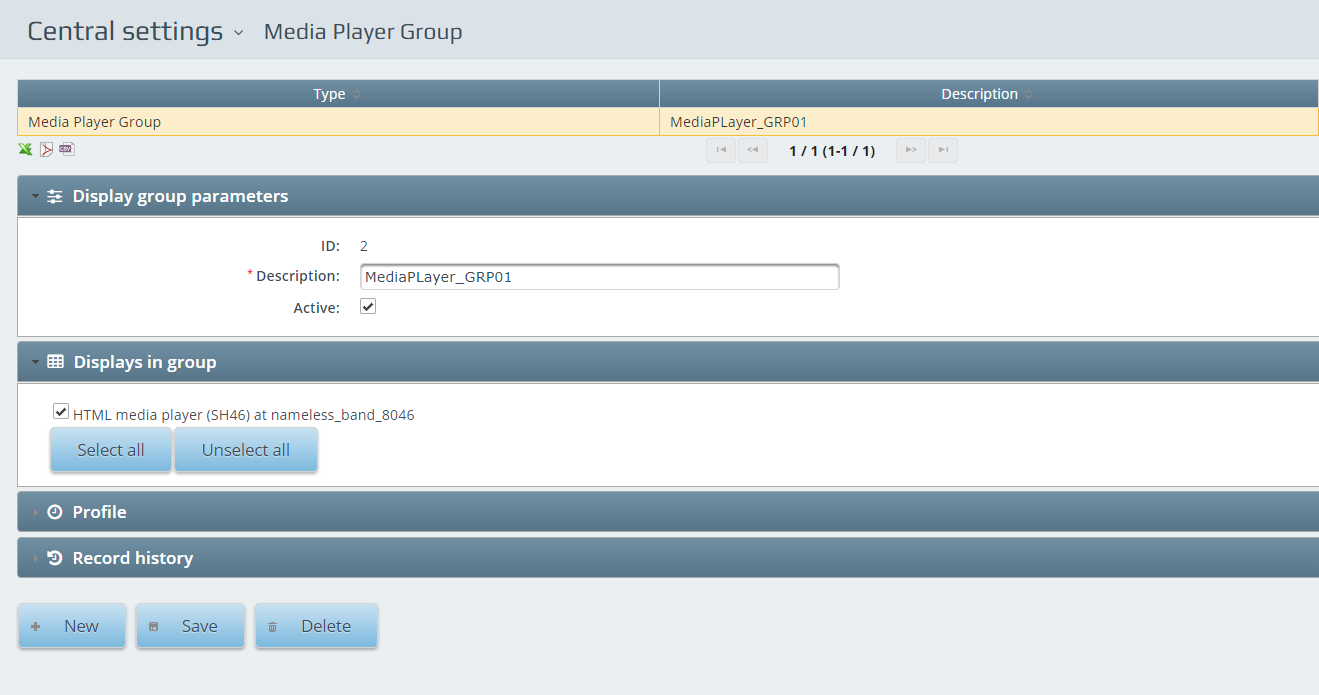
After this is done, navigate to Central settings/OPTIONAL MODULES/Media Player Group. It is recommended to create a media player group in a case if you have two or more media players. So, you dont have to change the media player’s profile settings one-by-one, you can change all of their via changing the group’s profile parameters.
Put the SH46 device into the group:
In order to assign a media player to a counter or counters, you will need a display group similar to Waiting Area Displays, with the difference of putting SH46 devices into the group, not waiting are displays.
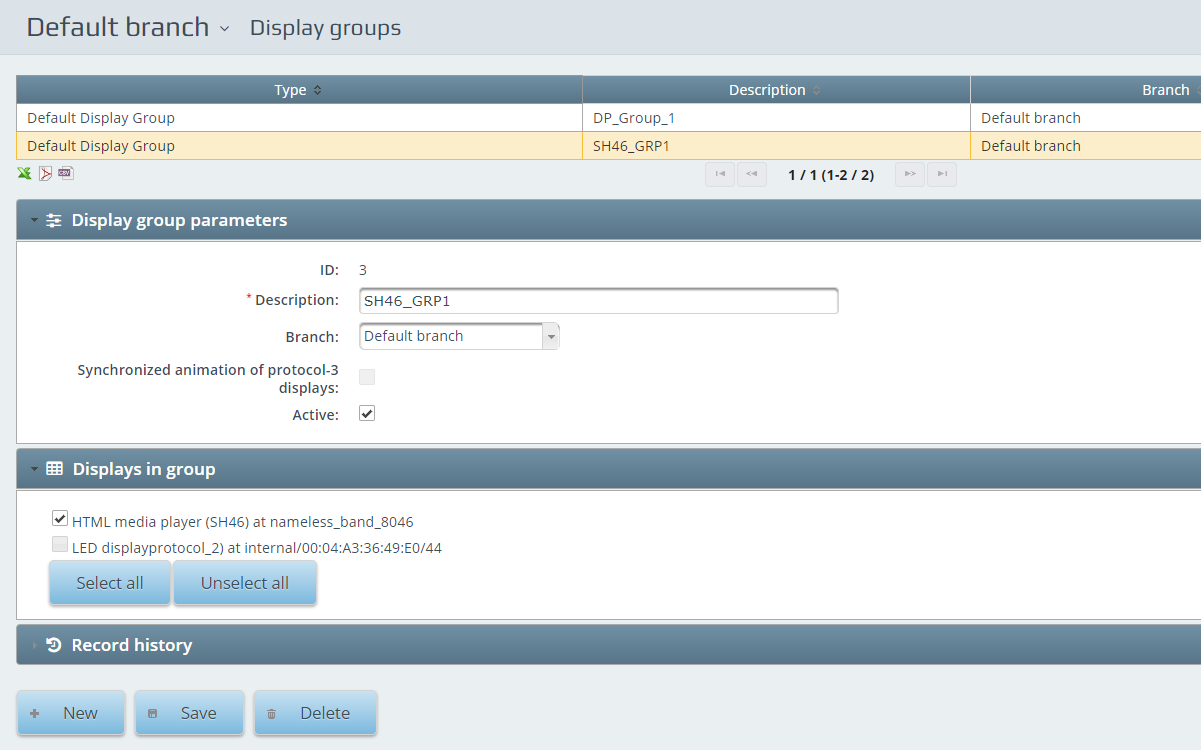
The last step is also the same as at Waiting Area Displays, you have to add the previously created display group containing the SH46/s to the counter of your choice.