Further Modules - Smart Ticket
Configuration
The licensing of this feature is similar to the appointment module. In order to use, enable it for the branch, under the Branch settings
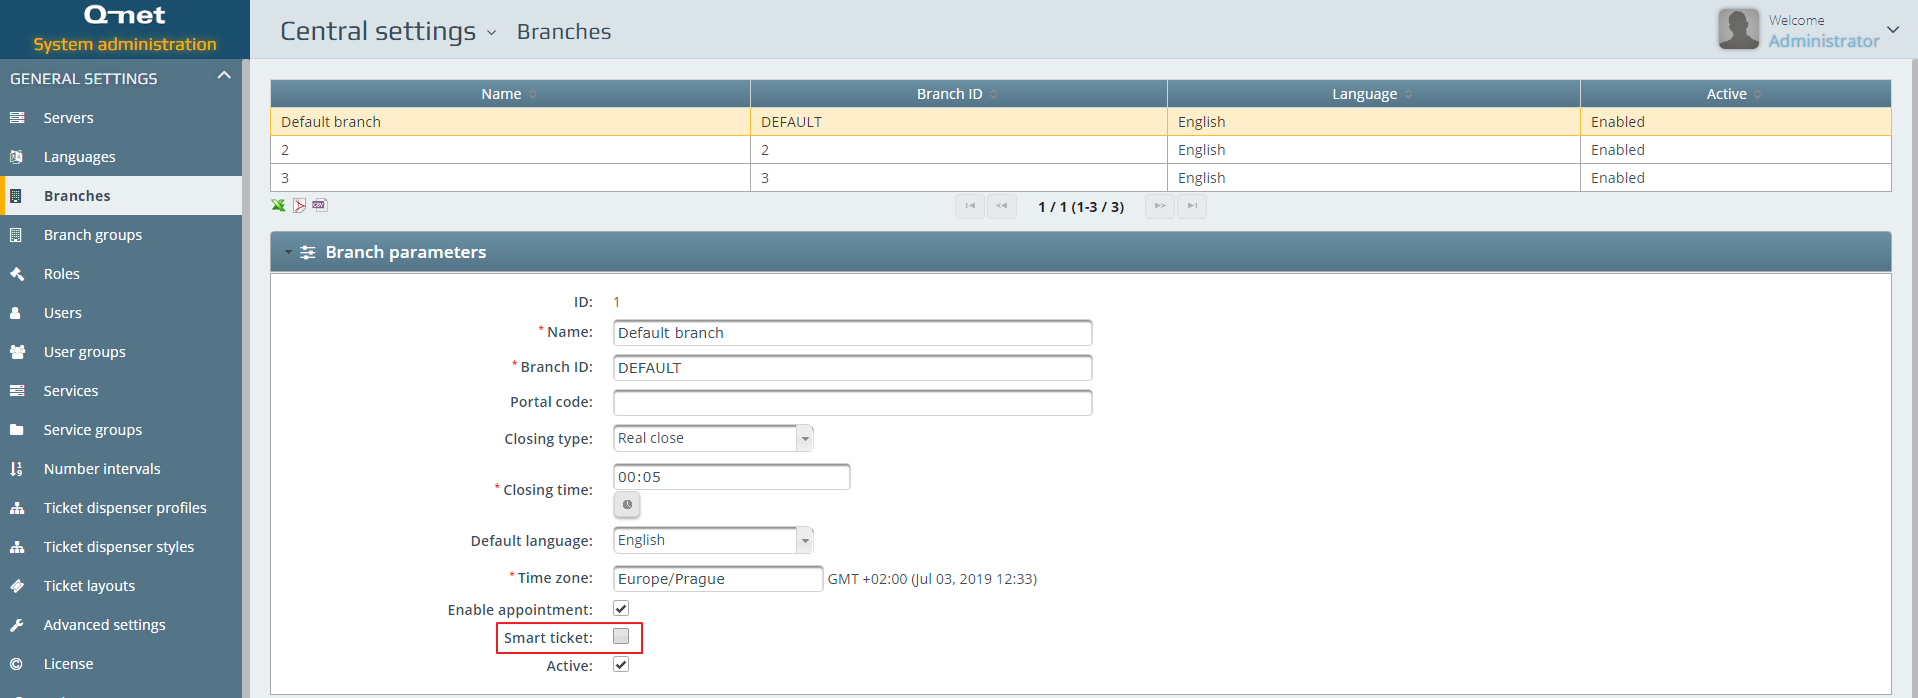
The feature is now enabled, and it is available under the Optional modules section
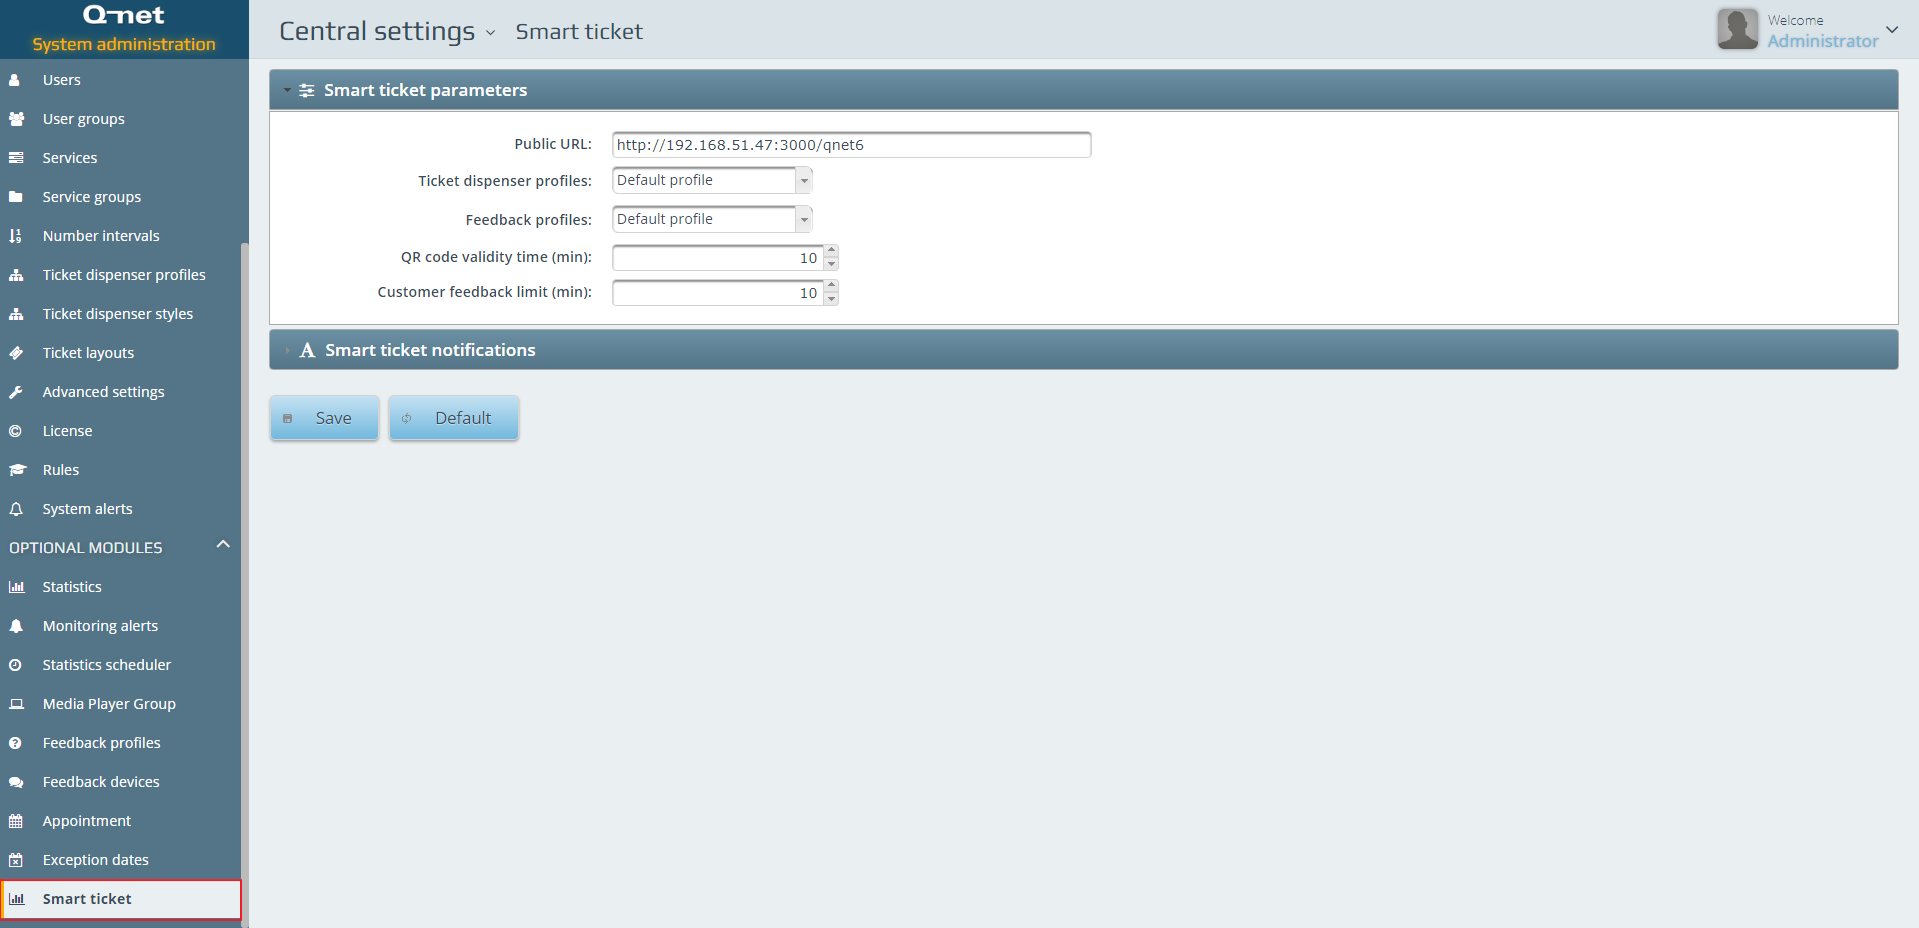
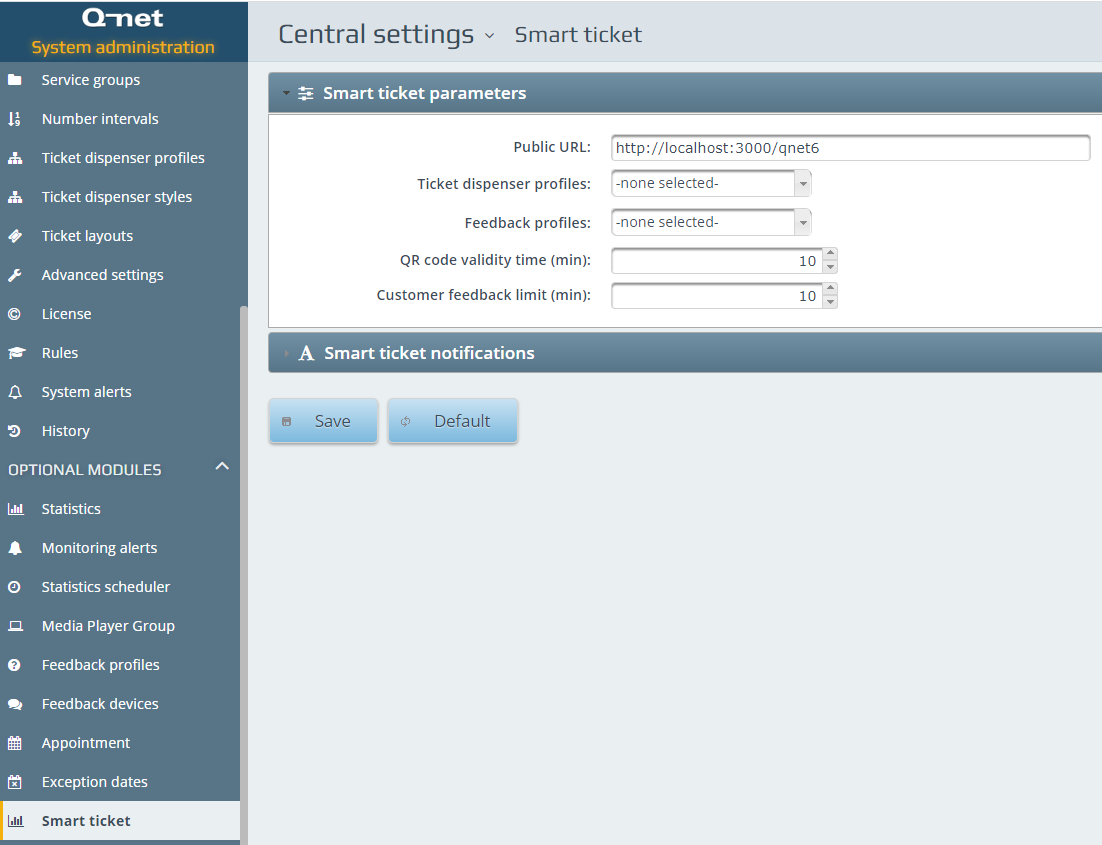
Public URL: URL address that is available from the internet
Ticket dispenser profile that will appear on the Smart Ticket page, during the service selection
Feedback profile that will appear after the successful transaction.
QR code validity time (min): Time interval in minutes, until a QR code is valid. The QR code is regenerating on the dispenser with this time interval.
Customer feedback limit (min): Time interval in minutes, until a feedback answer can be validated.
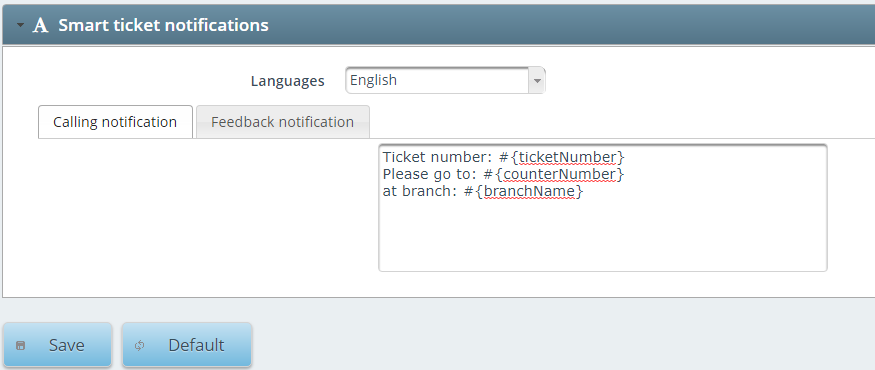
The notification text can be set by each language.
Note: You have to hit SAVE for each language.
Calling notification: The notification message that will appear on the phone.
Feedback notification: The notification message, that will appear on the phone, after the transaction is closed and there is configured feedback device
Available variables
#{ticketNumber}
#{counterNumber}
#{branchName}
#{branchShName}
Branch level configuration
Every parameter can be overwritten under the branch configuration
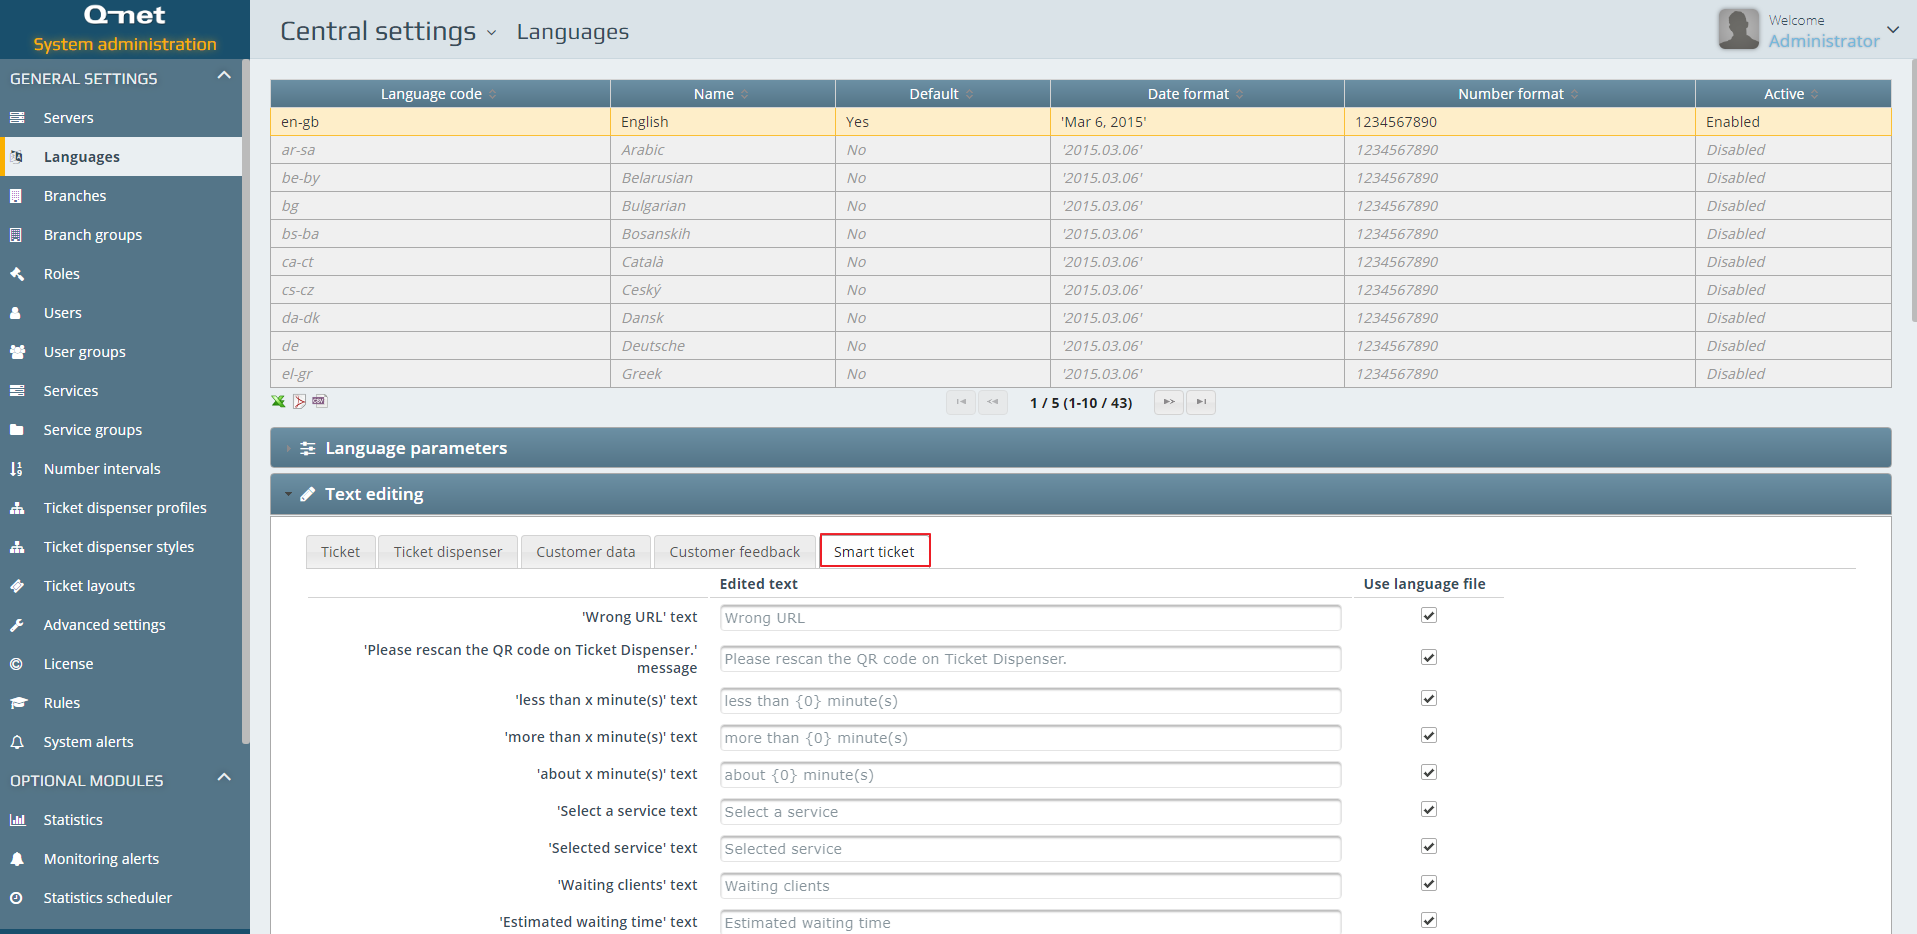
Texts
The text fields can be edited from the Languages section, under the Smart ticket tab
How to use
Starting the Smart Ticket

To start the process, read the QR code on the ticket dispenser with a QR code reader. Touching the QR code icon will open it in a bigger size.
Using the Smart ticket page
To use the page the user must have a modern browser on the phone. The notification function is not available on every phone, due security reasons. (iPhone) The notification must be enabled for the website to receive information about the call. In case of newer android devices, only the sound notification is enabled, the pop-up notification is not available. A sound notification and a small icon will inform the user about the calling.
Start page

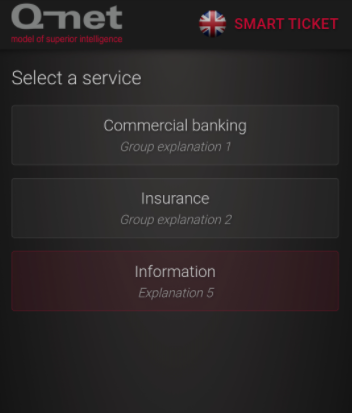
The ticket dispenser profile contains service groups and services. The groups will open down after touching the button, the service list is scrollable up and down on the phone.

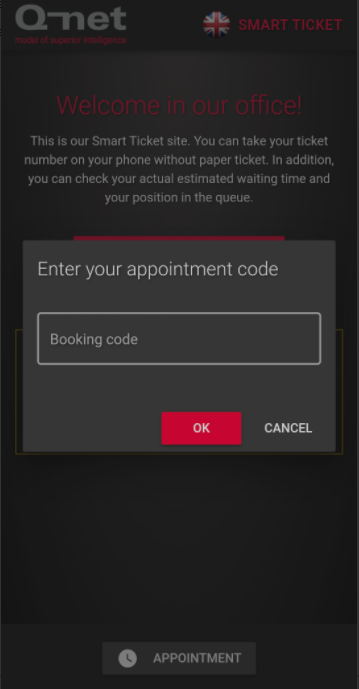
Appointment code
If you have a previously booked appointment enter the booking code here:
Service selection
After selecting a service, a dialogue window will appear, here we can confirm the selected service by pressing the Ok button. Additionally the number of the waiting clients and the estimated waiting time will also appear for the selected service.
Waiting ticket
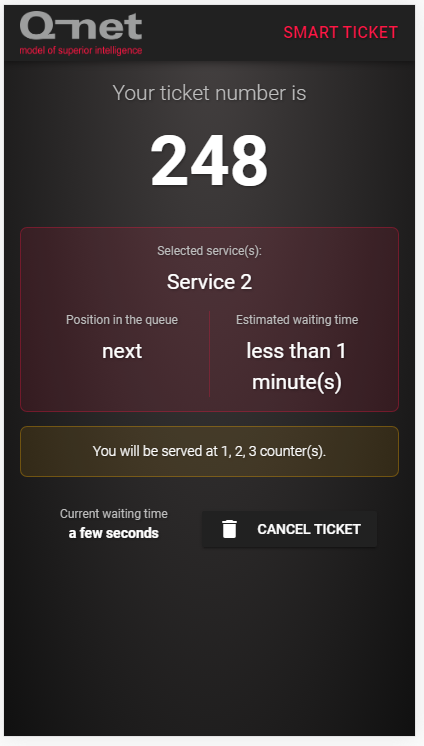
During our waiting time we will receive information about the ticket number, the selected service, as well as the estimated waiting time and our position in the queue. Depending on the service matrix (and the logged in counters) the page will which counter will call us. The bottom section shows the actual waiting time and a cancel button. With the cancel button the ticket can be deleted, if we don’t want to wait anymore.
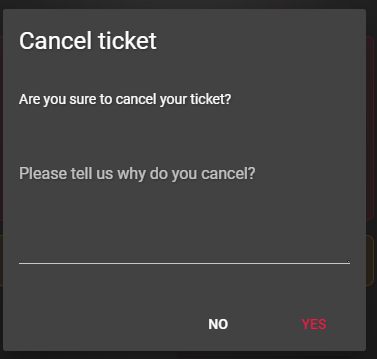
Deleting a ticket
During the ticket cancellation the page will ask why do you want to delete the ticket. This information will appear in the statistics.
Ticket calling
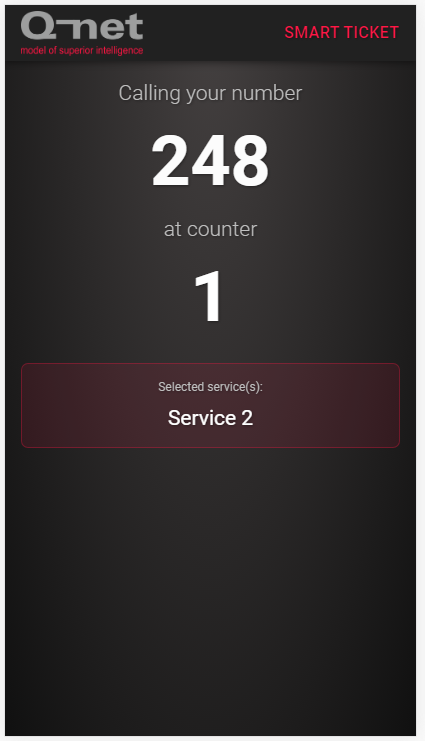
When a clerk call our ticket, the ticket number will blink and the counter number will appear in the middle of the screen and the user will receive a notification. (if the user enabled, that the site will send notifications)
Under transaction

Under transaction, additionally to the information on the previous screen, the total waiting time and the current transaction time will appear.
Customer feedback
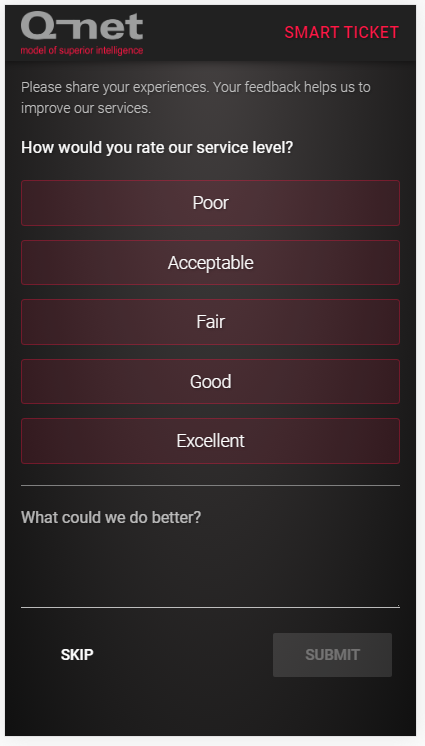
After the successful transaction /if the counter has an assigned feedback device/ the customer feedback page will appear with the previously configured profile. In this case the phone will receive a second notification. Clicking on the notification will open the feedback page. The customer can answer the preconfigured questions or enter a custom answer in the textfield.
The answer can be skipped with the “Skip” button. The “Submit” button will send the answer.
Ticked closed

After the feedback / or the counter doesn’t have a feedback device / the transaction will be closed and a “Good bye” screen will appear. The process has been closed, the transaction is finished and the browser can be closed.
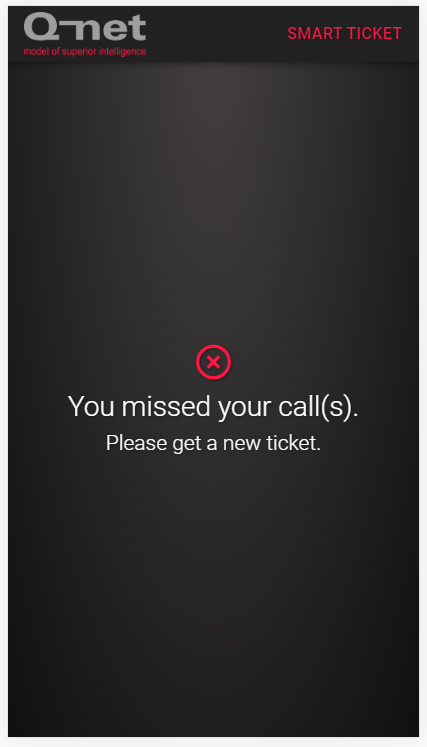
Missing ticket

In case of missing ticket, the page will show the recalling time. By touching the “put back in the queue” button, our ticket will be in the queue again, this way we don’t have to wait for the recalling time.
If the ticket was closed as a missing, the following page will appear, in this case there is no more interaction. The user must scan the QR code again on the ticket dispenser.
Smart Ticket Proxy Server
Node.js server that serves the Smart Ticket function. It forwards every request to the Q-net Pro server. It is recommended to use this to access the application thought the internet, instead of opening the admin port of the Q-net Pro admin page.
If you are using proxy server, you have to use it’s address at Smart Ticket’s public URL field:
Installation
The application can be installed with the nssm.exe provided. After started this tool, enter the location of qnet-smart-ticket-proxy.exe file and the name of the Windows service.
Configuration
The configuration.json file contains every configuration of the proxy server{
"port": 80,
"serverURL": "http://localhost:3000/qnet6",
"vapidPublicKey": "BIH.....",
"vapidPrivateKey": "tZf.....",
"accessLog": true,
"pushTTL": 10
}
| Name | Description | Default value |
|---|---|---|
port |
Proxy server HTTP(S) port | 80 |
serverURL |
A Q-net Pro server address | http://localhost:3000/qnet6 |
vapidPublicKey |
VAPID public key, for the Push Notification | null |
vapidPrivateKey |
VAPID private key, for the Push Notification | null |
accessLog |
Web access logging | true |
pushTTL |
Push Notification TTL | null |
Static files
The Proxy can serve the static files of the application. This way the server will send only the necessary REST calls to the Q-net Pro server. This workaround will remove the load from the Q-net Pro server, so it doesn’t have to serve the static files. The only disadvantage of this solution is, that you need to update this folder manually.
Create a www\smart folder and copy the content qnet6.war\smart to this folder.
+ www |
SSL
To make every function available in the Smart Ticket application (vibration, push notification), it is necessary to run it with a valid SSL certificate. The ssl folder must contain the following files+ www
|-+ ssl
|-- ssl.key
|-- ssl.crt
|-- ca.crt (optional)