Getting Started - Installation
Database install 2019 (recommended)
Install a supported database engine. In case of Windows 10 operation system we recommend you to use MSSQL 2019. Q-net v6 is compatible with the following database engines: MS SQL and PostgreSQL.
In case you are using an existing database you have to use it’s user at the installation and this user must have database create permission.
Download
You can download the Microsoft® SQL Server® 2019 Express and management studio from the Microsoft homepage:
https://www.microsoft.com/en-us/download/details.aspx?id=100809
Installation steps
Start the installation with administrative rights.
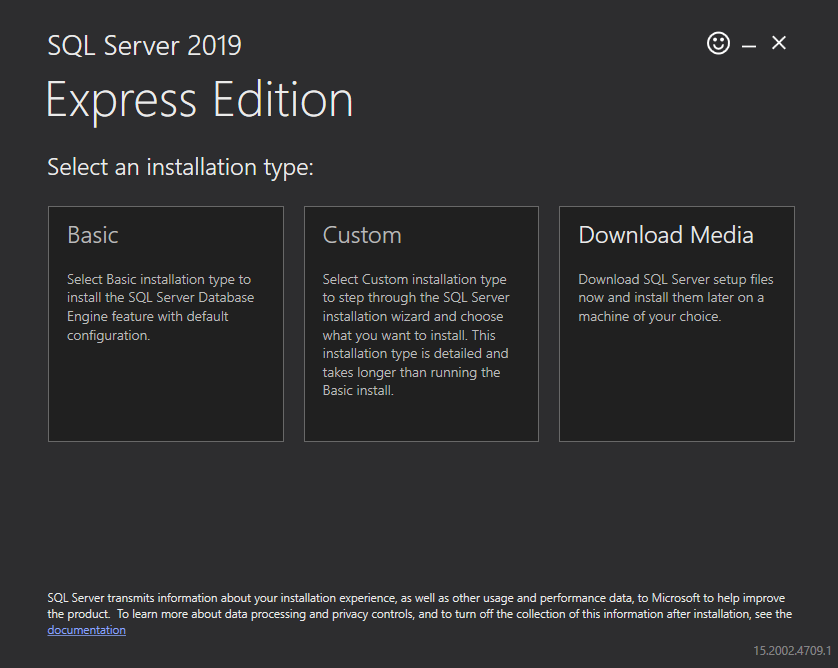
Chose the Custom installation type then specify the download target location and click on Install.
Click on New SQL Server stand-alone installation or add features to an existing installation.

On the Global Rules page accept them and click Next.
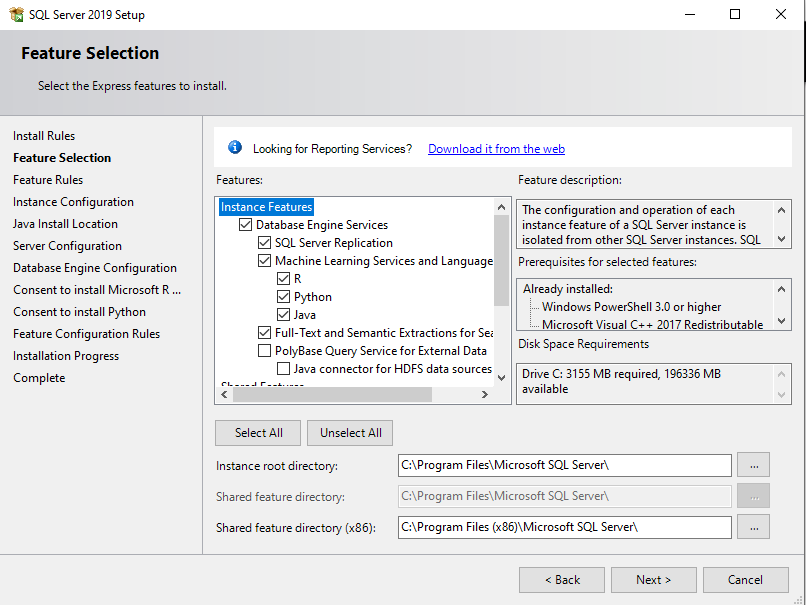
At the Feature selection, leave it on default and click Next.
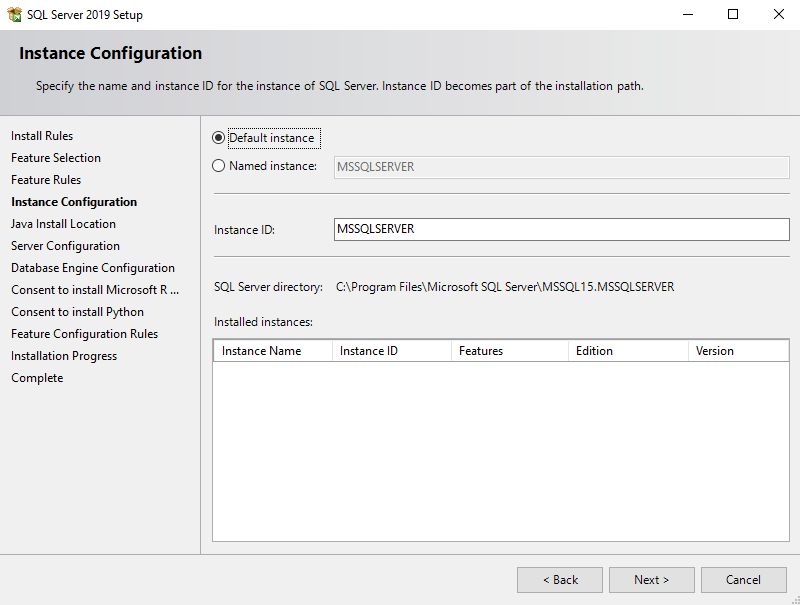
At the Instance configuration choose Default instance(recommended) and click Next.
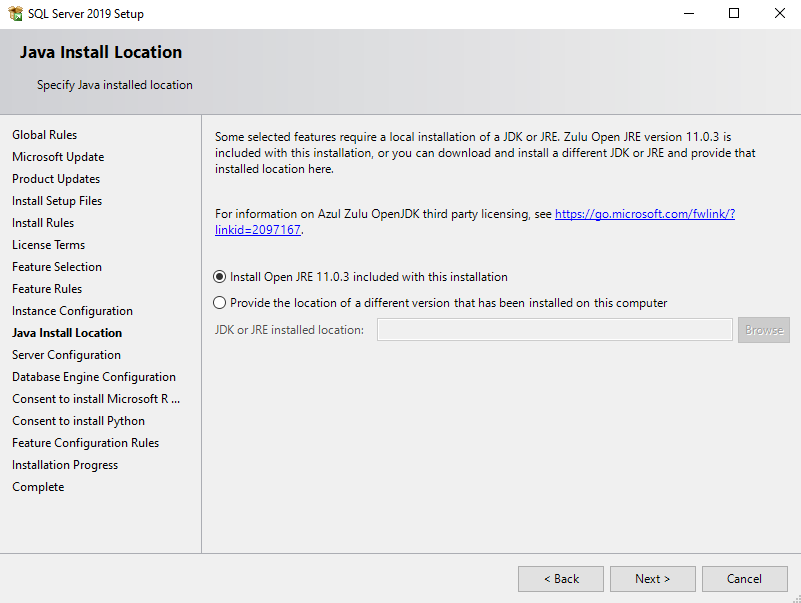
At Java options you can choose to let the installer install the newest JAVA version or you can choose an already installed version by specifying it’s location.
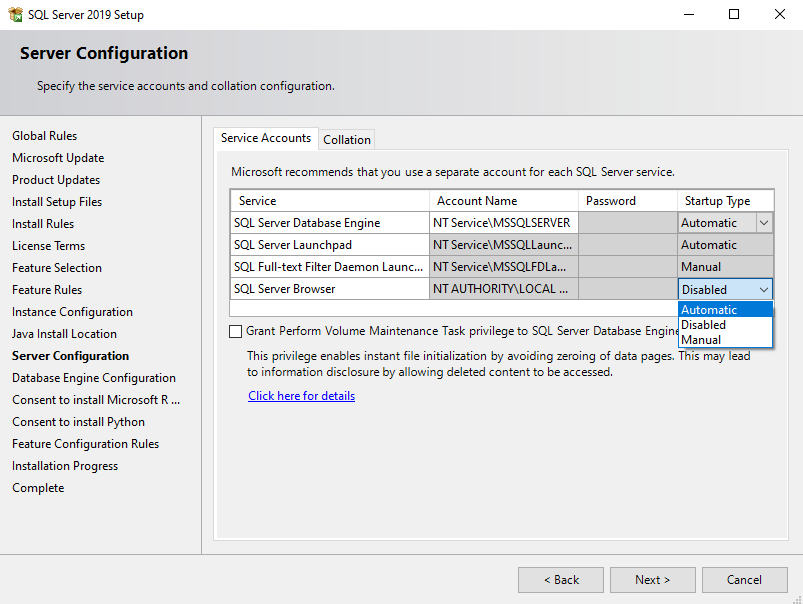
At the Server configuration, set the SQL server browser‘s startup type to automatic.
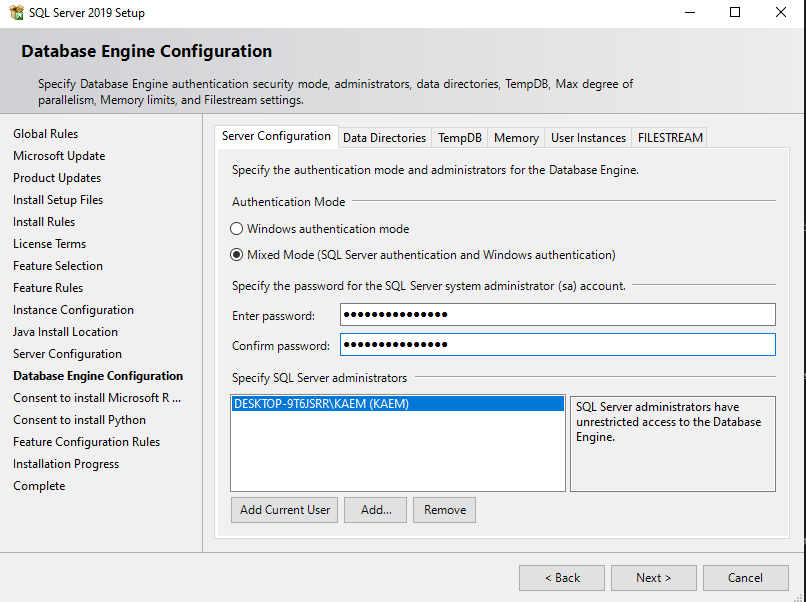
Choose Mixed Mode (SQL Server authentication and Windows authentication) instead of the default „Windows authentication mode” and Fill the password fields with:
“TRUSTED_SA_PASS”
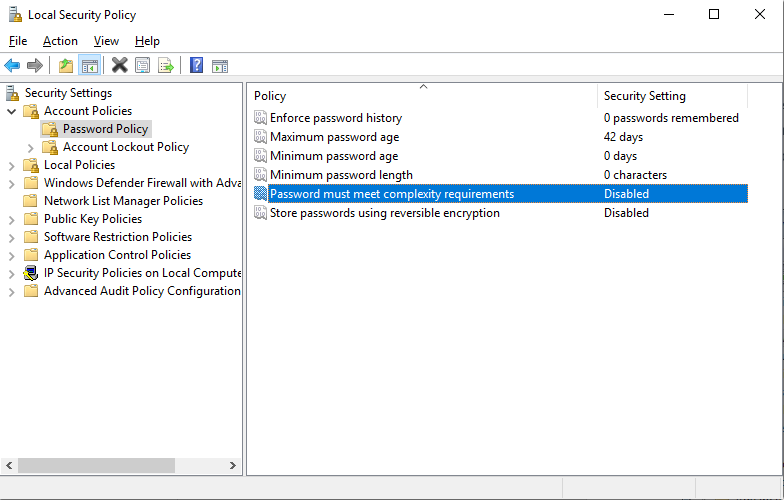
Sometimes the Windows wants you to make more complex password. In this case you can disable this windows feature: Control Panel -> Administrative Tools -> Local Security Policy -> Account Policies -> Password Policy –> Password must meet complexity requirements -> Disable
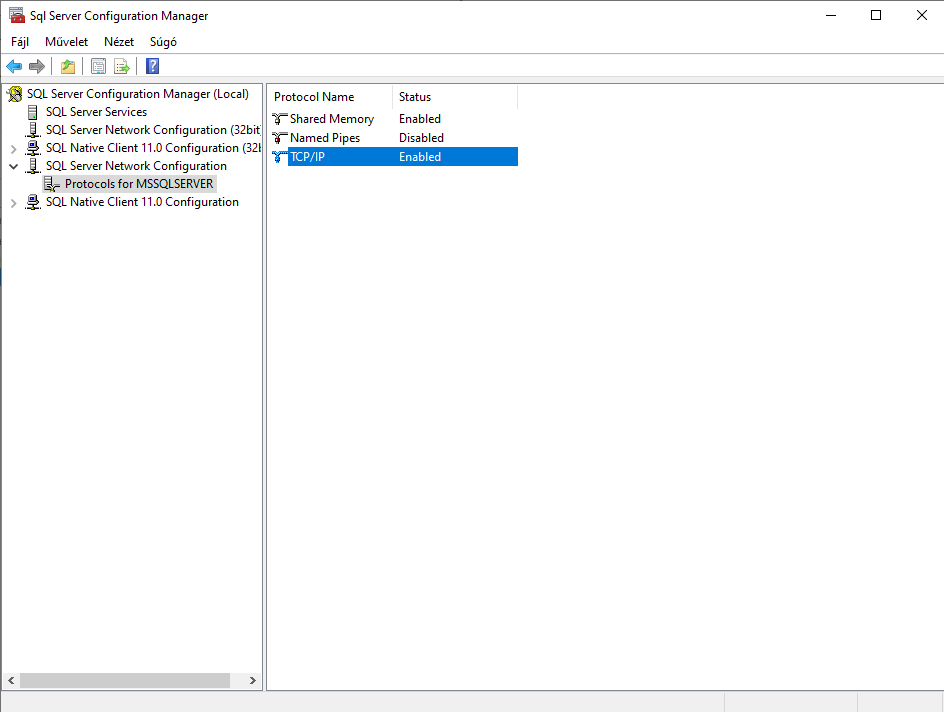
After the installation, start the SQL Server Configuration Manager. After opening the manager you have to enable the TCP/IP Protocol related to „Protocols for {Instace Name}”.
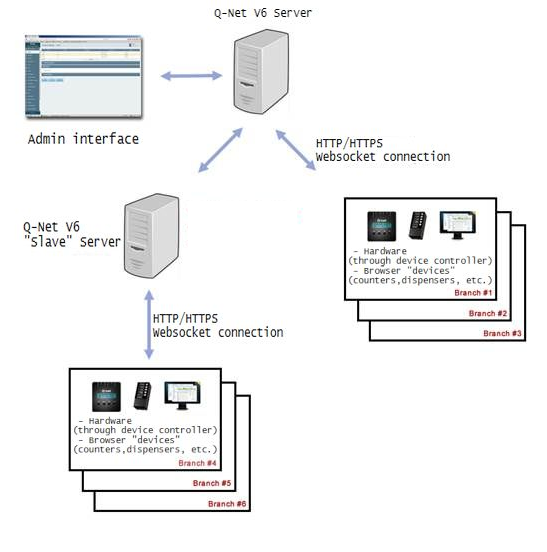
Q-Net Queue Management System Pro V6 Install
You have successfully downloaded the V6 installation file which looks like: ‘qnet6-setup-base-mssql-x64-v6.x.x.exe’. If you double click the installer file it will start to install the Q-net Pro 6.x.x. or the current version.
Also you will need to make sure that the port numbers are enabled on the firewall:
Required ports
| Type | Q-net Server | Ticket Dispenser | Device Controller | Communication Box | Media Player |
|---|---|---|---|---|---|
| Q-net Master Server | - | 3000 | 3000 | 8000 | 3000 |
| Q-net Slave server | 3000 | - | - | - | - |
| Ticket Dispenser | 3000 | - | 3000 | - | - |
| Device Controller | 3000 | 3000 | - | 8000 | - |
| Communication Box | 8000 | - | 8000 | - | - |
| Feedback | 8000 | - | 8000 | - | - |
| Media Player | 3000 | - | - | - | - |
| Appointment Proxy | 88 | - | - | - | - |
| Smart Ticket Proxy | 80* | - | - | - | - |
*customizable
Port 3000: HTTP(S) + Websocket
Port 8000: TCP+UDP
Server installation
Running “master” installer:

Running “slave” installer:

Click Next >
Please note that every time you install a slave server, you need to request a new certificate.
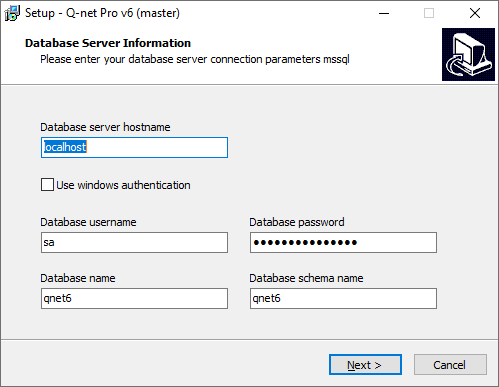
If the installer is started on the PC which is going to be the server than the Server hostname is going to be localhost without any protocol, or any port modification.
In case of MSSQL database you can also check the Use Windows authentication option.
If the installer is NOT started on the PC which has got the database installed – You will need to add the IP or the HOSTNAME of the PC that has the database engine.
I.e.: 192.168.10.10 or Qnet-Server-PC.lan
Username and Password is the predefined username and password of the database engine earlier described in the installation guide of the database engine.
You can change the default qnet6 Database name and Database schema name if you want.
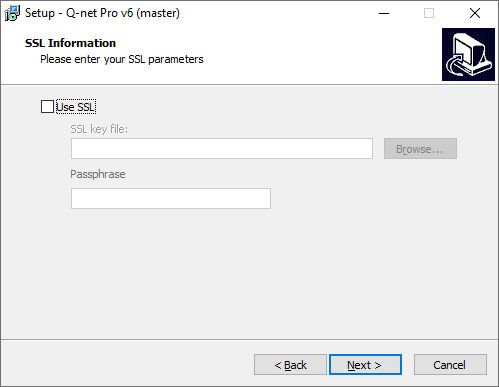
If you want to use SSL please click on the checkbox and Browse for the SSL key file and enter a Passphrase:
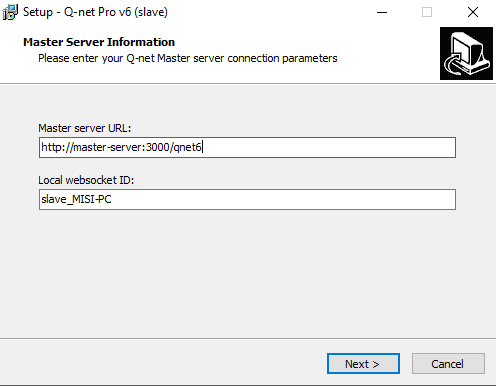
“Slave” installer will also require to fill the “master” servers URL:
Select the destination folder where the system is going to be installed.
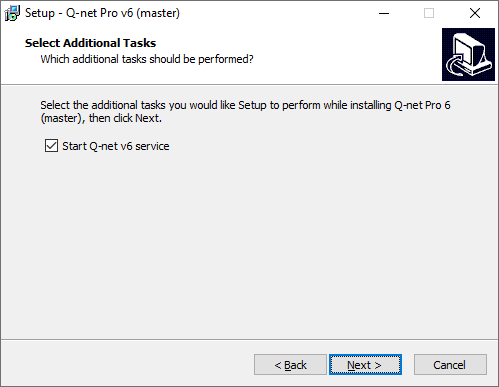
Leave the checkbox marked if you want to start the Q-net V6 service right after the installer has finished.
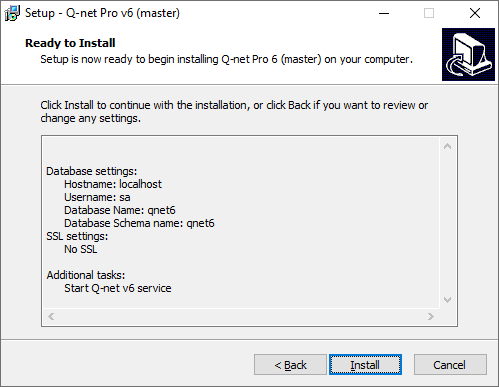
Check the settings you have made during the install and click Install.

Click Finish to finalize the installation. You have installed the Q-Net Queue Management System V6 on your PC.
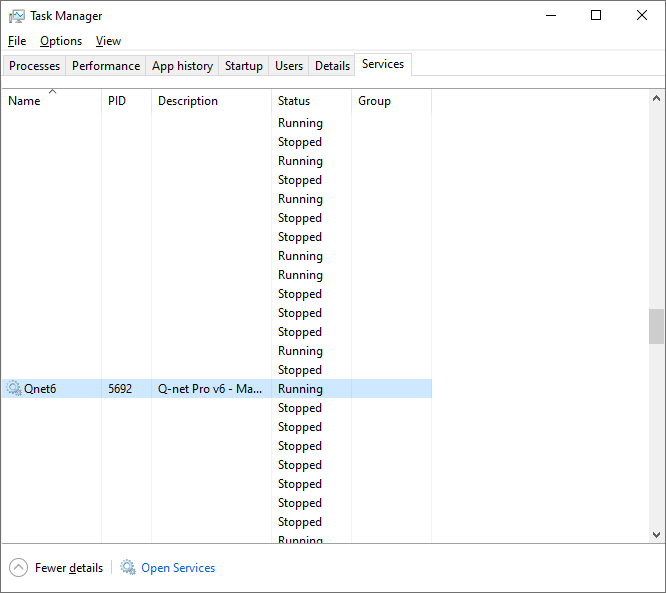
You can check the Service running in the PCs task manager under Services tab.
It is also very important to install the dispenser and the device controllers onto the required equipment.
DO NOT INSTALL DEVICE CONTROLLER ONTO THE SERVER MACHINE AS IT HAS IT’S OWN BUILT IN ONE.
These files are the “qnet_dispenser_setup_v6.0.X.exe” and the “qnet6-controller-setup-x86-v6.0.X.exe” or the “qnet6-controller-setup-x64-v6.0.X.exe”.
As the dispenser contains a printer as well it is required to install a device controller onto the dispenser.
The device controller is only going to ask the host IP/Name and the identifier of the controller during the installation. You can leave the port on the given value: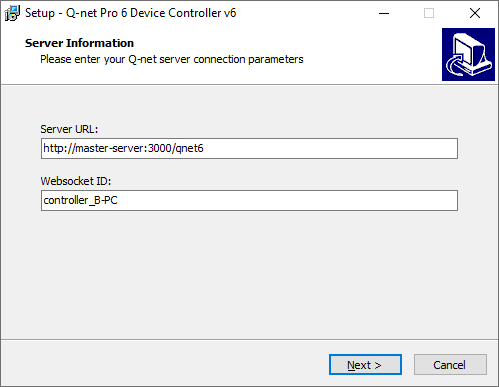
The same applies to the dispenser setup.
Open a Browser on your PC and enter ’http://host:3000/qnet6/’ into the address field and press enter. In case you have installed on the local PC than the host will be localhost otherwise it will be the IP of the Server host – i.e: http://192.168.10.10:3000/qnet6/
The default username and password is admin/admin