Administration - Central - General Settings
Servers
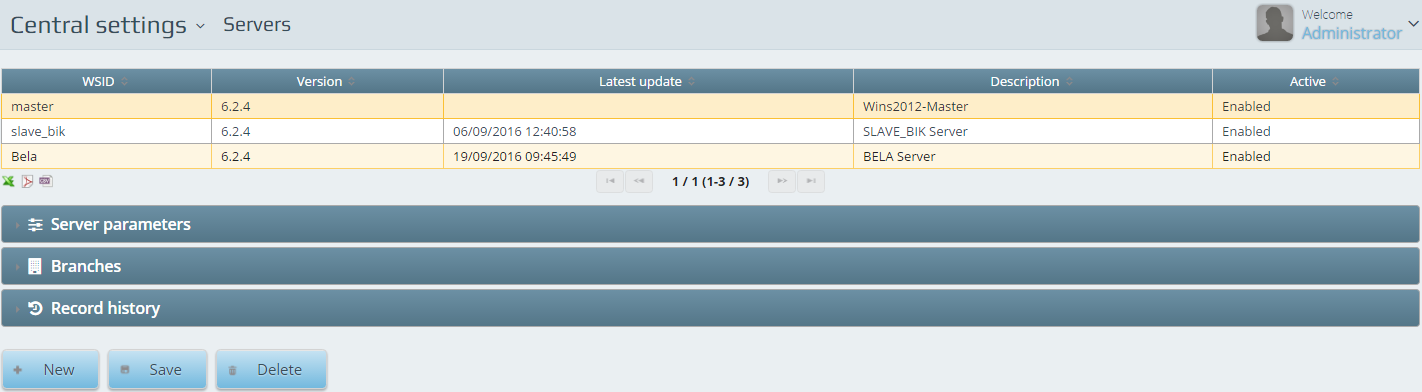
The “Servers” section in the Central settings shows the installed and connected master and slave systems. Version shows the version number of the installed and connected system while the latest update shows as the name: the date of the last update.
Server parameters

Server parameters shows the system generated ID of the server and the current version of it. WSID is so called the name of it. Description can be changed – this is the unique identifier. Update date and the status can be also found here.
After first start the master server URL is auto filled it makes the device links work. It looks like the following: http://SERVERIP:3000/qnet6
Branches

You can assign already existing/installed systems to each slave or master clusters. The connected systems are going to be appearing in the Branches list.
Server commands
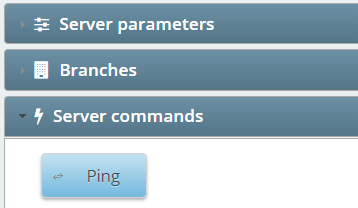
If you select a Slave server, it’s available to Ping it.
Languages
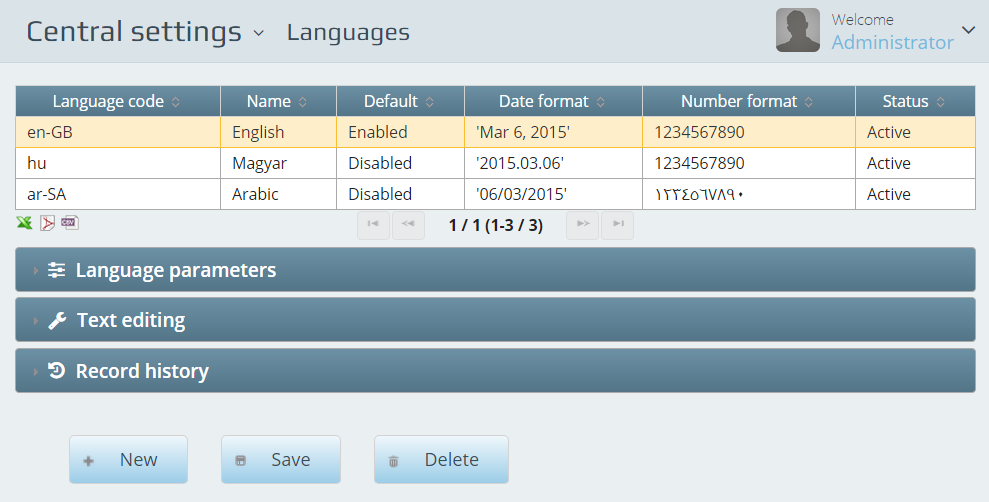
On the top section you will find a spreadsheet which contains the already added languages. (All sections will have a similar spreadsheet at the same place where you can make a selection.) Here you will be able to select the default language of the system.
Language parameters
If you click the first row or select a language the Language parameters will be visible.
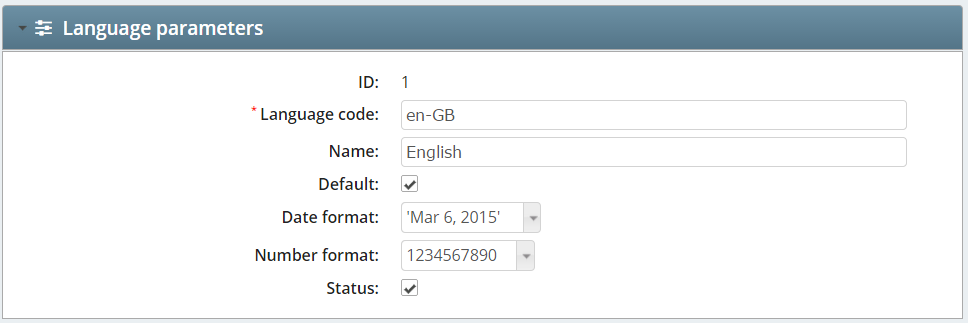
On this page you will be able to Default a language for the system. The language will change once the logged in user will logout and login again. Creating new language can be done with the help of the New button. There are mandatory fields which need to be filled to be able to save the created item. The language code will autocomplete, after start typing. These fields are marked with a little red asterisk besides the fields’ name. Make sure you always fill the mandatory fields.
Text editing
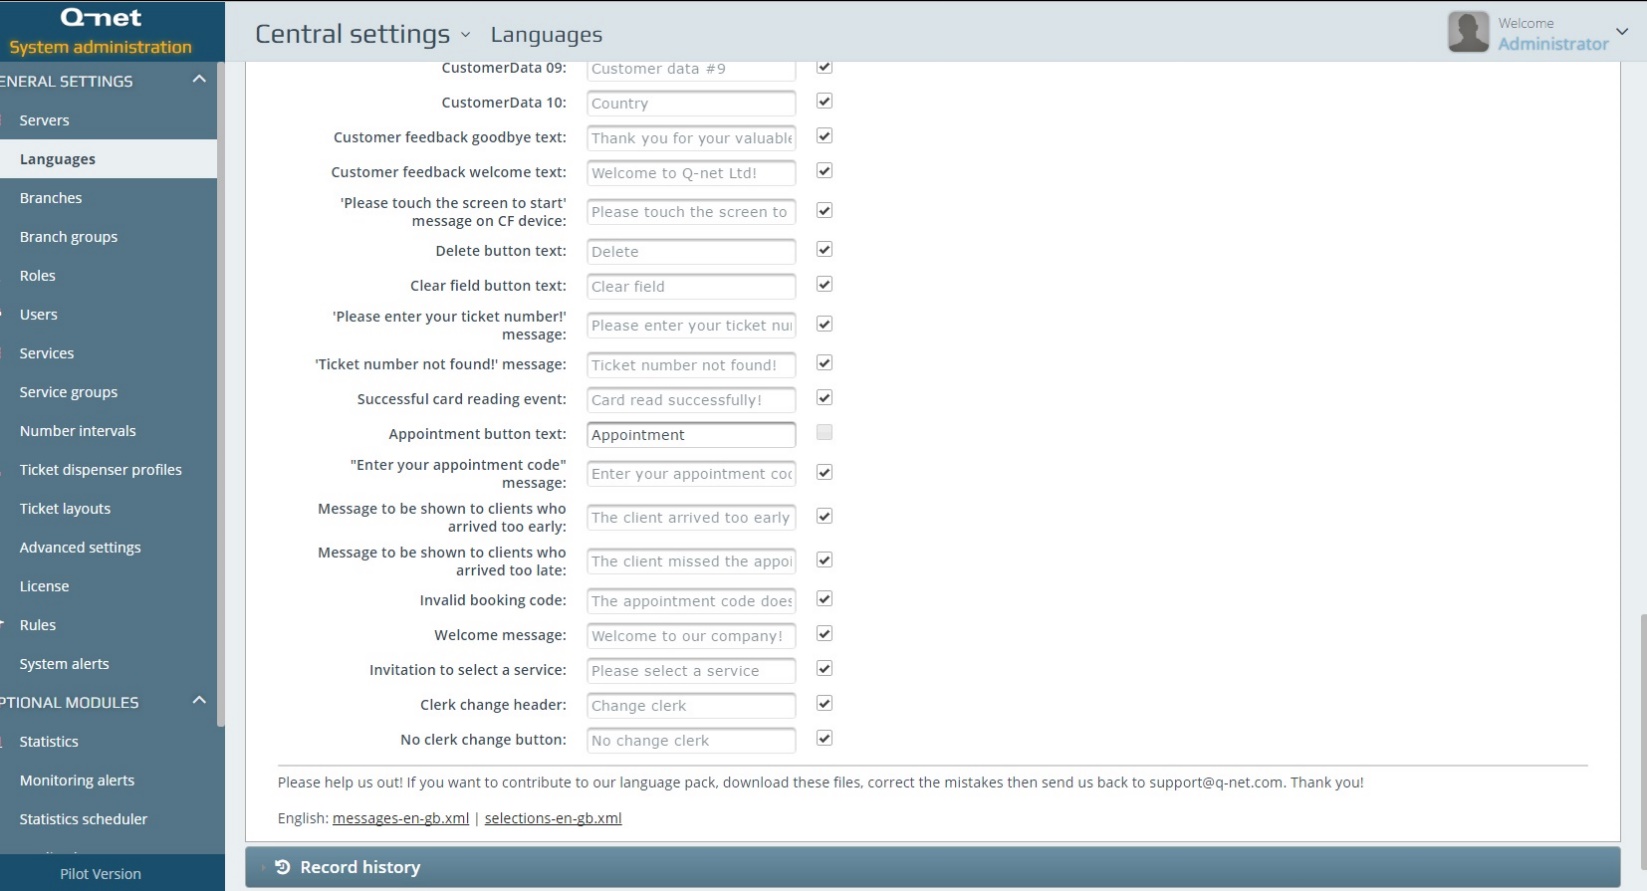
This section will allow advanced users to modify the system allowed texts. When creating a new language these fields need to be filled in on the desired language. Once all the fields are filled with the translation the system will be able to handle the users language. To modify any of the texts you will need to uncheck the checkbox and correct the field as you wish.
It is also possible to download the language files: If you find any of our translations incorrect, or you want to contribute to our language pack, download these files, correct the mistakes then send us back to [email protected]. Thank you!
Record History
This section is available in every unit of the System administration. This is the section where you can check the creation or modification data of the selected item.

Every section has 3 buttons on the bottom of the screen for adding New – to Save – and to Delete.

Branches
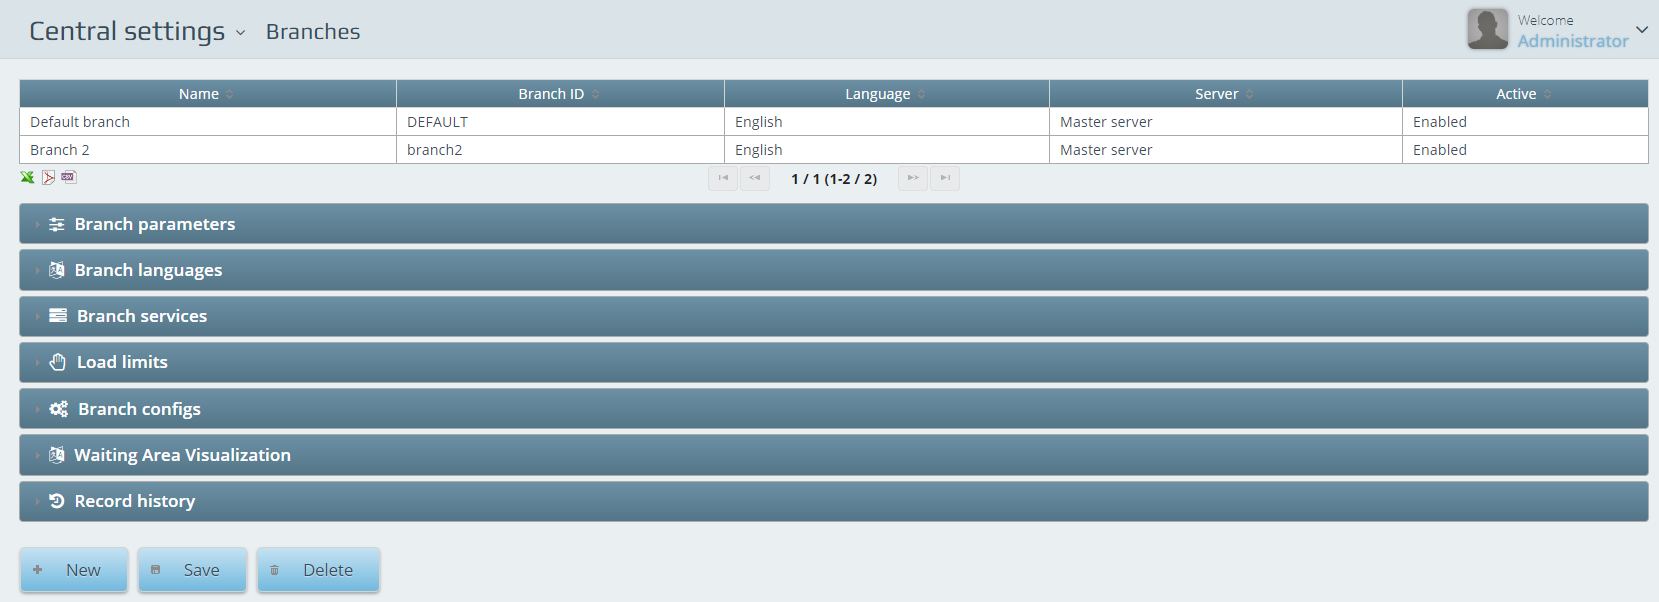
The section is dedicated to create and modify branch settings in the system. By default there is a Default branch added with 8 services and 5 users besides the Administrator.
Branch parameters
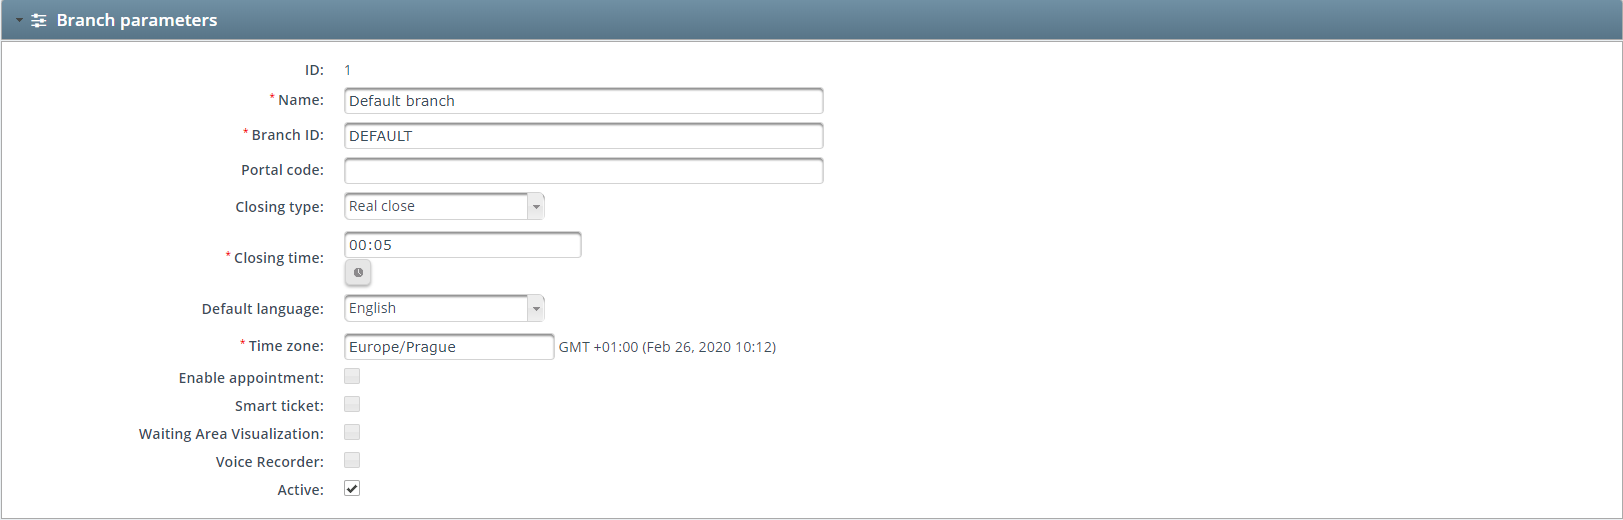
Here you can edit the properties of the predefined branch. There are certain fields which are necessary to fill – like the Name or the Branch ID.
Portal code is a secondary, optional ID for the branch
Closing type has two options: “Real close” will remove all tickets not closed so far and the ticket numbering will start from the beginning (this is used when the branch will stop working every day), while “Virtual close” will not remove the tickets and ticket numbering will not start from the beginning. This is necessary if the site is working 24/7.
Closing time can be set with the little hour icon besides the field. This is the option to edit the closing time of the branch – also this is the time when the ticket number intervals will be reset to the starting value. Once this time is set this means the end of the work for the logged in users as the system is going to automatically log them out.
Enable appointment is an option for online service booking availability. As the appointment is an optional module we recommend you to enable this feature if you have purchased this optional software module.
Smart ticket: If you are using smart tickets with the corresponding license, here you can enable it to your branch.
Waiting Area Visualization: If you have the license for this module, here you can enable it to the given branch.
Status is the highlighted branches state. Marked checkbox is Active – empty checkbox is inactive.
Branch languages
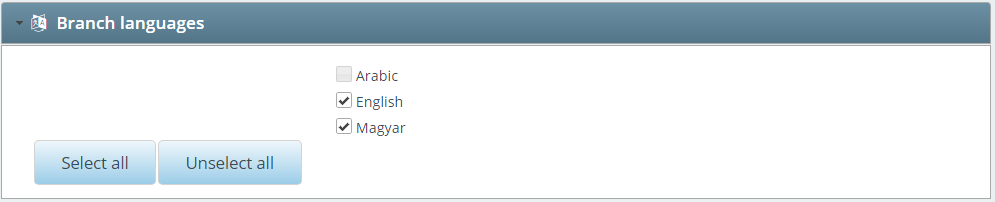
You can select here the spoken languages for the branches one by one.
Branch services
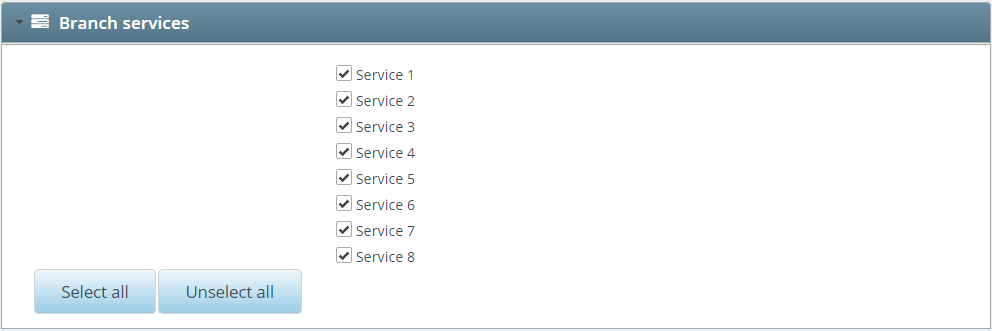
You can select the services which are going to be available in the branch. Services can be added / modified in the Services menu point under section 1.6.
Opening hours information on the ticket dispenser
This function is available only on branch level. The ticket dispenser can show a message, when the branch is closed. It will give the customers information about the opening hours or any other message.
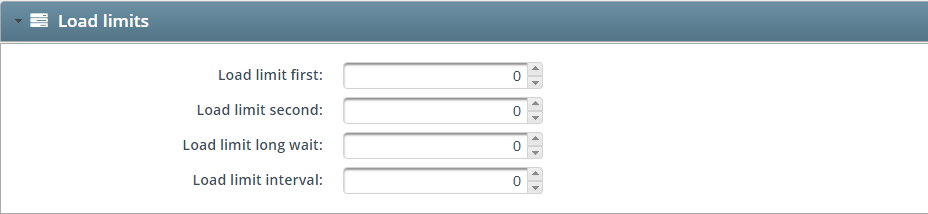
Load limits
In some special cases, these values can be useful for third parties. These are available with the following REST request:
- @URL /qnet6/rest/branch/settings/{brnID}
Branch configs
Waiting clients limit for the monitoring alert: “Too many waiting clients”

Branch groups
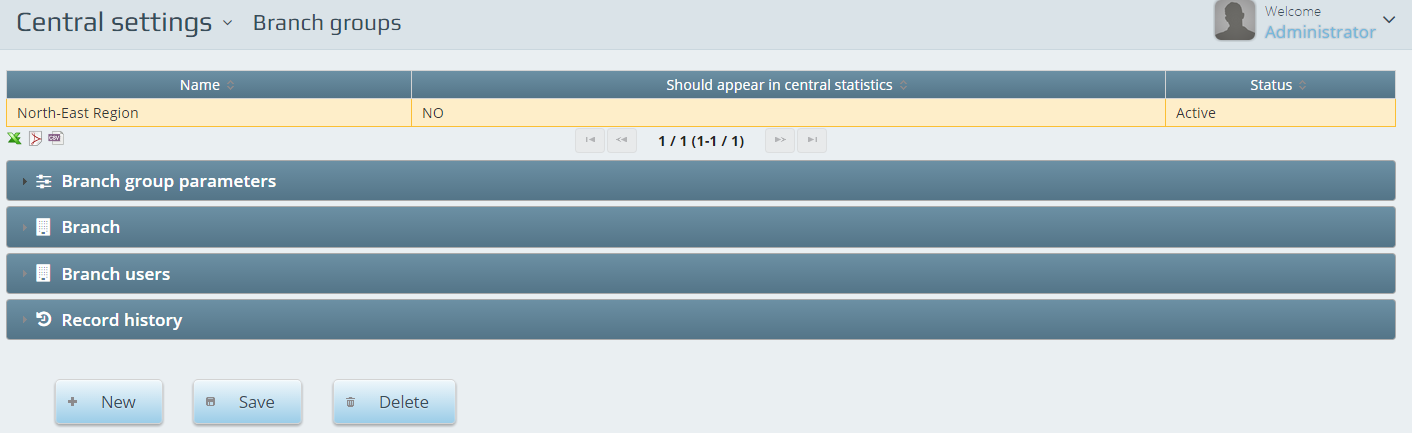
Branch groups can be created to handle and overview the branches easily, especially if their number is quite big.
You can group the branches according to client policy, based on regions or individual notion.
Branch group parameters

Mandatory field is the Name of the branch group. ID will be generated by the system.
Should appear in the central statistics is an option to view the branch performance as a group or by separate branches in the statistics.
Status is an enable / disable option. This field can be found in every section where you can create entities. The objective of this option is the same everywhere. It can enable or disable the already existing or newly created entity.
Branch

You have to select the branches here by Checking the checkbox to include them into the selected branch group above.
Branch users
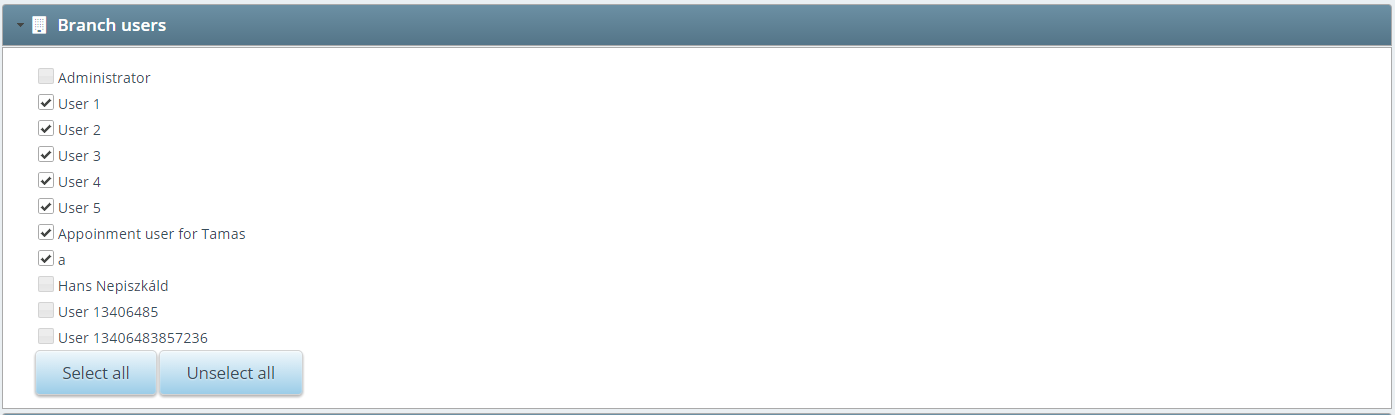
You have to select the users here by clicking on the box to include them into the selected branch group’s users.
Roles
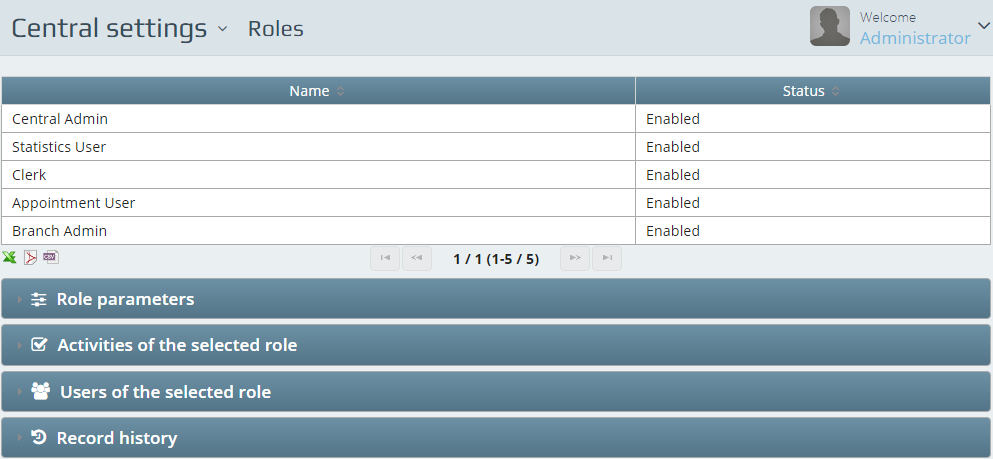
Created system users can be assigned with various user roles or privileges. These “accesses” can be organized and configured here. It is recommended to set up all the roles here first and the users once the roles are done.
 Role parameters
Role parameters register the ID of the role which is generated by the system. You can identify a role by filling the Name field. Status is for enabling and disabling the selected role.
Activities of the selected role
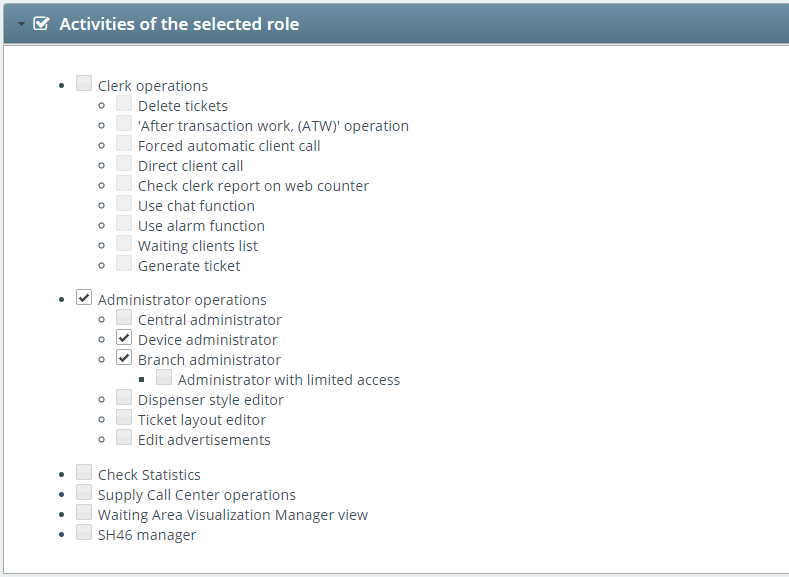
This activity selection predefines the users’ accesses and functions within the system. Various limitations or grants can be done with the correct setup. You can give limited access to Branch administrators.
Users of the selected role
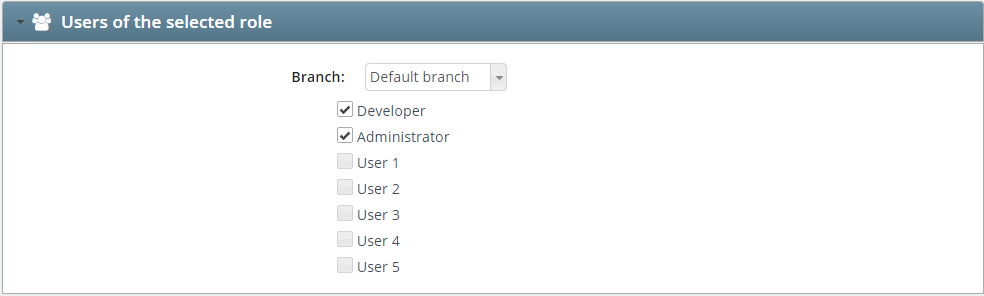
You will be able to define the users for the selected role in the selected branch. Branch level user roles may vary.
Users
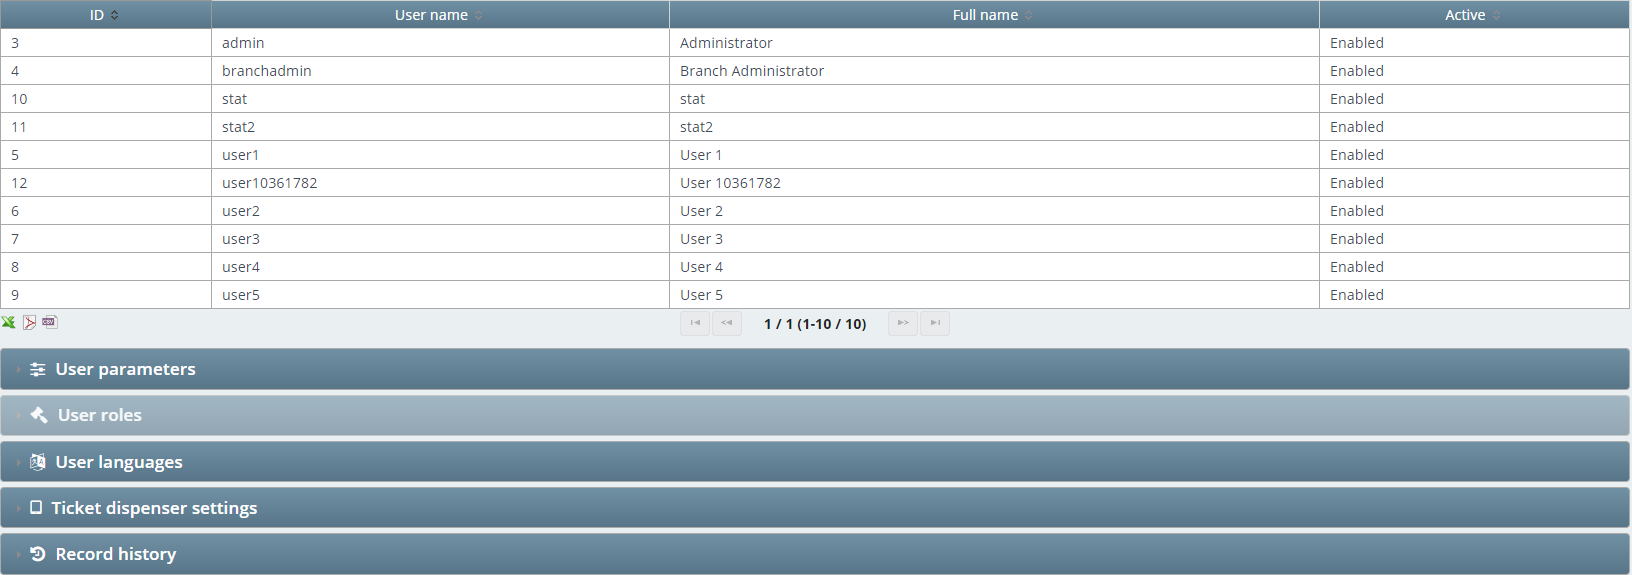
This area is where all the system users will be created and set up. You can also modify the preconfigured or the existing entries.
User parameters
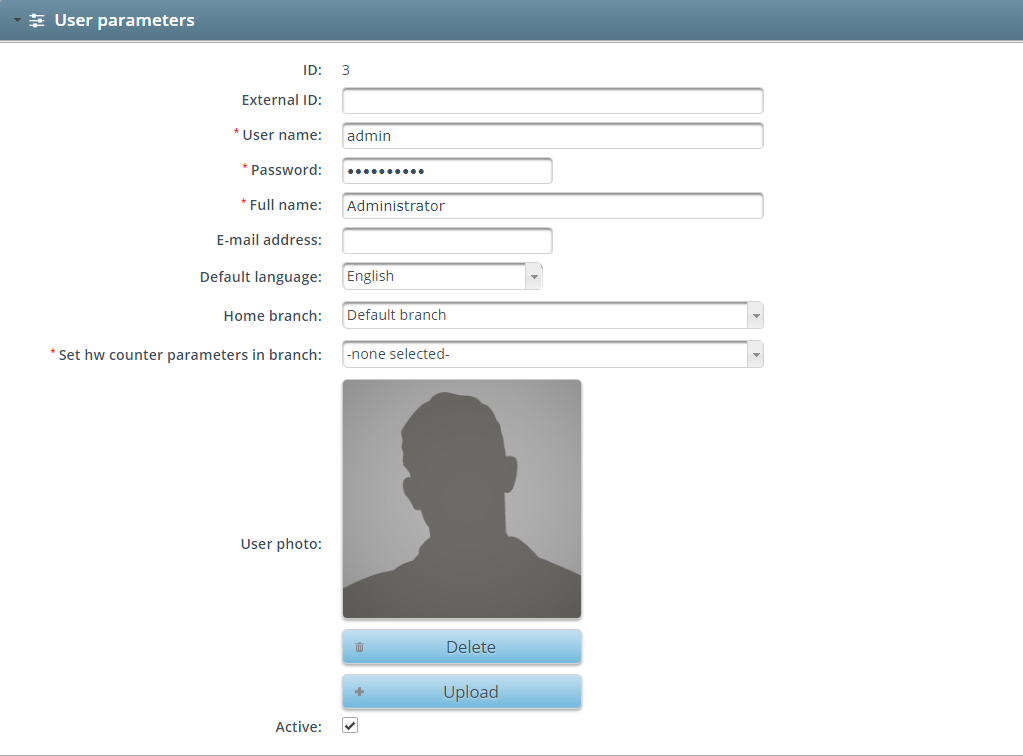
The ID of the user is generated by the system. Username and Password are mandatory fields – these are going to be the login credentials for the selected or newly created user. Full name is the unique identifier of the user. External ID is an optional field, CRM or other ID’s can be inserted here.
E-mail recipient can be filled with an existing e-mail account in case the account will receive notifications from the system.
Default language of the user is the language that the logged in account will be using the complete system – including the software keyboard.
Home branch is the users default branch. A home branch is where the user will be completing services mainly.
If there are hardware keyboards used in the system – you will be able to assign them to the users at the Set hw counter parameters in branch.
User image can be uploaded in a 240 x 240 pixels size jpg or jpeg format by selecting Upload button. Selecting Upload uploads the picture while Delete removes it.
User roles
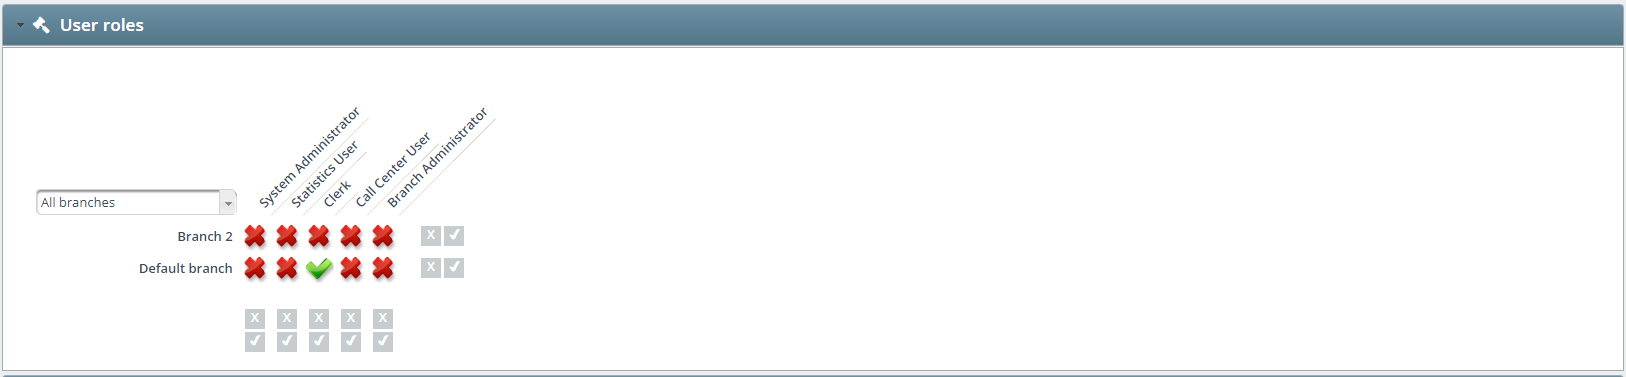
Here you can decide this user is entitled to which role(s) in the branches, which you have to select one-by-one.
You will see a selector button on the sides and on the bottom of the matrix. With the help of these buttons you can easily check if a user has the same roles in each and every branch in the network. I.e.: the Administrator user is an administrator in all branches – or another user has all the roles in only one branch.
Works exactly the same as Service matrix – see section 4.13.
User languages

User’s spoken languages can be set here. Every added and enabled language is available in this list.
Services
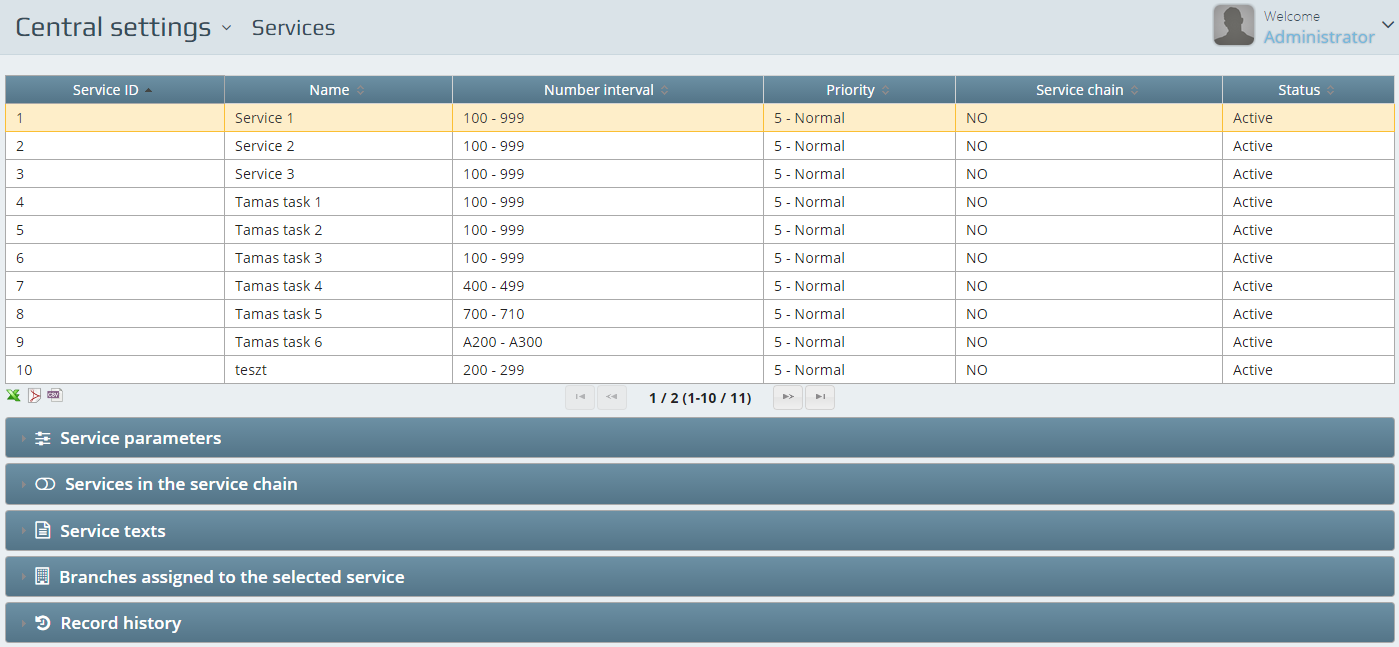
One of the most important setup stage – the services. Here you will be able to add the services that will appear on the ticket dispensers as per configuration.
Service parameters
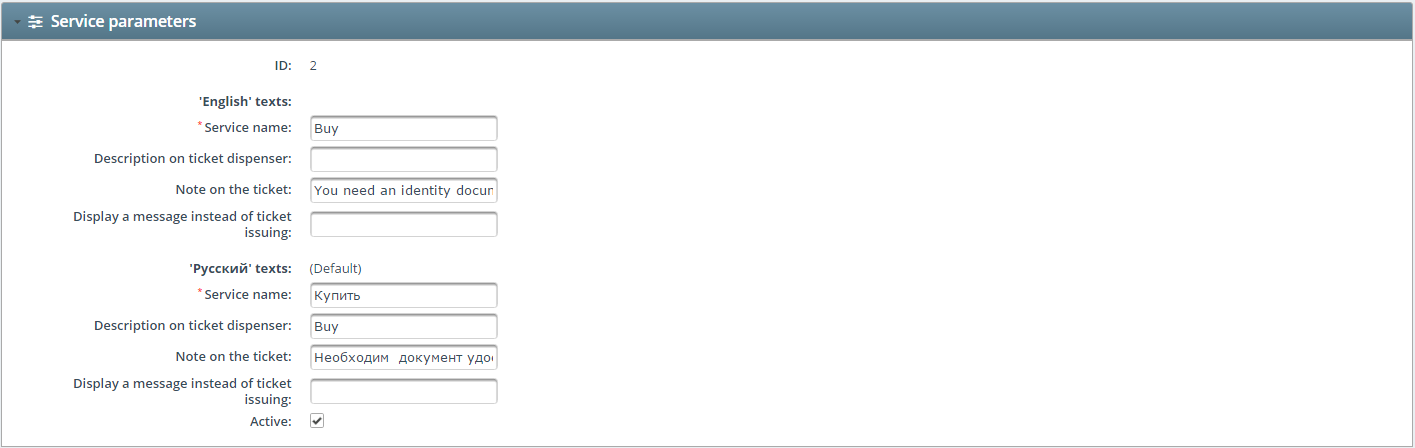
The service parameters contain the most relevant service configuration steps.
ID of the service is a mandatory field to display.
Service name is the name of the service displayed in the statistics reports and dispensers.
Description on ticket dispenser of a service can be set in order to identify the task which is handeled under this service name.
Note on the ticket is an option for the service to display a message on the printed tickets.
Display a message instead of ticket issuing can be set in case you do not want the service selection to print a ticket but instead of that display a preset info on the ticket dispensers screen.
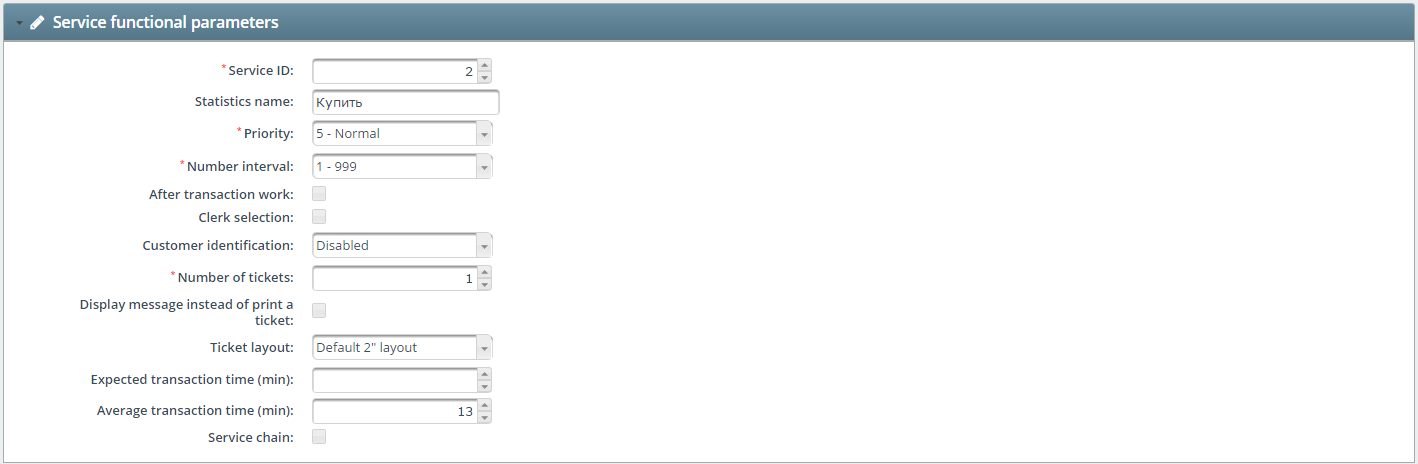 Service functional parameters
The Service ID is a parameter that can be set manually – the system generates it automatically when creating a service. Service ID must be unique.
Statistics name of a service is which can be found in the reports.
Priority of a service can be changed at the creation time from low (1) to high (9).
Service queues can be separated with Number intervals set here. Every service can have its own ticket number interval, it can be override on branch level.
After transaction work is to enable clerks to initiate paperwork or backdoor business after transaction has finished.
Clerk selection points to enabling the clerk selection on the ticket dispenser interface via the uploaded clerk photos.
Customer identification can be set to authorize special treatment or initiate other rules within the system via an existing customer identification database.
Number of tickets is the number of tickets to be printed, this might be necessary in certain cases: the first ticket should be connected with the entered document or product while the second ticket remains with the customer.
Display message instead of print a ticket: in certain cases a message should appear on the ticket dispenser instead of printing out a ticket.
Ticket layout can be set to 2” and 3” printers. Further layout settings can be done in the Ticket layouts – see section 1.11.
Expected transaction time (min) is the value that is given in case the end user company has a set value as a benchmark for a transaction.
Average transaction time (min) is the mean value of the transactions’ serving time.
We can set up service chains as well with the help of the Service chain checkbox. After checking it in please click on Save below and the services will appear under Services in the service chain.
Enabling the option allows you to create a chain of transactions as per company policies or based on individual plans.
Services in the chain
If you have a chained service setup in the line of services you will have the opportunity to set up or modify the services in it/them.
Branches assigned to the selected service

Here you can see / decide which branches should handle this service.
Maximum ticket parameters

On branch level, there is one additional tab with 3 options:
Reset type: there are 3 ways to reset a ticket. At the end of the day, at Branch close or Manually.
Available ticket (pcs): The number of tickets can be generate before reset.
Processed ticket (pcs): The number of tickets has been generated.
Service Groups
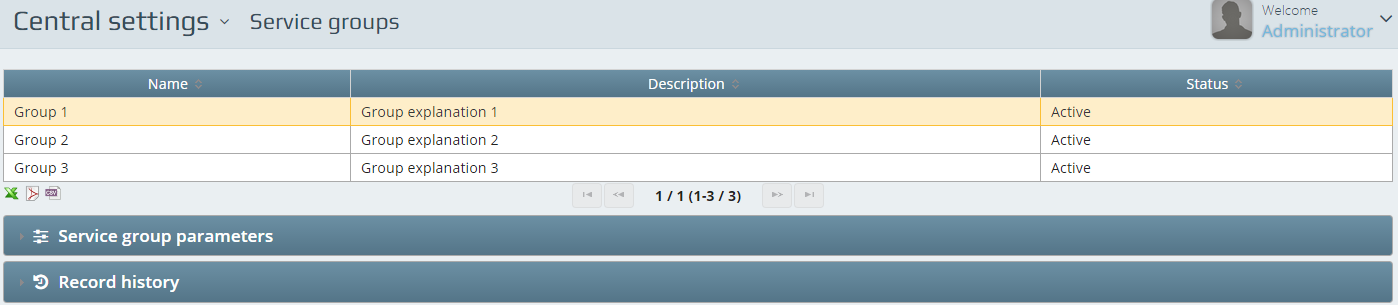
Service groups are folders for services. The groups contain logically planned or relevant items. Groups can contain further groups as well and with this method any number of services can be displayed on the ticket dispenser.
The structure of the services / service groups can be created in the in the section 1.9. (Ticket dispenser profiles).
Service group parameters
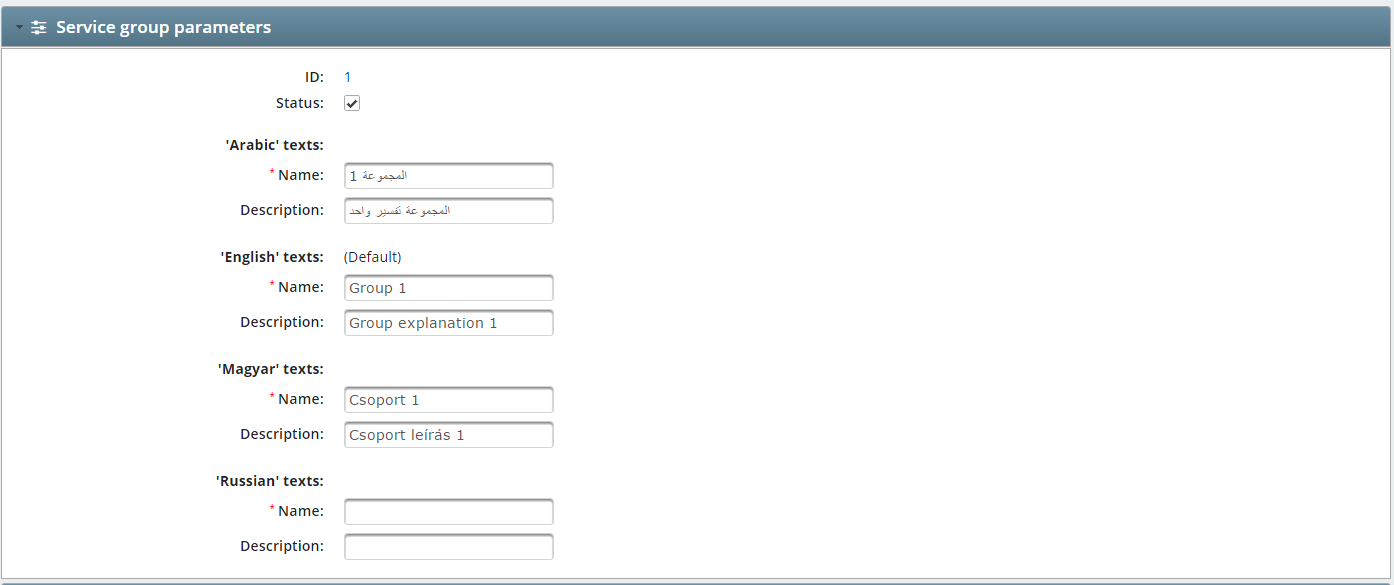
On this field you will only be able to enable or disable the group with the Status checkbox and find the ID of it.
Similar to what we have seen at the service texts - the forms needs to be filled with the Name of the group. You have a description text field which will be shown underneath the group name on the ticket dispenser. It is recommended to fill all the applied languages.
Number Intervals
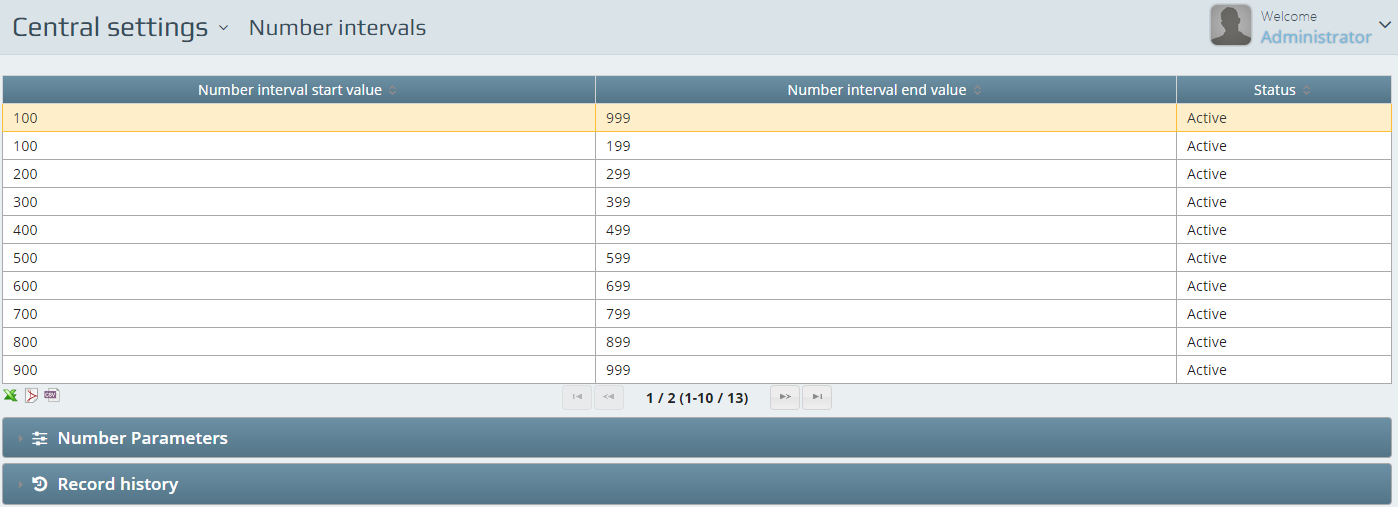
Services available on the ticket dispenser will have a queue. To separate the queue with the help of the number interval assignment is a help in case of large number of transactions dealt within the branch. There are predefined intervals which can be customized or you can create one based on individual plans.
Number Parameters

You are able to set a letter mode (A123) number interval even by setting up the Number interval start value and the Number interval end value and selecting a Prefix. The ID is a system generated one.
Ticket dispenser profiles
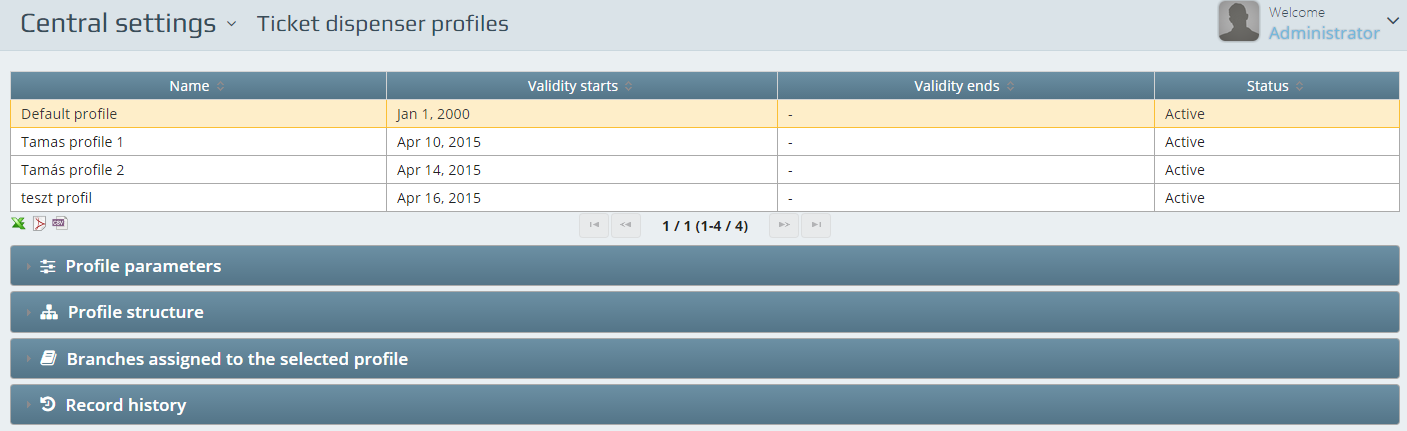
For the ticket dispenser units the profiles need to be configured on the following pages. You can modify an existing profile or can create your own.
Profile parameters
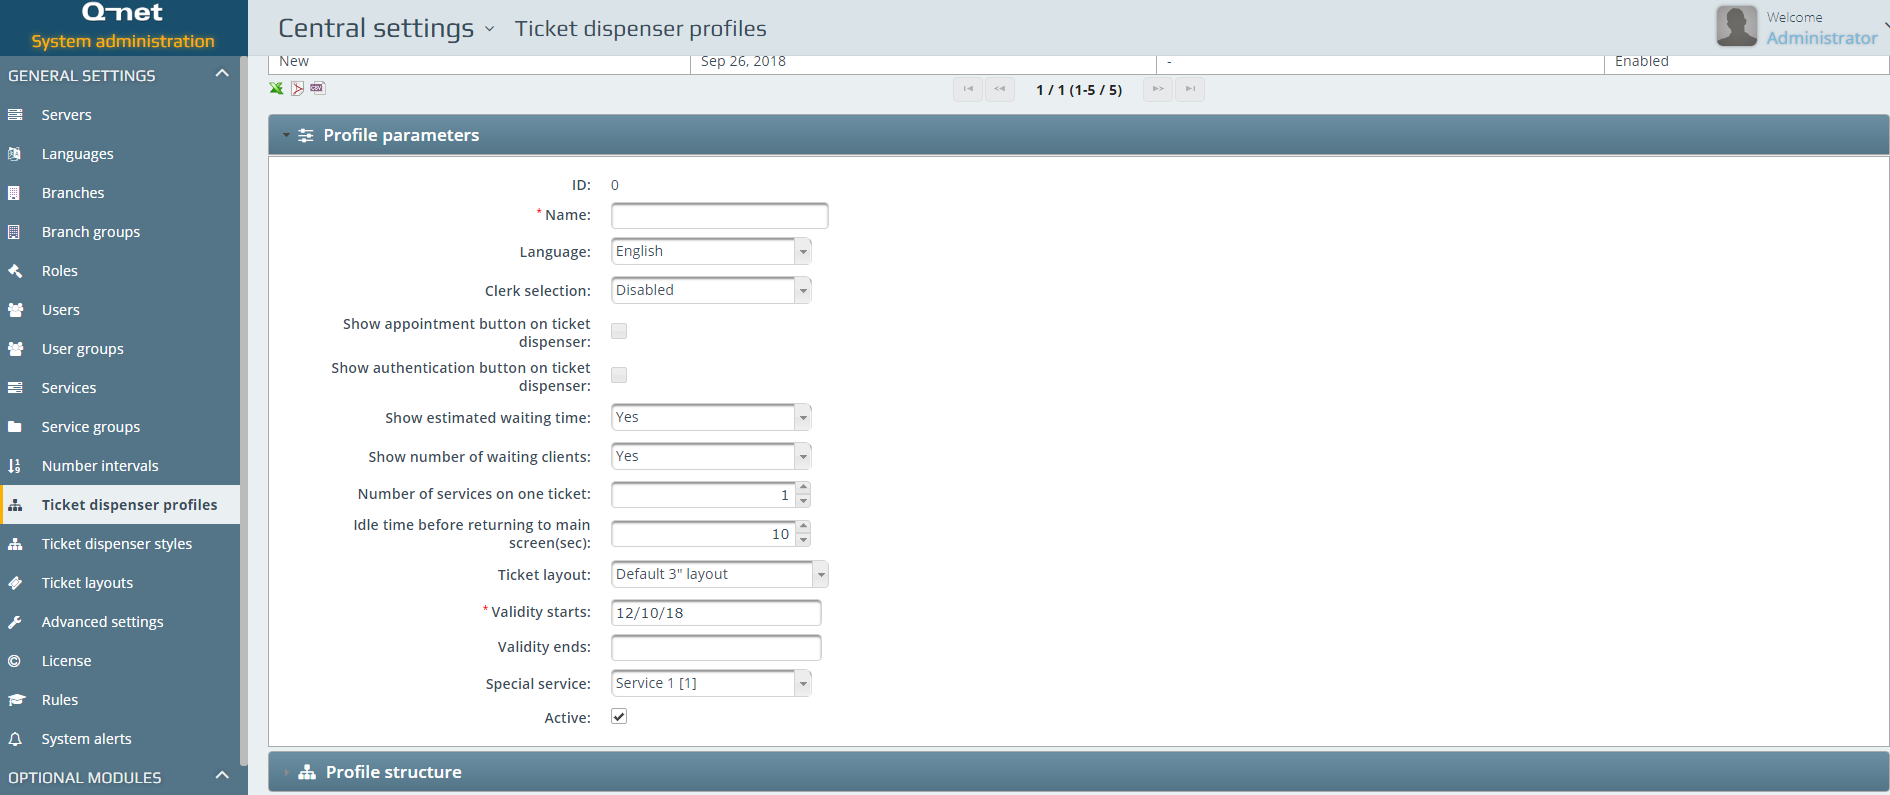
Every profile needs to have a Name. You can select the Language of it with selecting the desired one from the dropdown menu. For multiple profile ticket dispenser setup see section 6.3.5.
Clerk selection can be turned on if the customers can choose clerks by their uploaded pictures. Appointments can enabled at the Show appointment button on ticket dispenser: checkbox. If the checkbox is marked the option becomes active.
To inform customers about the service queues there can be estimated waiting time or queue size displayed besides the service names on the profile. To enable or disable these options you need to select the right answer to Show estimated waiting time and the Show number of waiting clients. There is also a possibility to have more than one services selected to one ticket number. You can set the number of services available to be selected to a ticket with the help of the Number of services on one ticket.
Idle time before returning to main screen is the value of the time in seconds that specifies the limit of the screens appearing on the dispenser profile when to return to the set main page. I.e.: a customer has selected a non-relevant service group that doesn’t contain the service that s/he has been looking for and s/he doesn’t press back button – the screen will return to the main menu within the given time.
Every Q-net provided ticket dispenser has a built in printer. The size of these printers can be 2 or 3 inches. 3” printers has a double-sided version also. You will be able to select the right profile for your ticket dispenser based on the size of printer at the Ticket layout selection area.
Validity starts and Validity ends are to set the profiles validity frame if there is any. As only the starting date is mandatory this frame can be left open which means the profile validity is set to “never expire”. This feature can come handy if there is a periodic or a onefold promotion in the branch.
Some ticket dispensers has an additional physical button on the ticket dispenser for blind and partially sighted customers, for this button we can select a special service by selecting a service from the Special service dropdown menu.
Profile structure

The structure of the profile can be edited in a “graphical” area where there are two main sections. The profile structure and the available items are to set the exact needs of the client regarding the structure of the selectable services topology. The available items contain the added and enabled languages – the active service groups and the set services. To configure the topology you have to drag and drop the wanted items step by step.
You can Sort your services by Service name or Service ID for easier setup.
Branches assigned to the selected profile

The finished configuration can be assigned to more than one branches if the client policy requires so. This is ideal if the branch has to have a standardized look.
Ticket layouts
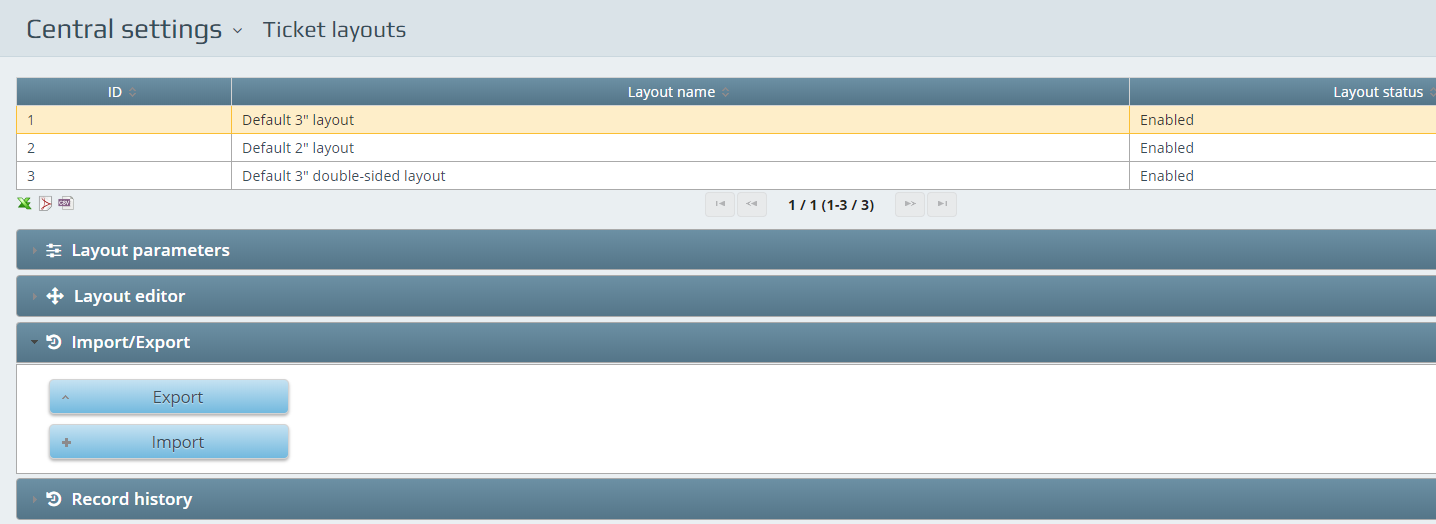
The printed ticket picture is a very important part of the queue management. To be able to set the most suitable printed ticket picture you will have to use the editor tool to adjust and set the desired notions.
Now it is supported to Import/Export Ticket layouts.
Layout parameters
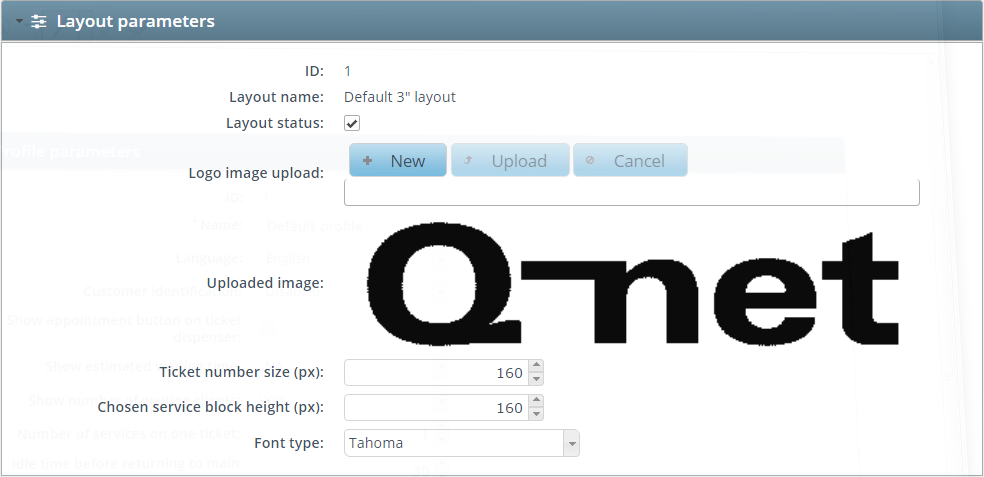
Once the printer size selected on the spreadsheet the layout parameters will become visible. ID and the Layout name is a non-changeable system generated parameters. Layout status is to enable or to disable the sizes or the actual layout.
Logo image upload has got three buttons. Pressing the Choose button will enable you to browse the local images of the PC. Picture formats can be jpeg, jpg, bmp, png, or any other format until it is not over 100Mb. Clicking the Upload button will upload the selected image into the system. You can cancel the action with the Cancel button. Uploaded image will show the selected and uploaded image which is going to be printed onto every ticket of that size.
Ticket number size (px) is to set the size of the actual ticket number which is going to identify the service selection in the system. It is recommended to set a value about/from 200 as that is the middle range of the well perceptible size.
Chosen service block height (px) can be set in case of more services are allowed to be selected onto one ticket. As the system breaks the pages automatically so if there is only one service on one ticket it is enough to leave the preconfigured minimum in this field – but in case you have allowed i.e. 5 or 6 services to one ticket it can be raised to fit the printed ticket part.
Font type shows the selected font type that can be selected freely as per the end user’s wish.
Layout editor
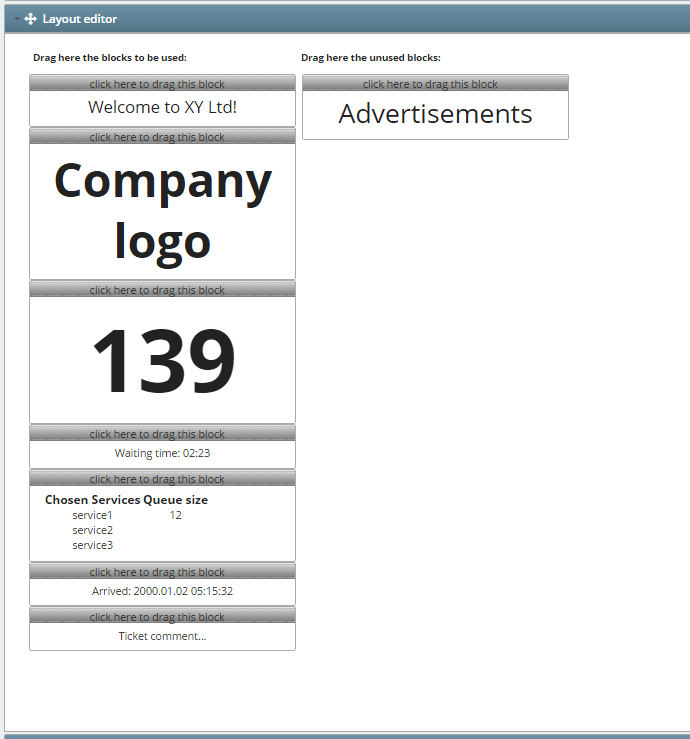
The layout editor is the area where you will be able to select which blocks are needed and which are irrelevant for the end user. The area is a drag and drop field. The two columns are the used and unused blocks column. There is a Click here to drag this block area on every block. You should get hold of the block clicking onto that area. Release the block if you see a grey area on the side which you want to place it. If you haven’t released it in the grey field – the block will return to its original column.
There are several blocks which you are able to mix as to finalize the perfect ticket layout. The setup of the advertisements and company logo will be discussed in a different manual.
Ticket preview
This section will let you have a look at the ticket after saving the layout so you do not have to print any tickets to see how it is going to be look like.
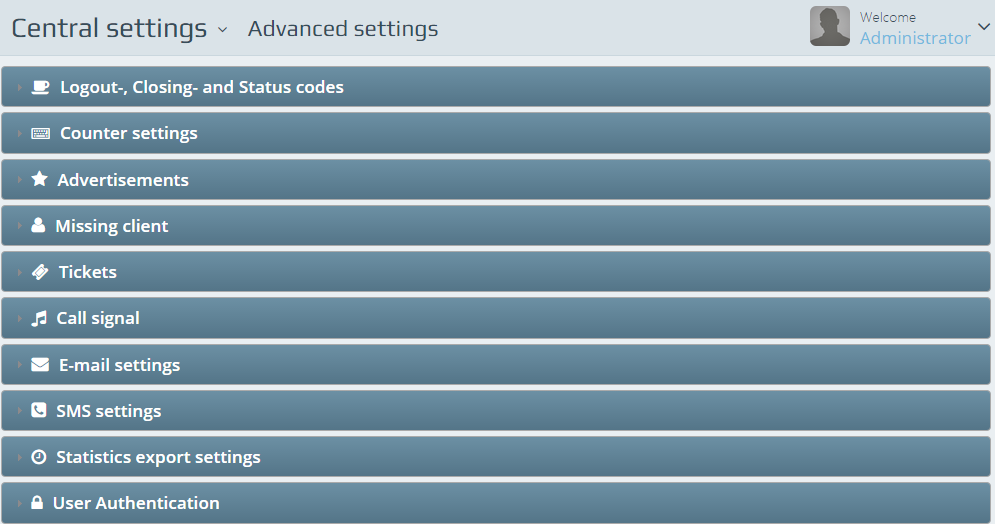
Advanced settings
If the branch setup will be unitary this section has to be setup with good care. Most of the settings made here will be able to be overridden on some areas if needed. There is a Default button on the bottom of the page to nil the settings to preconfigured values for every section.
Logout, Closing – and Status codes

Logout code is to determine why the system users (clerks) have been logging out. Using this feature will help the local manager to keep a track about the working time of a clerk.
In case the__ Closing code required __box is checked it enables the clerk to determine the precise purpose of the transaction if the selected service name covers general subject: for example the name of the selected service is “Information” the clerk can define what information was requested by the customer: about the bank, about opening hours, about investment possibilities, etc.
Multiple closing code required enables to record more than one closing code to a certain transaction: for example the clerk has to give the age of the customer that was asking about opening a new account.
Counter settings

The counter settings contains options for automatic transaction start which can be set by modifying the After called a ticket start transaction automatically (sec) value. This value can be override at each user settings per each branch. The Autocall starts between value is an option to be able to set the forced autocall role option users calling time. It can be set between 1 and 10 seconds. Forced autocall menu timeout allows the software keyboard to return to client call even if in menu.
Advertisements

The advertisement pictures needs to be copied into the server installation path /media/tickets folder. The naming format of the pictures should be the following:
[uniqe identifier without spaces]-[width in pixels]-[height in pixels]-[ID of the language (can be more than one)-or all]-[ID of the service (can be more than one) or all]-false.png
In case of all is used to identify the language or the service – the adv should be printed on all services in all language selection cases.
Example:
ad1-800-600-all-all-false.png (all language – all service)
foo2-800-600-en-all-false.png (only English language – all service)
pic3-800-600-en,hu-4-false.png (only English or Hungarian language – only on service 4)
The pictures of the advertisement shown on the ticket dispensers or CF01s should be placed into almost the same location ~/media/images. The naming convention should be the same.
Example: ad14-892-1680-all-all-false.png
False is an internal commend for the system to be able to detect if the picture has been cropped or not. (“Crop” effect)
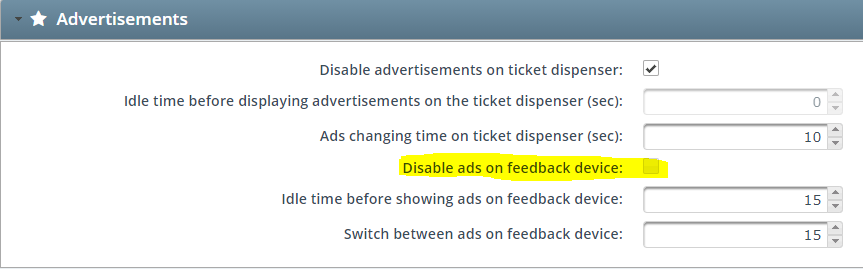
You can configure the advertisements appearing on the touch screen ticket dispensers if there is no activity on it after a certain period of time.
To switch on or off this feature click on the box at Disable advertisements:. You can configure also how many seconds should one ad appear on the ticket dispenser by selecting the desired value at Ads changing time on ticket dispenser (sec):
Finally you can decide the Idle time before displaying advertisements on the ticket dispenser (sec). The CF01 units can behave as advertising spaces as well. You can control the ads with the idle time and the switch time in seconds.
Feedback device advertisements
First of all, you have to enable the advertisement on Feedback devices:
Secondly, copy the media contents to the direcotry.
In case of pictures: C:\Program Files\Q-net\Pro 6\media\images
In case of videos: C:\Program Files\Q-net\Pro 6\media\videos
Also, you can create a playlist from the media contents you would like to display on the device. To do this you have to edit the default.json file located at: C:\Program Files\Q-net\Pro 6\media\playlists
If you dont have this directory with the file: default.json you have to create them!
Example content of the default.json file:
|
If you would like to create different playlists for different feedback devices you have to name the .json file with the device’s WSID. You can check your device’s WSID HERE.
Example file name: feedback01.json - Contents of the file is the same as in case of the default.json
Without a playlist declaration, videos and images will be displayed randomly.
Missing clients

There are always a few customers who don’t appear after calling their ticket numbers. These customers can be tolerated with setting up this point.
You can decide how many times can a missing customer be recalled at the Maximum number of missing clients repeated calls, and
how much time do you allow for the system to put back the same customer into the queue so that he or she can be called again Put back missing client to the queue after configured time (min).
These settings will be decided centrally, but these can be overridden on branch level.
Tickets
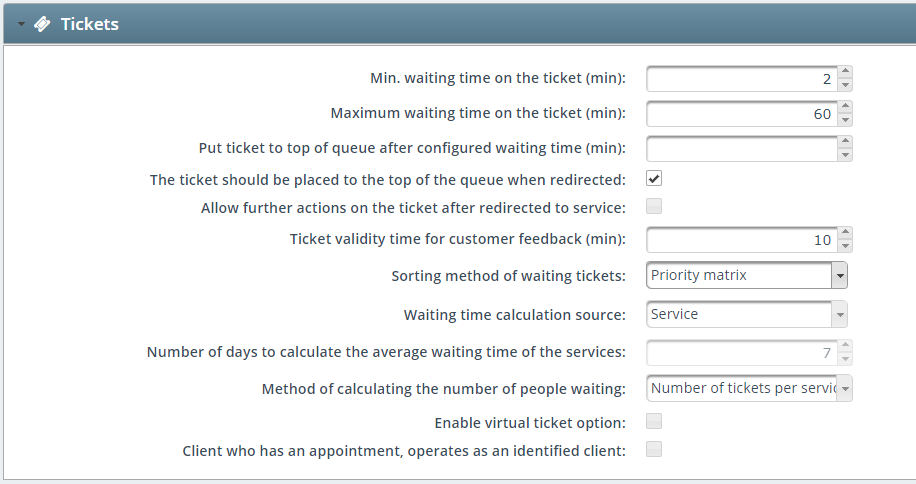
You can edit the Minimum waiting time on the ticket (min) which is going to appear on the printed ticket as a minimum value. So if the first customer asks for a ticket s/he is going to see that no one is in the queue although s/he has to wait a little bit.
The contrary applies to the Maximum waiting time on the ticket (min). This value will show the maximum on the printed ticket as a waiting time tranquillizing the customers in case of a huge queue. The Put ticket to top of queue after configured waiting time (min) is a value in minutes__ __that needs to be configured if the waiting clients can be handled with maximum priority after reaching a certain waiting time.
Ticket image generated by the server is a facilitation option which can disable or enable the server to generate the ticket image. Unmarking the checkbox will enable the ticket dispenser to generate the ticket image which ends up in less data sent over the network.
The ticket should be placed to the top of the queue when redirected gives the opportunity to handle the redirected customers with maximum priority.
Ticket validity time for customer feedback (min) is the timeframe for common feedback devices to be able to delay a feedback about a transaction.
Waiting time calculation source can be selected. If the Service is selected than the predefined time values are used (Services section) – if the Statistics is selected than the waiting time is going to be calculated based on the last weeks statistical data per service.
Method of calculating the number of people waiting can be set to Number of services – so that every service will have a waiting client who has selected that service. In case the Calculated number of forthcoming calls is selected – than the number of future calls are the base. If the Calculated length of the clerk’s queue is selected – the available clerks per service are the base of the waiting number of the services.
Enable virtual ticket option is to send a virtual ticket number to the customers mobile phone via SMS. ( SMS settings needs to be set and tested )
Client who has an appointment, operates as an identified client can be set if the appointment module is in use. If this option is checked – the client who has an appointment acts an identified customer with all the privileges of it.
Call signal

The central call signal setup contains the Default volume and the Default signal type setting. This is another eloquent example how branch networks can be unified.
E-mail settings
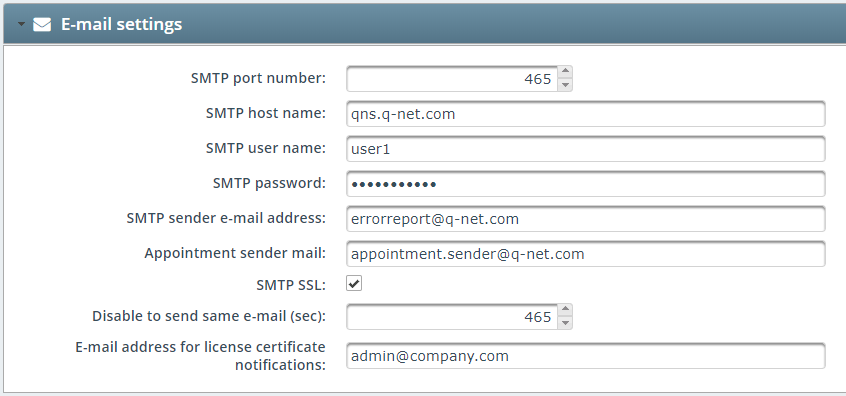
Here you will be able to set the systems e-mail notification properties. The system will be able to send reports, alerts and appointment confirmations/reminders if configured that way.
SMS settings
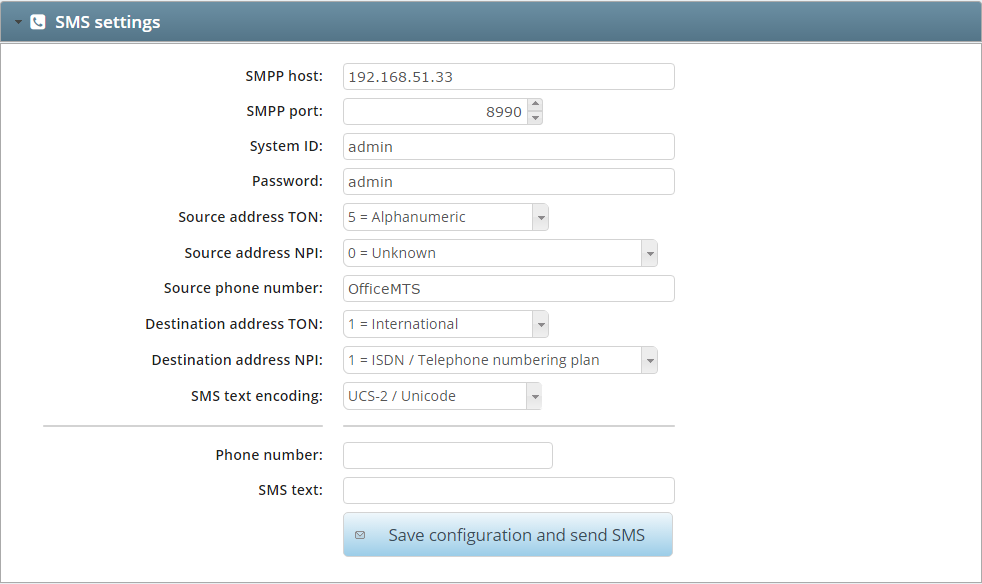
If the end user has purchased the Alerts optional software module the messages can be sent on SMS too. You configure the SMS sending properties in this zone.
Statistics export settings
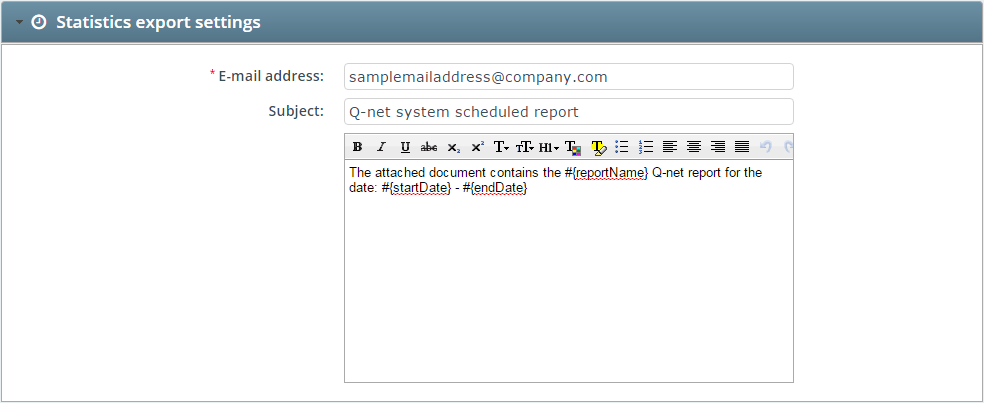
You can set the e-mail address and the subject of the mail that is going to send the pre-scheduled statistics reports. Also you can change the body of the email which will have the reports attached.
User Authentication

Based on individual system configuration you can select the user authentication method by selecting the alternatives from the Type of the user identification system. It can be Full database driven identification system where the users are being created or modified through the application in the users section. (See Section 1.5) It can be also User authentication using LDAP server – where the authentication is done by a preconfigured quote. Selecting this method allows you to enter the various different LDAP authentication settings.
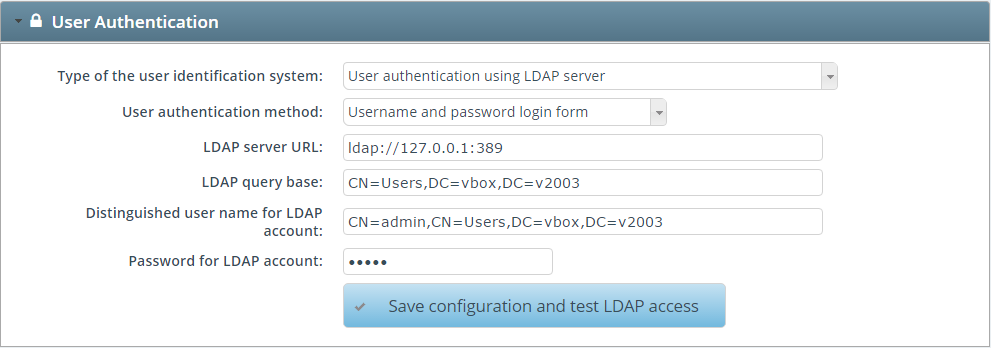
Choosing the Authentication, branch and role assignment using LDAP server allows you to fine-tune the LDAP authentication method with the systems configured roles per branch. Basically LDAP authentication with extras.
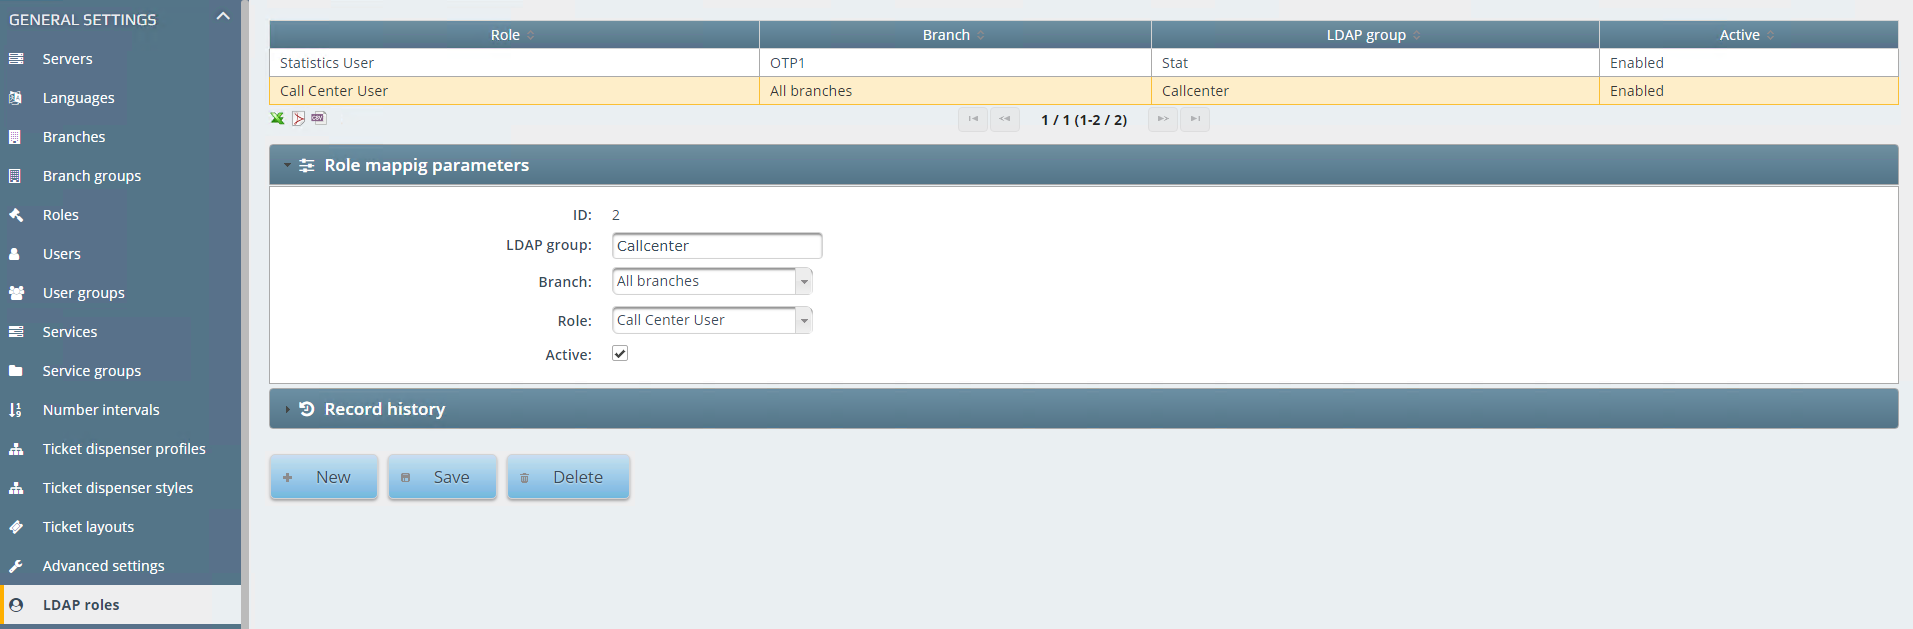
LDAP roles
Read more about it here.
License
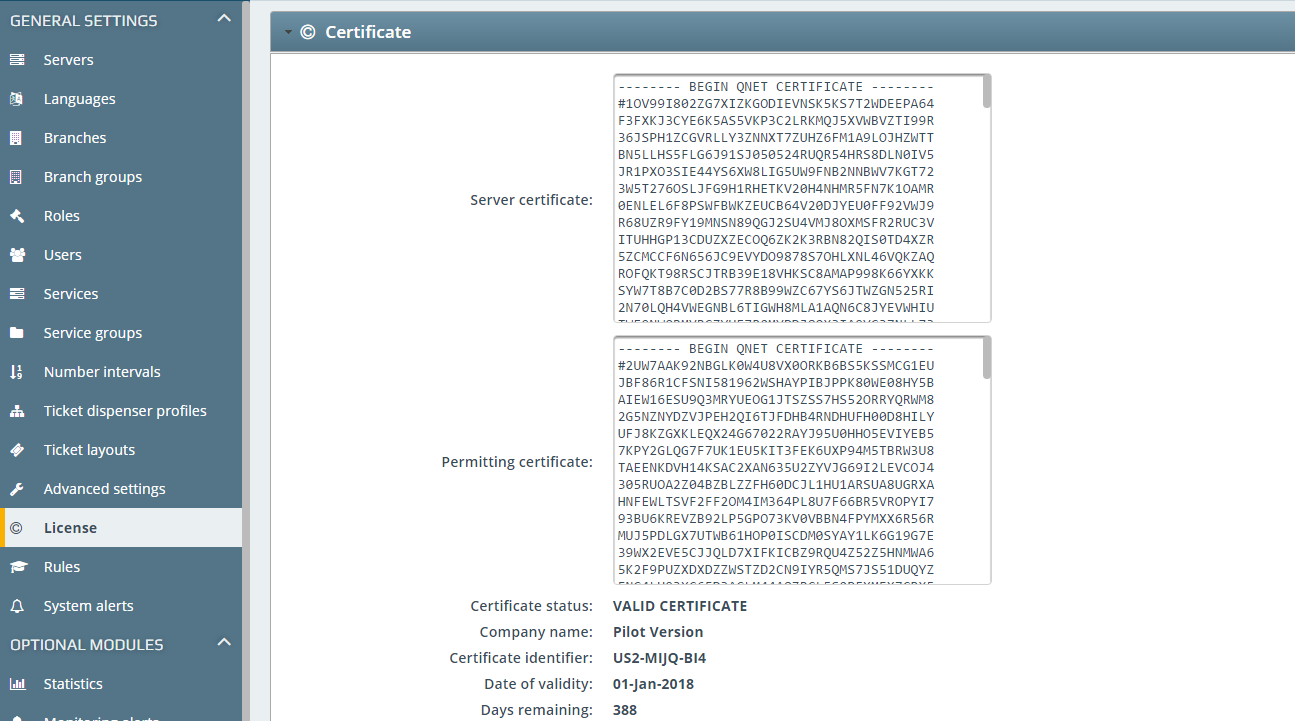
Every software package will have its own certificate. This certificate includes the amount of peripherals and the validity date.
For more information click HERE
Rules
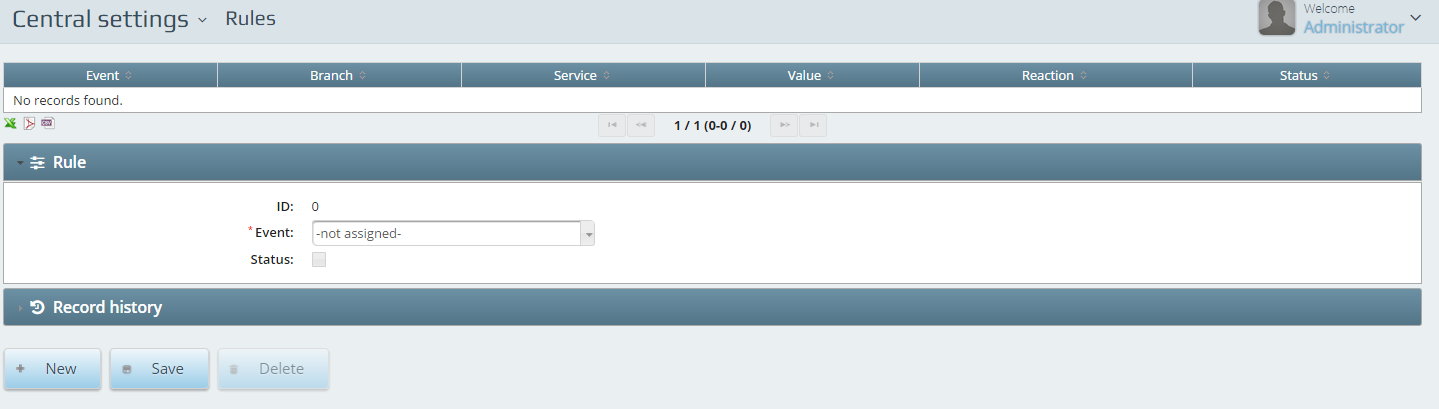
There are and there will be many rule setups that can be set on this area. Various events with numerous reactions can be configured.
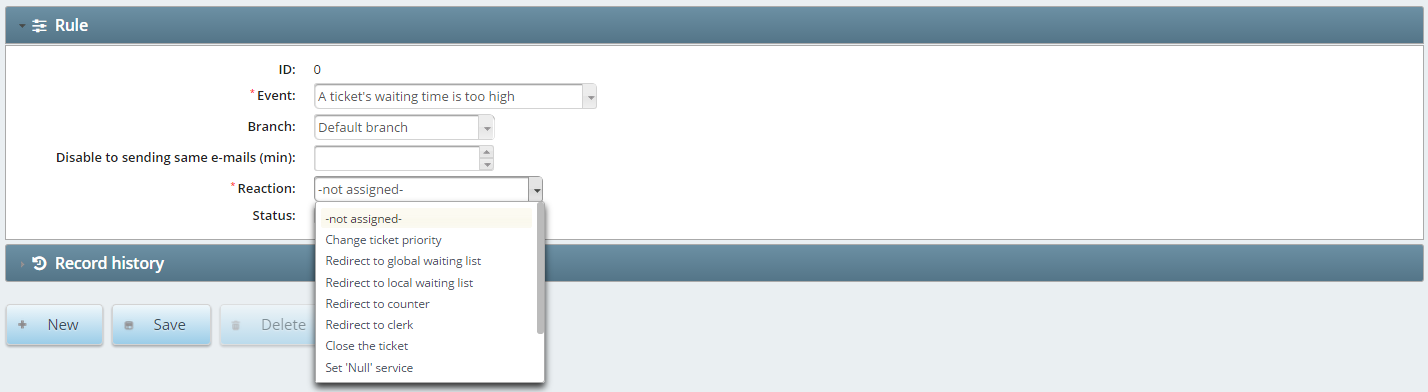
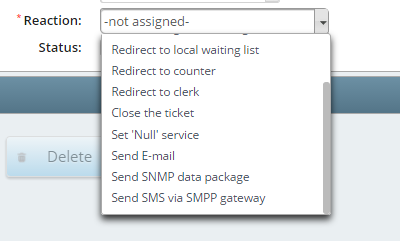
These are our initial options for Reaction and we are open to include more upon request.
System alerts
System alerts are for special events which are affecting the system’s everyday functionality.
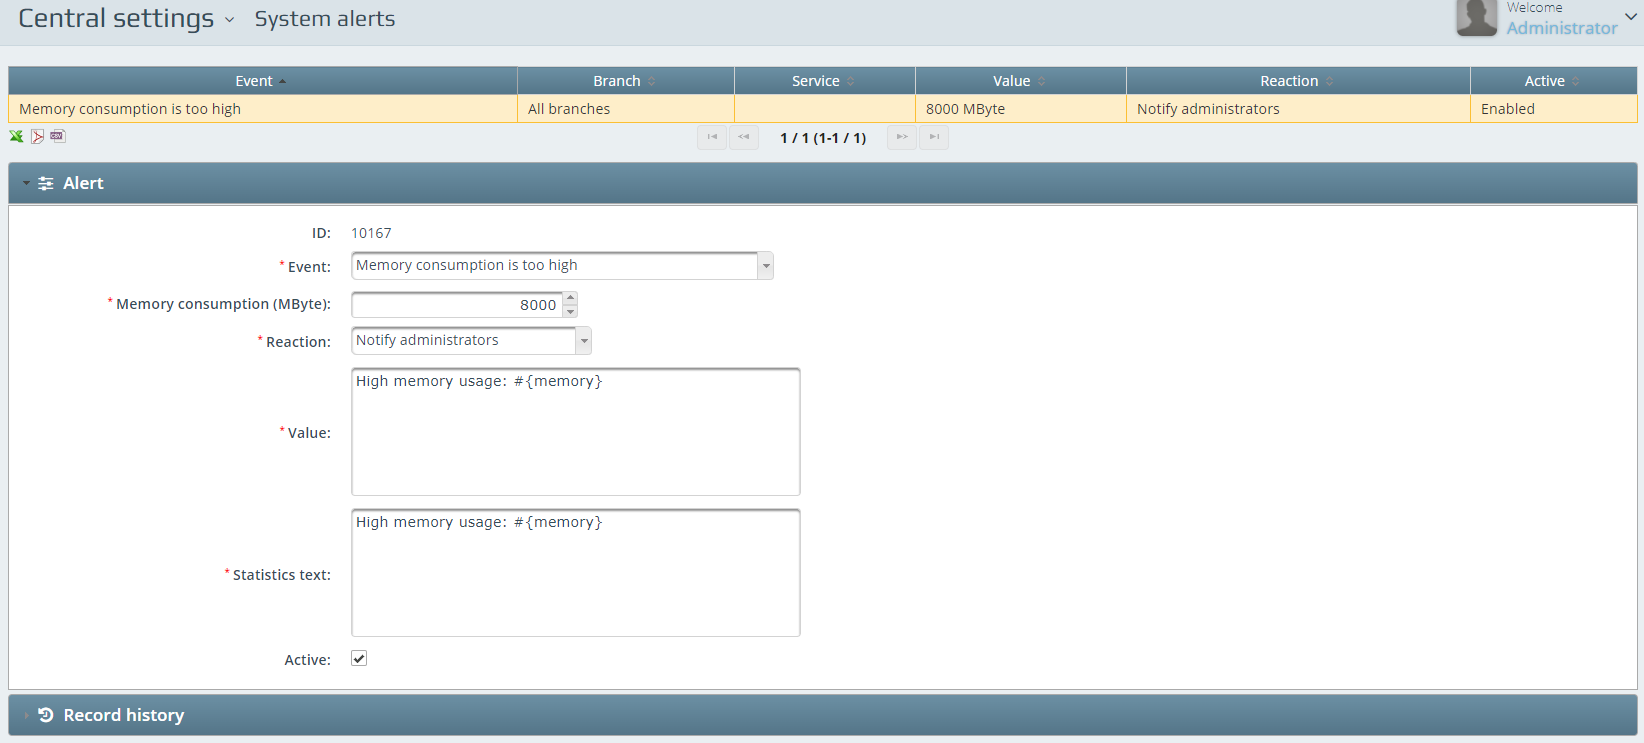
These can be for example:
- Printer is running out of paper
- Any software malfunction
- Memory consumption is too high
- Device is offline
- Certificate expiration
After the selection of the event we have to specify the alert with for example:
- Choosing the branch
- Specify the memory usage
As the last step we have to configure the reaction which can be for example:
- SMS
- Notify the administrators
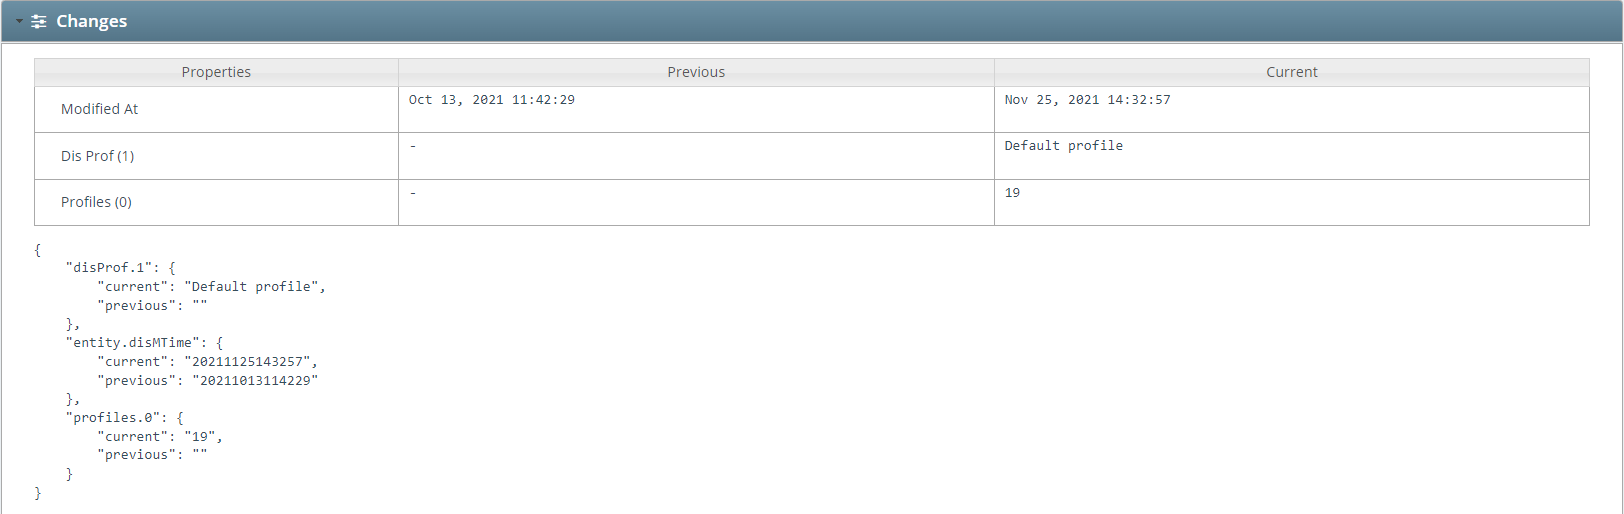
History
You can also track most of the changes made to the system by any of the users and sort them by page, type, branch and date.
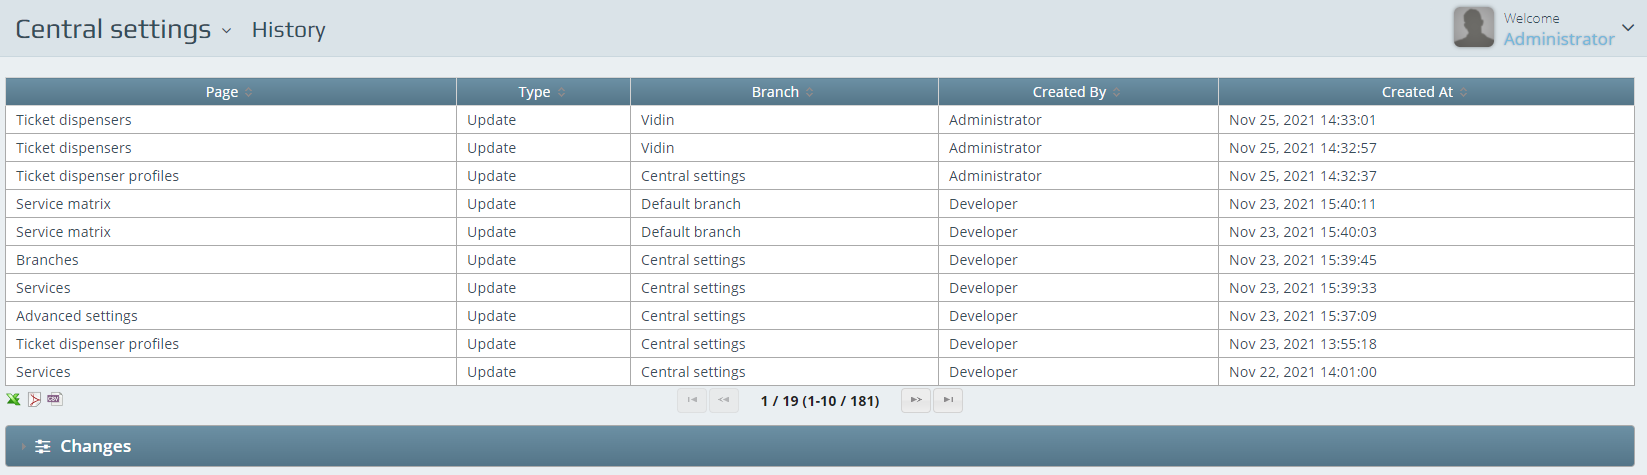
By selecting the given change and open the Changes tab you can see the more specified information about that modification.