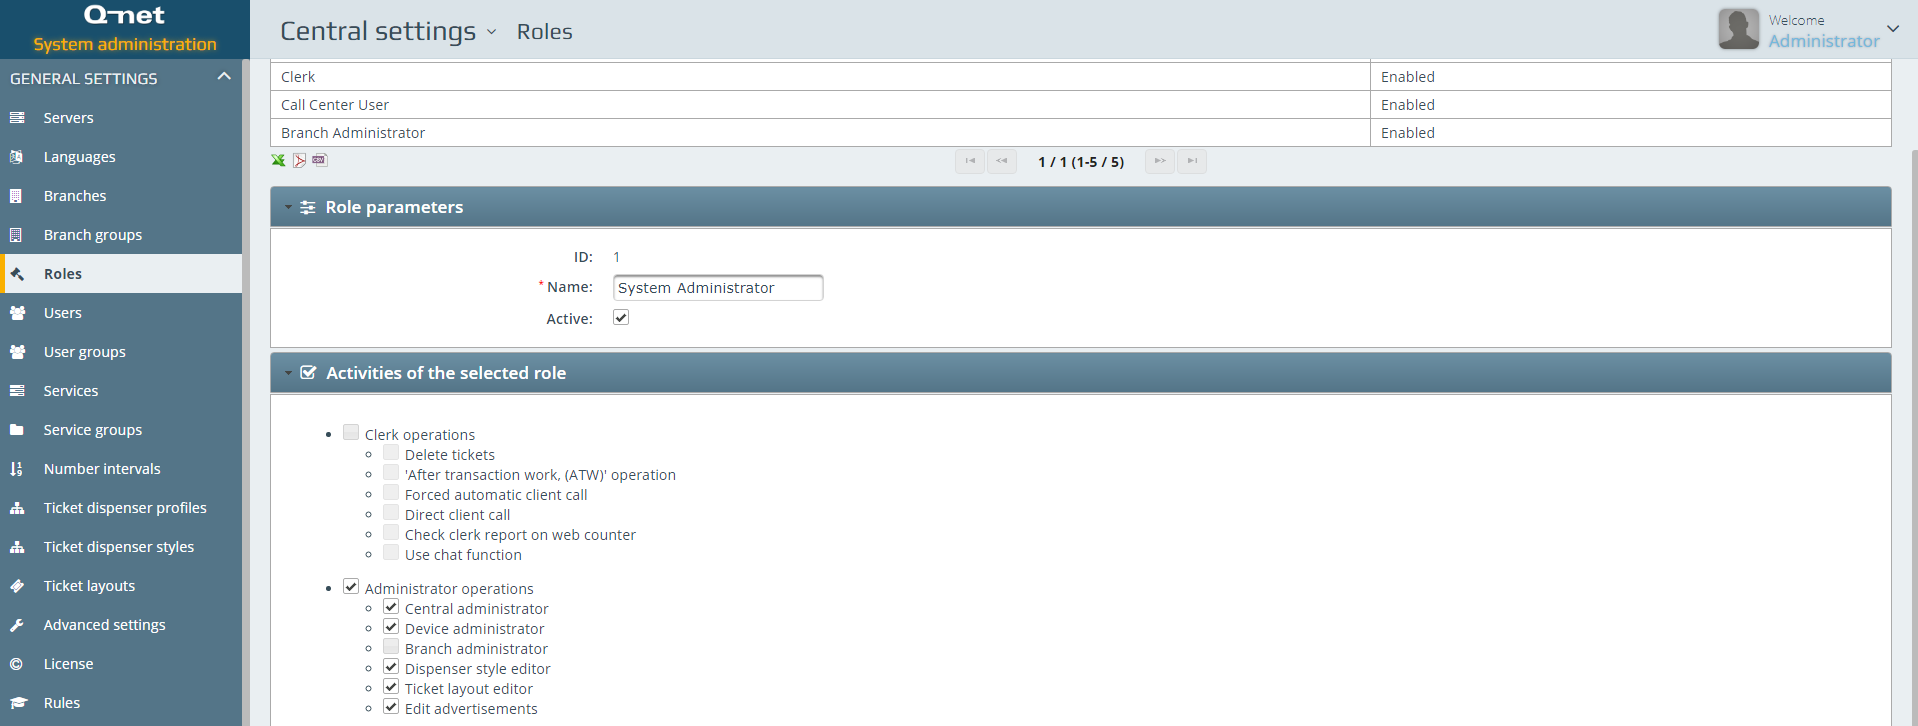
Administration - Central - Optional Modules
Statistics
Statistics and monitoring module contains every important data that reports about the current and past situation of the customer flow in a branch. In this zone you can fine tune some details in three different tabs: Statistical service groups, Statistical user groups and Statistical codes.
Statistical service groups:
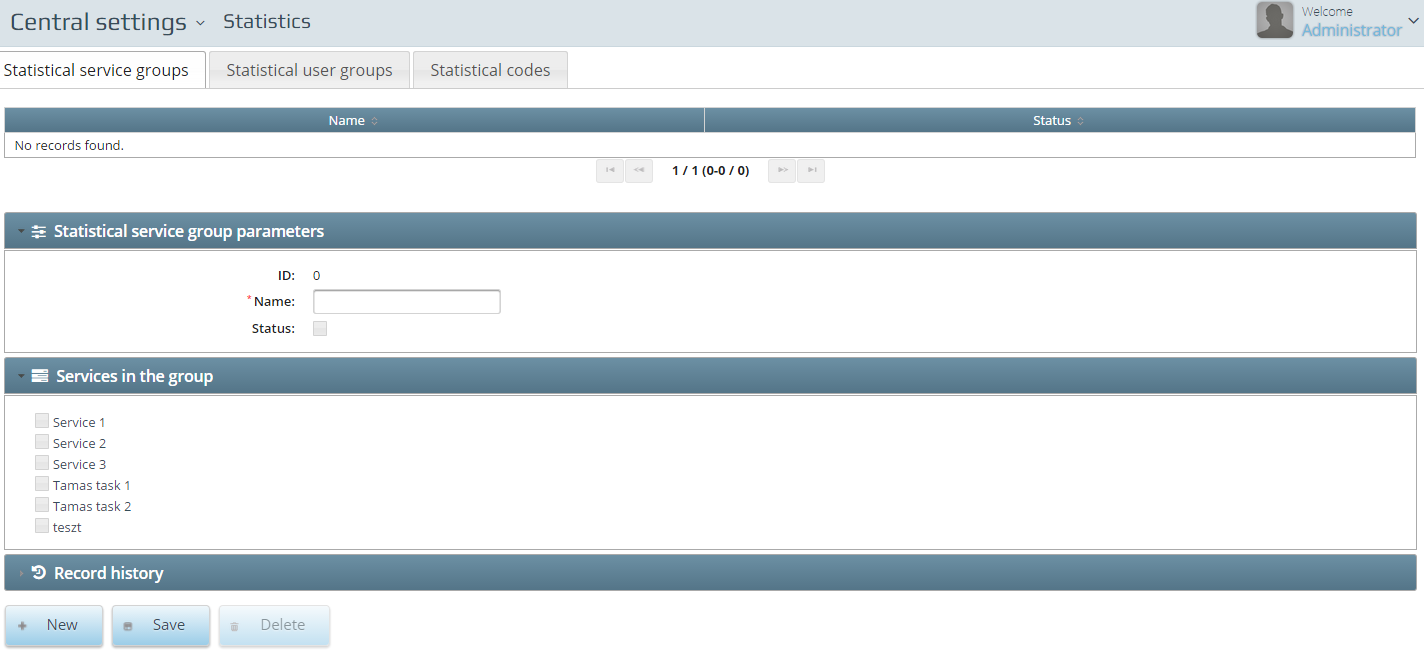
Here you can create service groups for statistical purpose to examine data in the statistics that belong to each other therefore their data should be summarized, for example: if you have 3 services for credit cards in a bank (apply, extend, info) you can create a statistical service group “Credit card” for better evaluation. The original statistical data remain available of course.
Statistical user groups
This is the same logic like above for services: users’ special groups can be created (for example: private and business)
Statistical codes
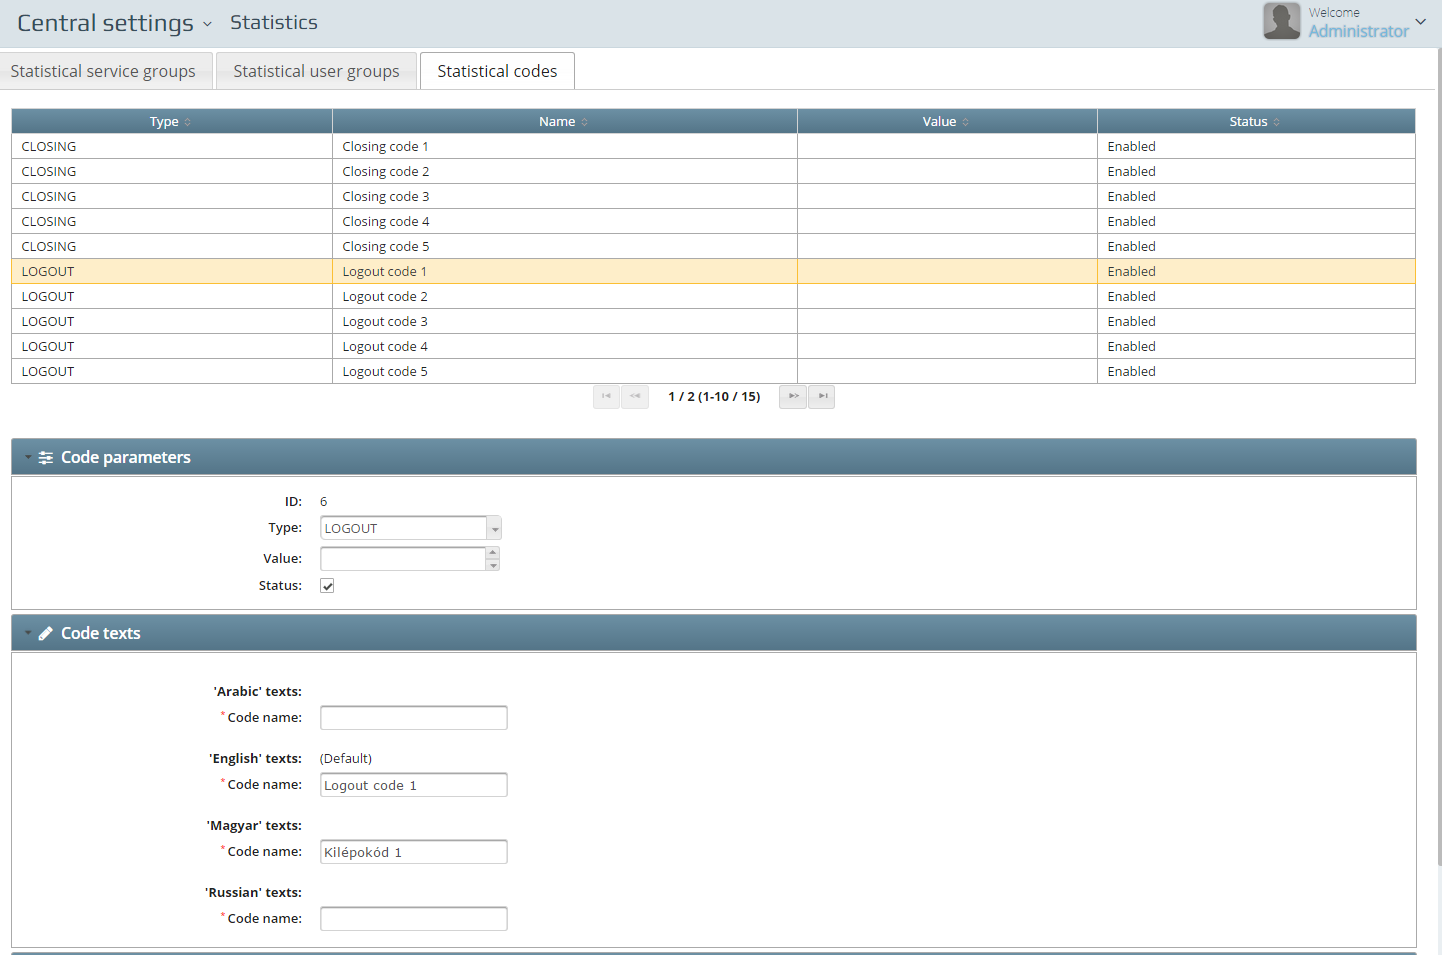
In this zone you can configure and add closing, log out and status codes
At installation 15 codes are available by default: 5 closing, 5 log out and 5 status codes.
In the__ Code texts__ you have to fill in the name of the code in every active language that are used in the branches. Codes names should be short and easy for fast understandings.
Monitoring alerts
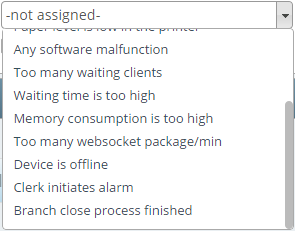
This solution provides several default monitoring alert possibilities, to inform the authorized person(s) if a monitored item is over or below a set value. For example client’s waiting time is higher, transaction time is higher, clerk’s idle time is higher, numbers of waiting customers are too much, etc.
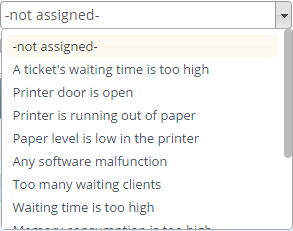
Every Event
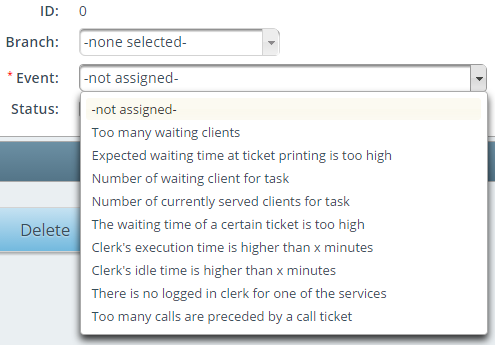
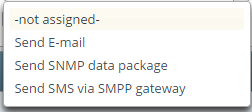
can have several Reactions:
and the values to be set will be different depending on the selected event.
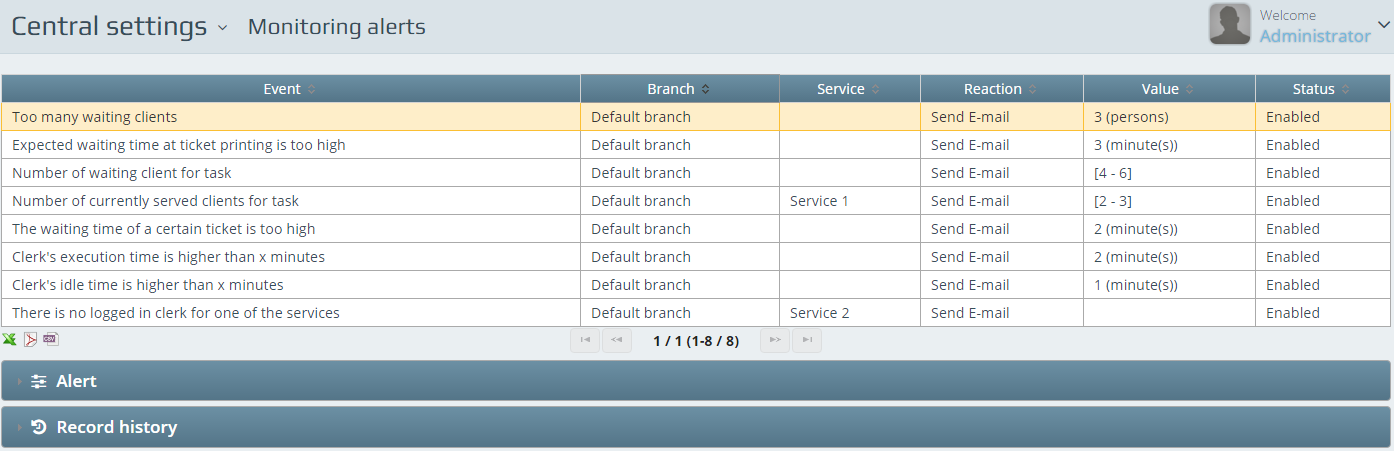
Here are some of the basic alerts that can be easily configured on this section.
Too many waiting clients:
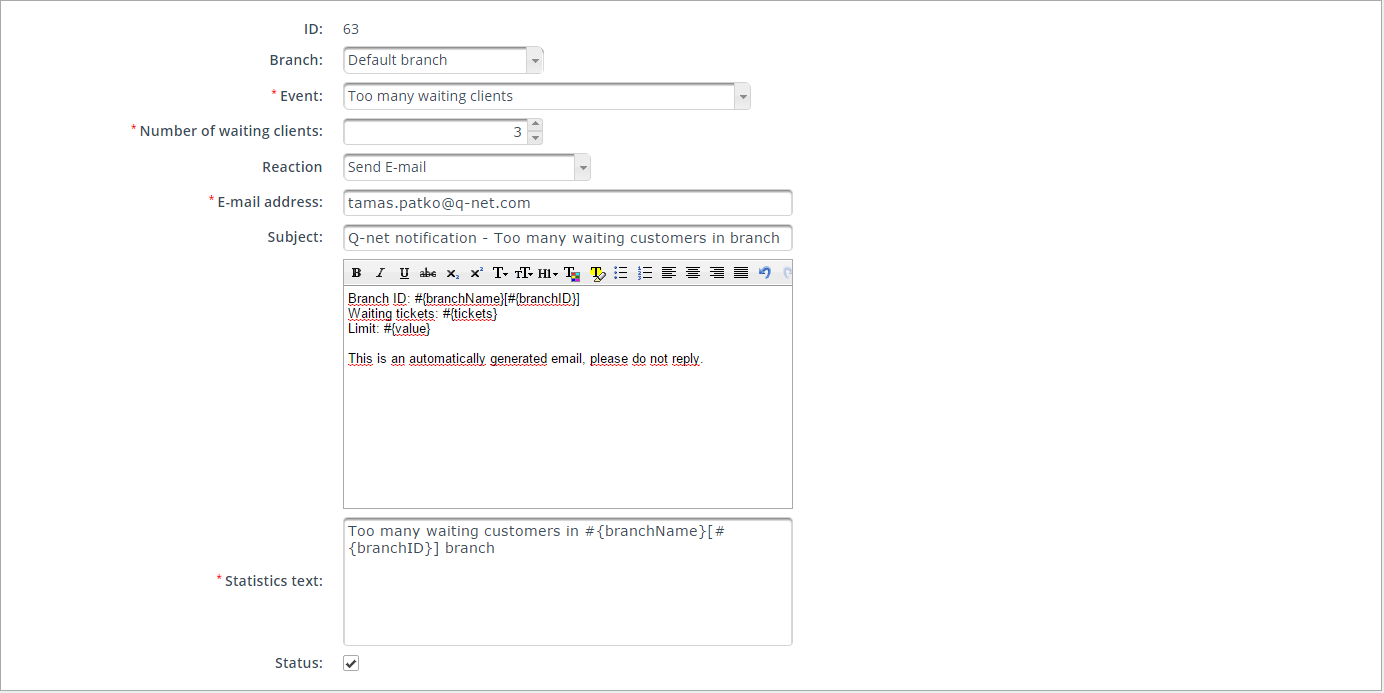
In every event types a Brach is selected/assigned. The event type describes the alert. The reaction is normally Send E-mail but of course the alerts can be Send SMS (to send a short text message if the SMS settings are configured as per section 1.11.8.) and Send SNMP data package as well. If alert type is set the system will generate an automatic (customizable) template with the information needed. In case of SMS alert is the defined you will face the Phone number – (predefined) SMS text – and (predefined) Statistics text.
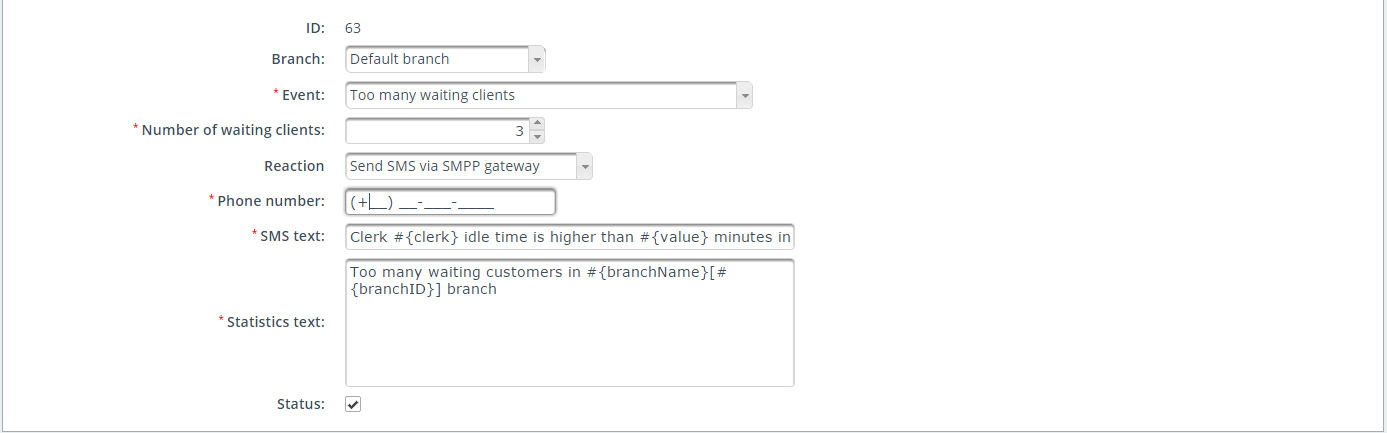
In this alert the system sends information if 3 or more clients are waiting in the global queue.
Expected waiting time at ticket printing is too high

This alert type is initiated when the customer prints a ticket and the printed ticket at that moment is having a more than 3 minutes waiting time printed on it to any service.
Number of waiting client for task
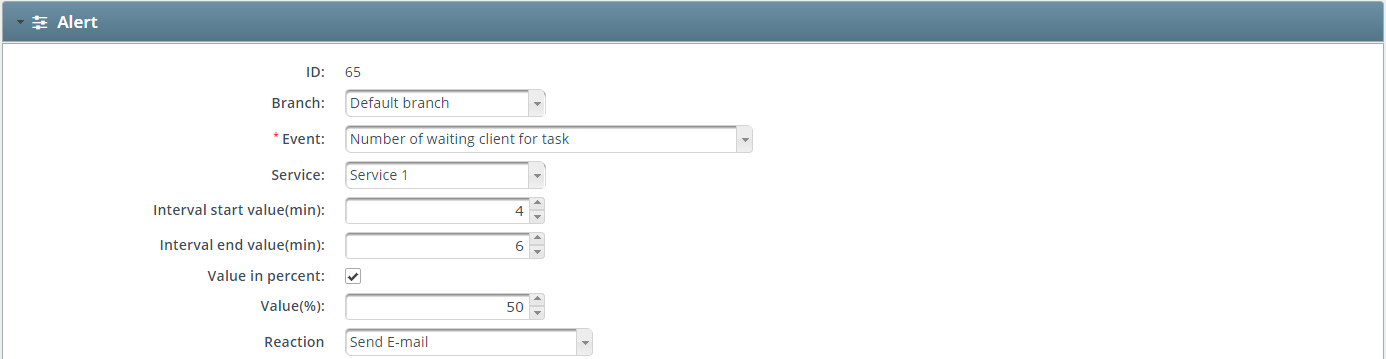
If the queue has got a certain number of customer who has been waiting for more than 4 minutes (but not more than 6 minutes) the alert starts. This is the case where the Value in percent is not checked. This alert can be set to calculate the percentage as well – so that if the queue size is 10 and there is a 50% value is set the alert is going to send notification if 5 customers are waiting for more than 4 minutes.
Number of currently served clients for task

If the active transaction time for a certain task is between 2 and 3 minutes for 5 customers the alert sends a notification. In case the percentage is set it converts the values to percentage.
The waiting time of a certain ticket is too high

As the name says: the alert is to notify when a selected services waiting time has reached a predefined value.
Clerk’s execution time is higher than x minutes

In case a logged in clerks execution time goes above a defined time value the alert sends the details.
Clerk’s idle time is higher than x minutes

If a clerk is a bit loafer the alert sends the report.
There is no logged in clerk for one of the services

There can be times when a service cannot be served by any of the clerks in the branch. This alert can inform predefined individuals to avoid this situation.
Feedback answer for question

A Question and Answer pair can be selected and with this alert the management can be informed about the extremely bad or good reviews.
Statistics scheduler
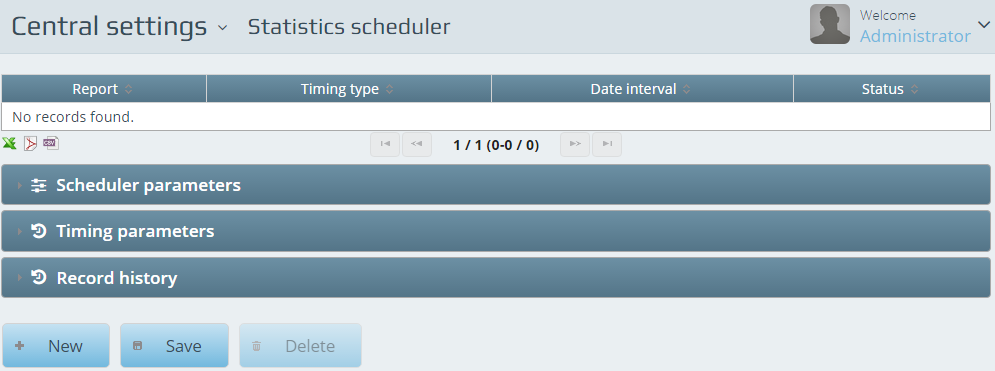
Statistics scheduler is a module that can generate various reports and can send them to a predefined e-mail address configured in the Scheduler parameters.
Scheduler parameters
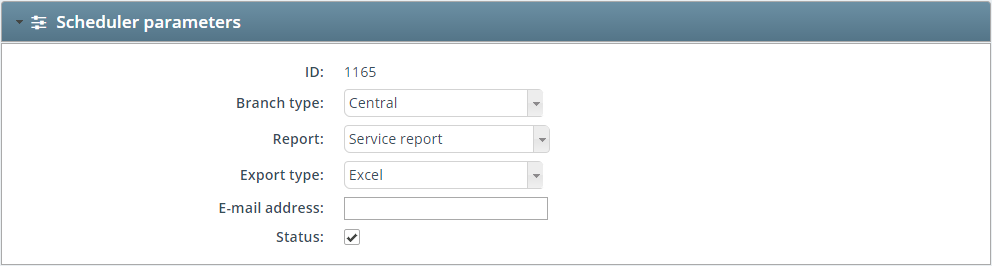
The Branch Type can be defined if the reports would be pulled from Central – Region or Branch level. If you select the Region type – the available Branch group list will become available under the type. If you select the Branch type – the available Branch list will become selectable. Report types can be selected from the dropdown menu – the available report types can be extended with personal custom reports. You can select if you want to receive the reports in excel or PDF format at the Export type. An E-mail address needs to be specified where the module is going to send the reports to.
Timing parameters
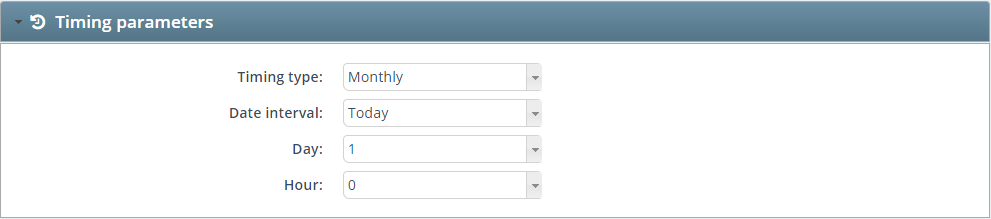
Very simple to set – the Timing type is to set the period of the sending. You have the option to select Monthly – Weekly – Weekday – Daily – or the real analytics can have Hourly reports as well. Setting the Date interval for the report is necessary for the reporting period. Reports can be sent from This year – Last month – This month – Last 30 days – Last week – This week – Last 7 days and also for the daily reports you can select the Yesterday either. The email can be timed with the Day and the Hour parameters. If you select Daily reporting period the Day won’t be available. If you select the Monthly timing type – you can define the day of the month here selecting the desired day you want to receive the report list. Setting the hour will fine-tune the sending time of the reports.

Media player group
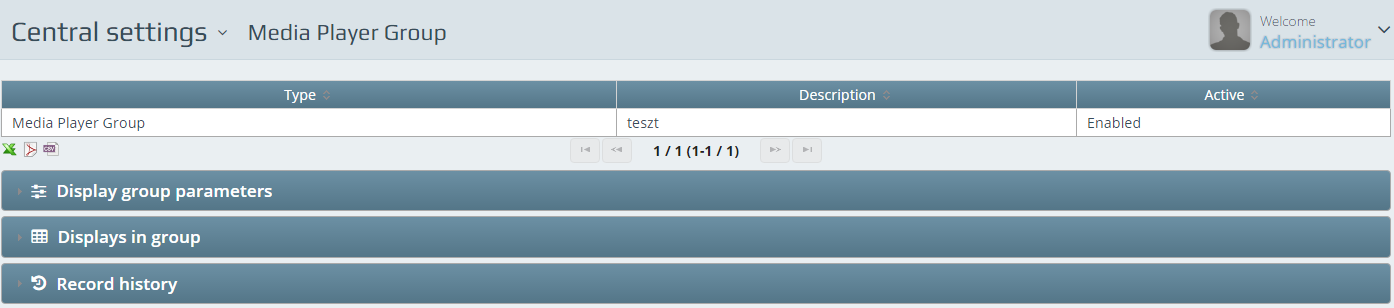
Media player group is an optional group where users can add as many media players as they want – if they want to unify the profile selection on all of them at the same time or with the same content.
Group can contain players from different branches as well. Changes made to the group will affect all the players within.
Display group parameters is the section where you can enter a name for the group of displays.
Displays in group have a list of media displays where you can select the desired ones to be grouped.
Feedback profiles
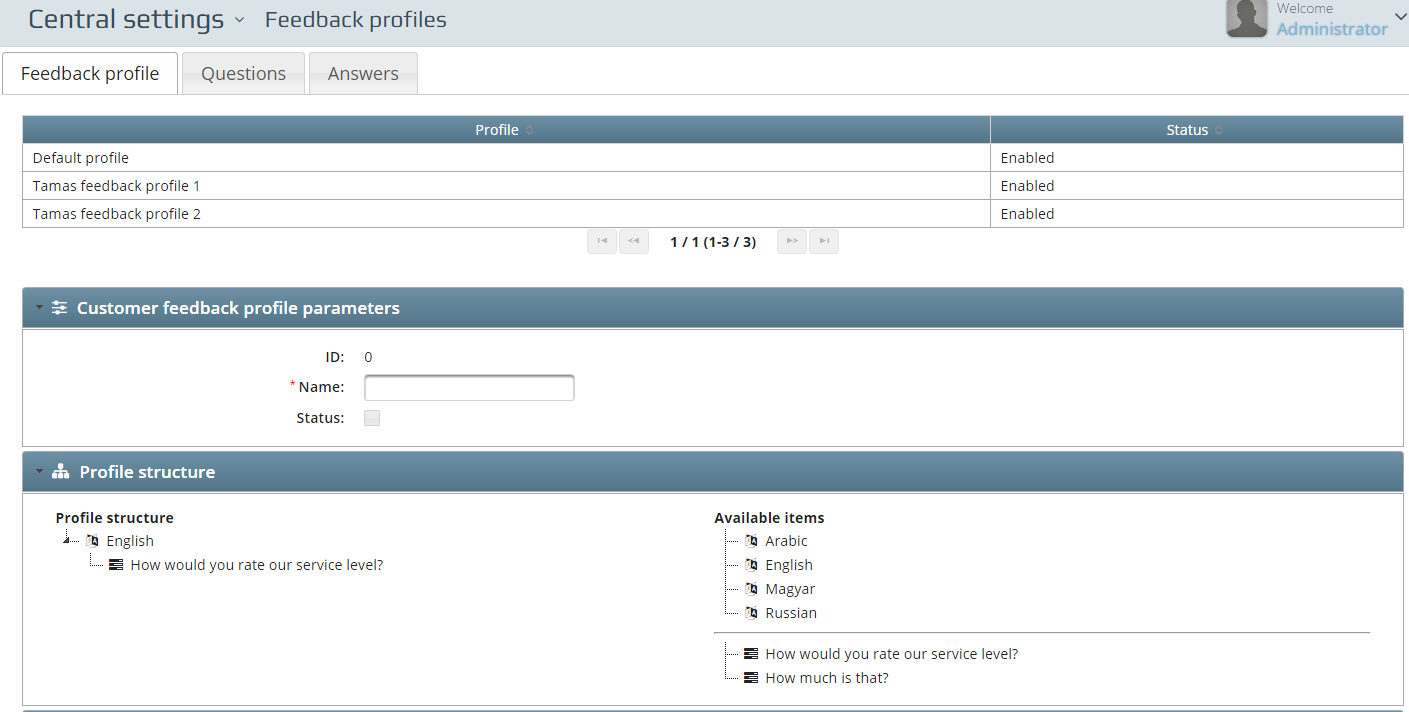
Optional customer feedback modules can give feedback about the quality level of the service provided in the branches. For these modules a profile needs to be configured with a question and answer possibilities. Every answer has its value for positive or negative feedback. With the help of these modules the service can be fine-tuned and customers can feel more satisfied. Questions can be set up in the Question tab, answers can be prepared in the Answers tab and these can be organized in the Feedback Profile tab.
###
Customer Feedback profile parameters
Not much to set here – the Name field is mandatory and you can enable and disable the profile with the Status.
Profile structure
With simple drag and drop you can create the topology of this profile from the available questions set.
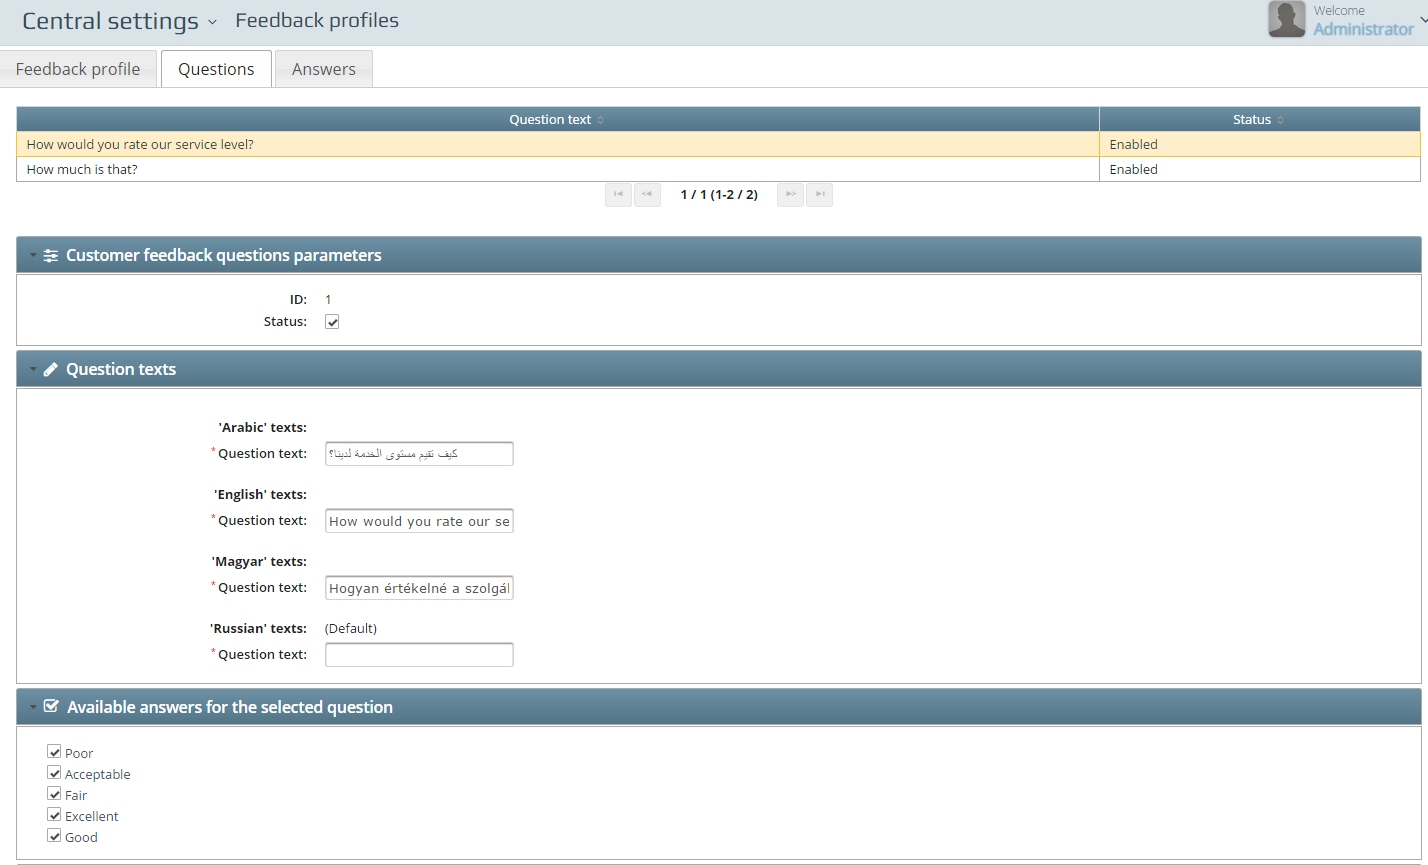
Customer Feedback Questions Parameters
To activate or deactivate the selected question above.
Question texts
Every question has to be filled out in every available language.
Available answers for the selected question
You can mark the desired answer possibilities for the given questions. Answer positions can be edited by dragging and dropping the answers to their final position.
Answers
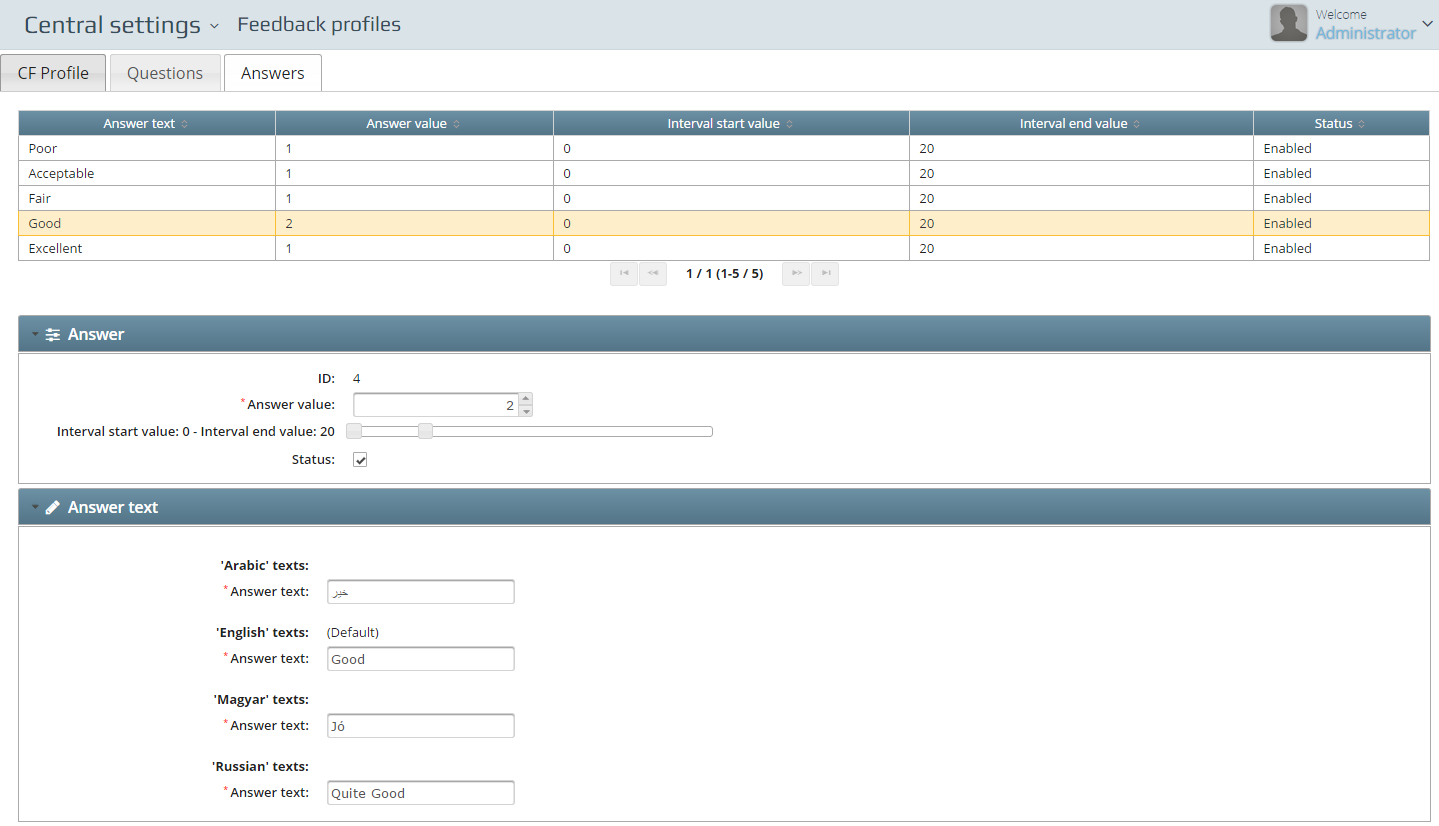
Answer
As mentioned earlier every answer can have its own value. This value can carry positive or negative feedback answer. The value can be set with the help of the Answer value. The value interval can also be set by pulling the limiters of the slider of the Interval start value – Interval end value bar.
Answer texts
Every answer needs to be filled out in every available language.
Feedback devices
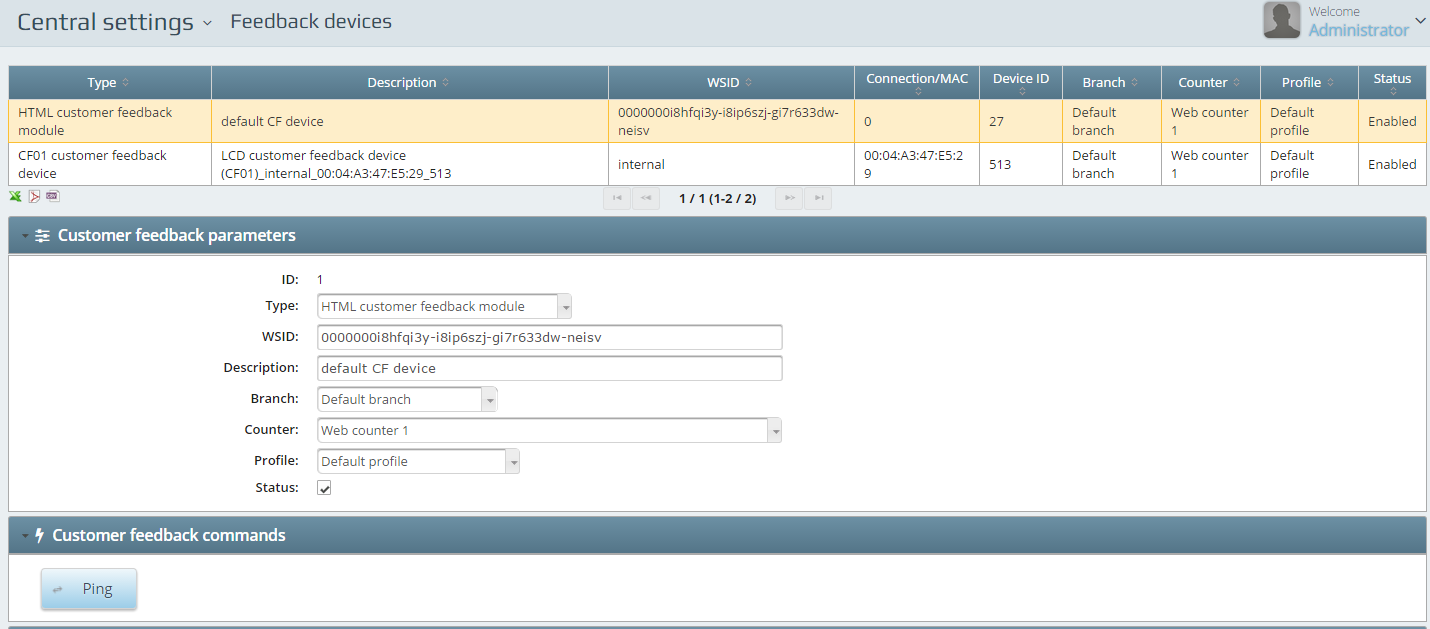
Here you can configure all the feedback devices in the system.
The CF01 Customer Feedback devices have to be set manually. Each and every device needs to be connecting to the SERVER via IP address and the PORT number should be 8000.
Appointment
In this zone you can configure the central settings for the Appointment optional software module. Once the appointment has been configured with the required data – the page will be available at the http://HOST:3000/qnet6/appointment.xhtml (HOST is the server IP). With the help of the AppointmentAPI it could be reached from every kind of mobile or desktop device.
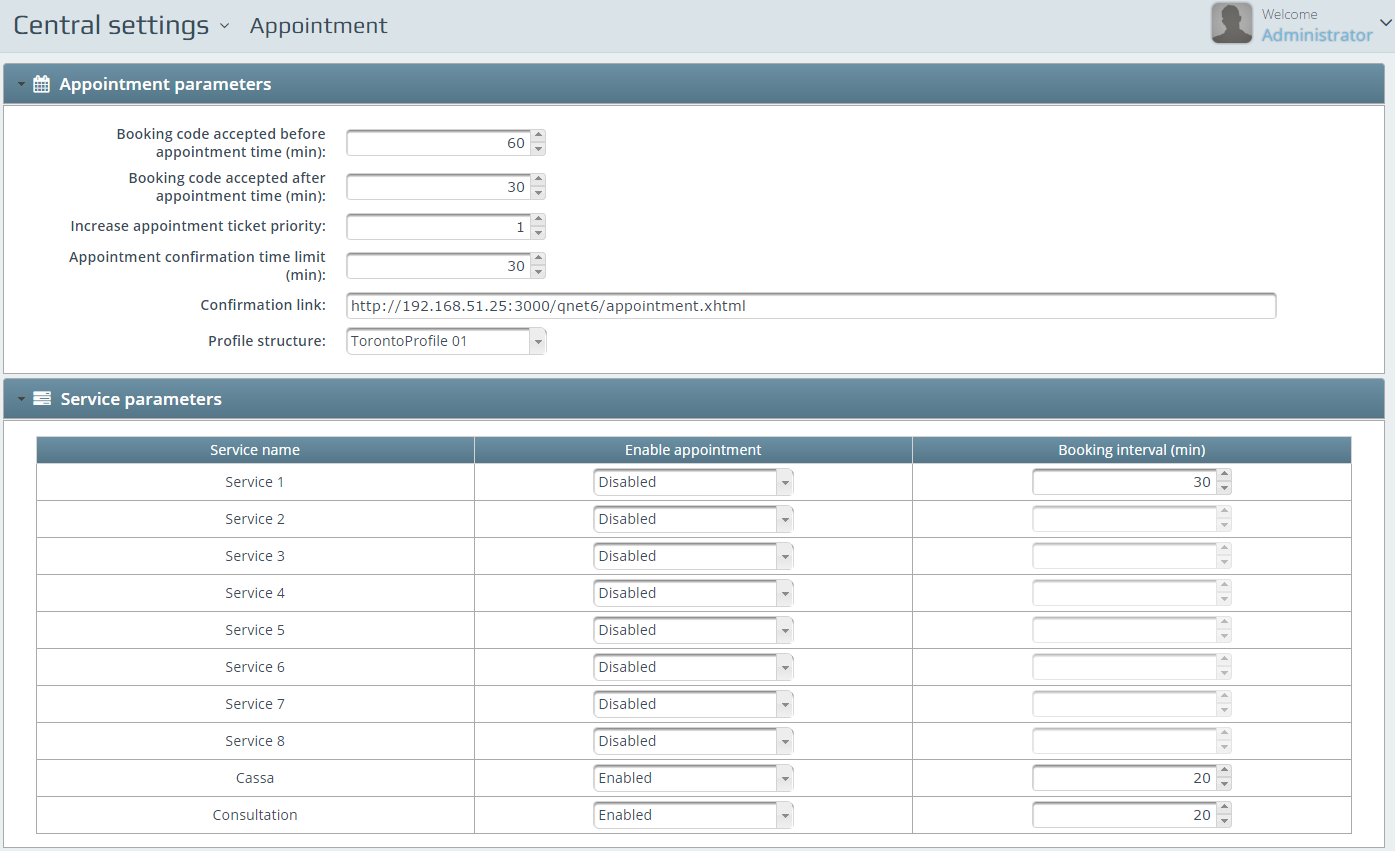
Appointment parameters
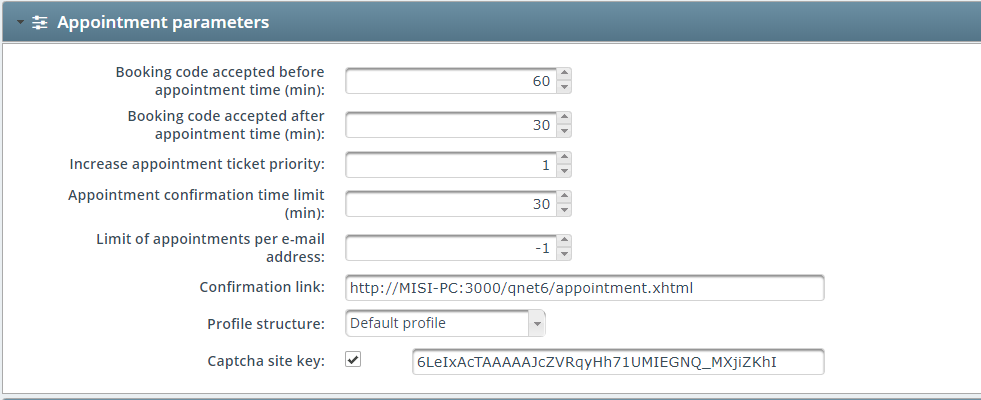
Booking code accepted before appointment time (min) is when the customer arrives to the selected branch with the booking code – selects the appointment button (as s/he arrived to a booked time ) – and gives the code which s/he received. This code is accepted before the appointments time within that timeframe which you set up with the help of this option and the Booking code accepted after appointment time (min). This last option is for customers who may be late from the appointment. Client missed the appointment is a time value which after the system won’t accept the booking code for the selected appointment. It is recommended to increase the booked services ticket priority with the Increase appointment ticket priority so the customer will feel advantage of the use of the appointment system. You can set the Limit of appointments per e-mail address.
Profile Structure can be selected – just like a dispenser profile – with all the available services with service groups as well.
Service parameters
As not all service is taking the same time – this option is to set up the available services timeframe on the service list. You just select the service from the dropdown menu and set the availability with the Enable appointment and once that is enabled you give the timeframe of that particular service at the Booking interval (min).
Exception dates
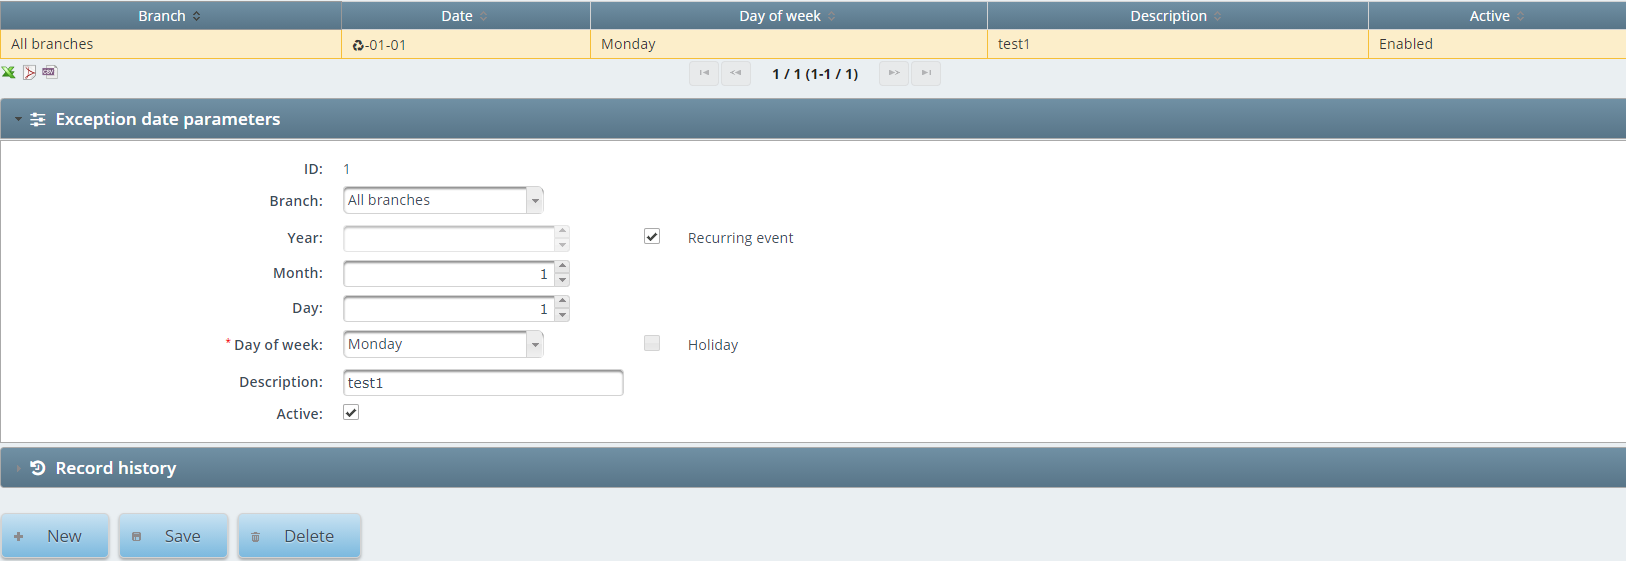
In this page the exception dates can be handled in the appointment module. In case of national holidays, when the branch is working with unique opening hours or not working at.
Exception date parameters
You can configure exception dates as a central settings that affects all of your branches or select one specific branch and set the date to that one only.
The date of the event can be modified with the Year, Month and Day fields. If the event is a Recurring event, the checkbox can be used.
The module can be used in two different ways:
If the exception day is an extra workday, the appointment module can copy the the booking intervals of an already configured workday. In this case select Day of week value, as sample.
If the exception day is a holiday, check the Holiday checkbox, so the date won’t be available for booking.
The Description field is optional, it can be the short description of the exception date.
System alerts

Similar to Rules – section 1.12 – any number of alerts with different reactions to any person can be configured here. This is an optional module as it contains complex features. There are numerous variables available in this area.
The Event is the only mandatory field until you don’t select it. Various events have various mandatory fields assigned. Please make sure you fill or set every mandatory field and Save the alert before starting to configure the next one.
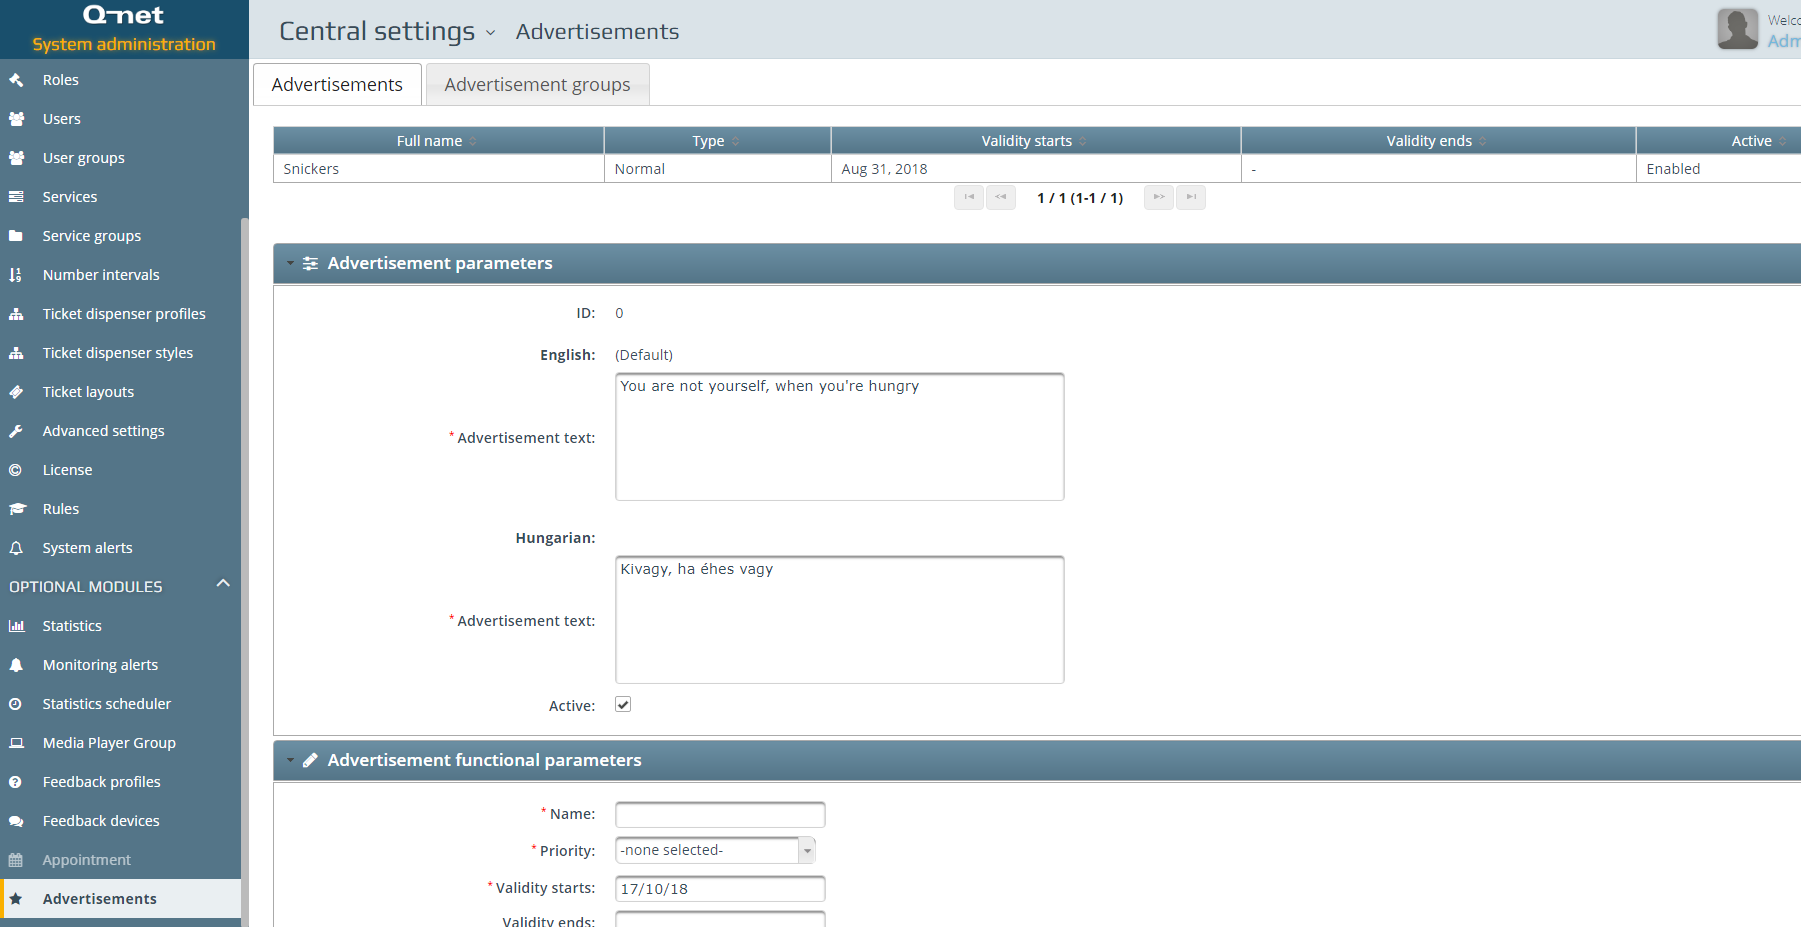
Advertisements
To enable the Advertisements module, you have to add the Edit advertisements role to the user, under the Roles section. After it is enabled, log off and log in.
Advertisement parameters
Every enabled language will appear in this section. The Advertisements text is a mandatory field. This text will appear on the ticket, with the language of the ticket. The Status of the ticket can be Active or inactive
Advertisement functional parameters
The Name field is mandatory. Priority defines how often an Advertisement will appear on the tickets.
Validity of an advertisement can be set with the help of Validity starts and Validity ends set.
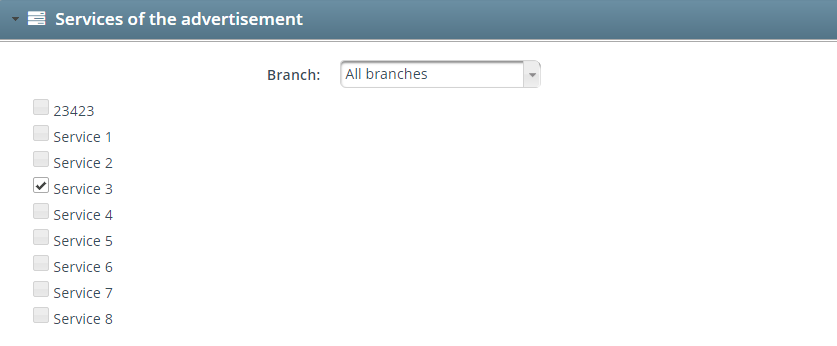
Services of the advertisement
First, you have to select a Branch or all branches, where the advertisements will appear and the services that are assigned to the advertisement.
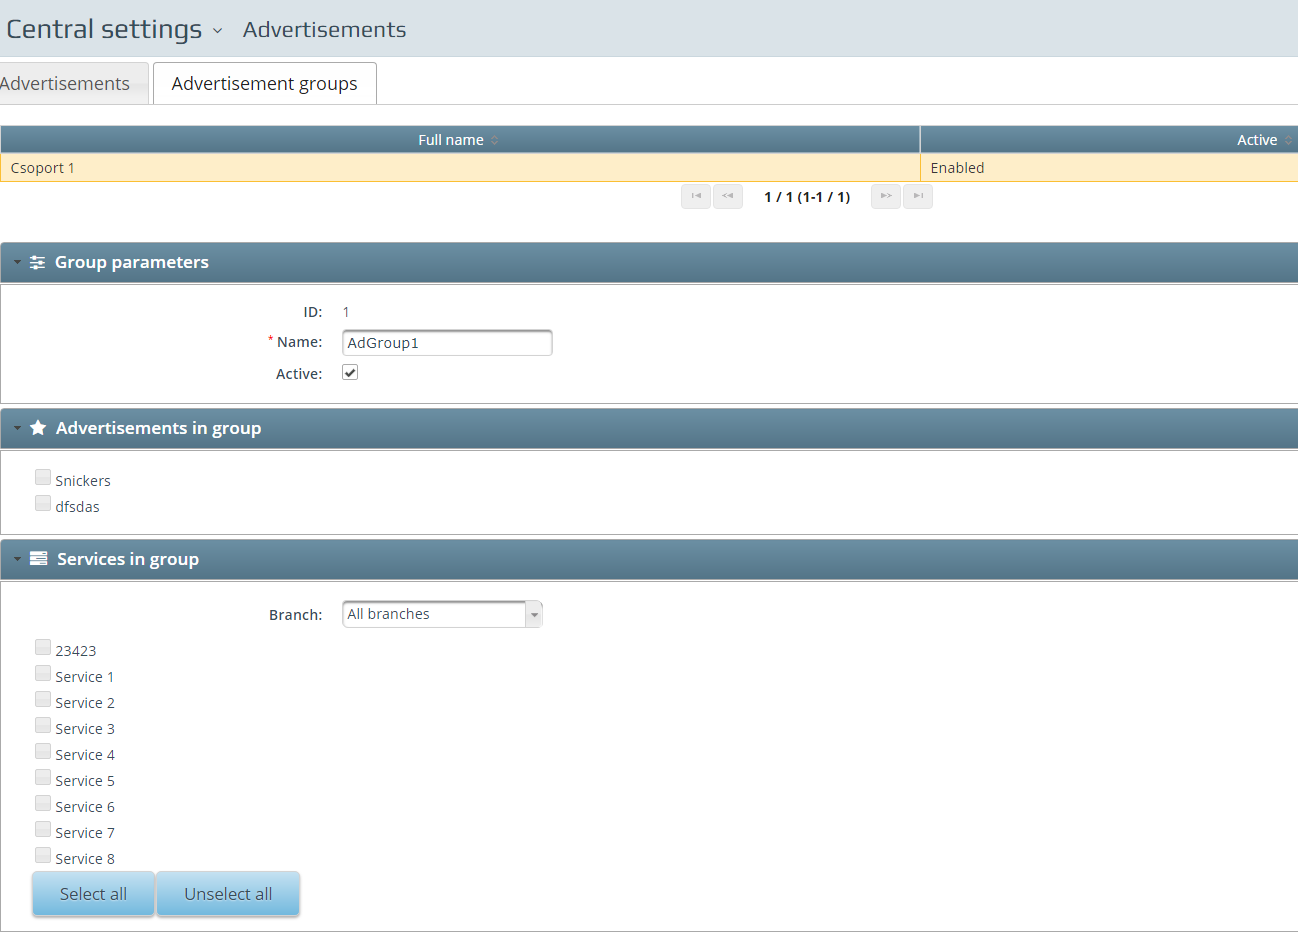
Advertisements groups
On the second tab, Advertisements groups can be created. Previously created Advertisements can be to groups in this section.