Further Modules - Software Keyboard
First of all, the software keyboard has to be opened. This can be done from the admin page of the software:
http://IP:3000/qnet6/admin.xhtml
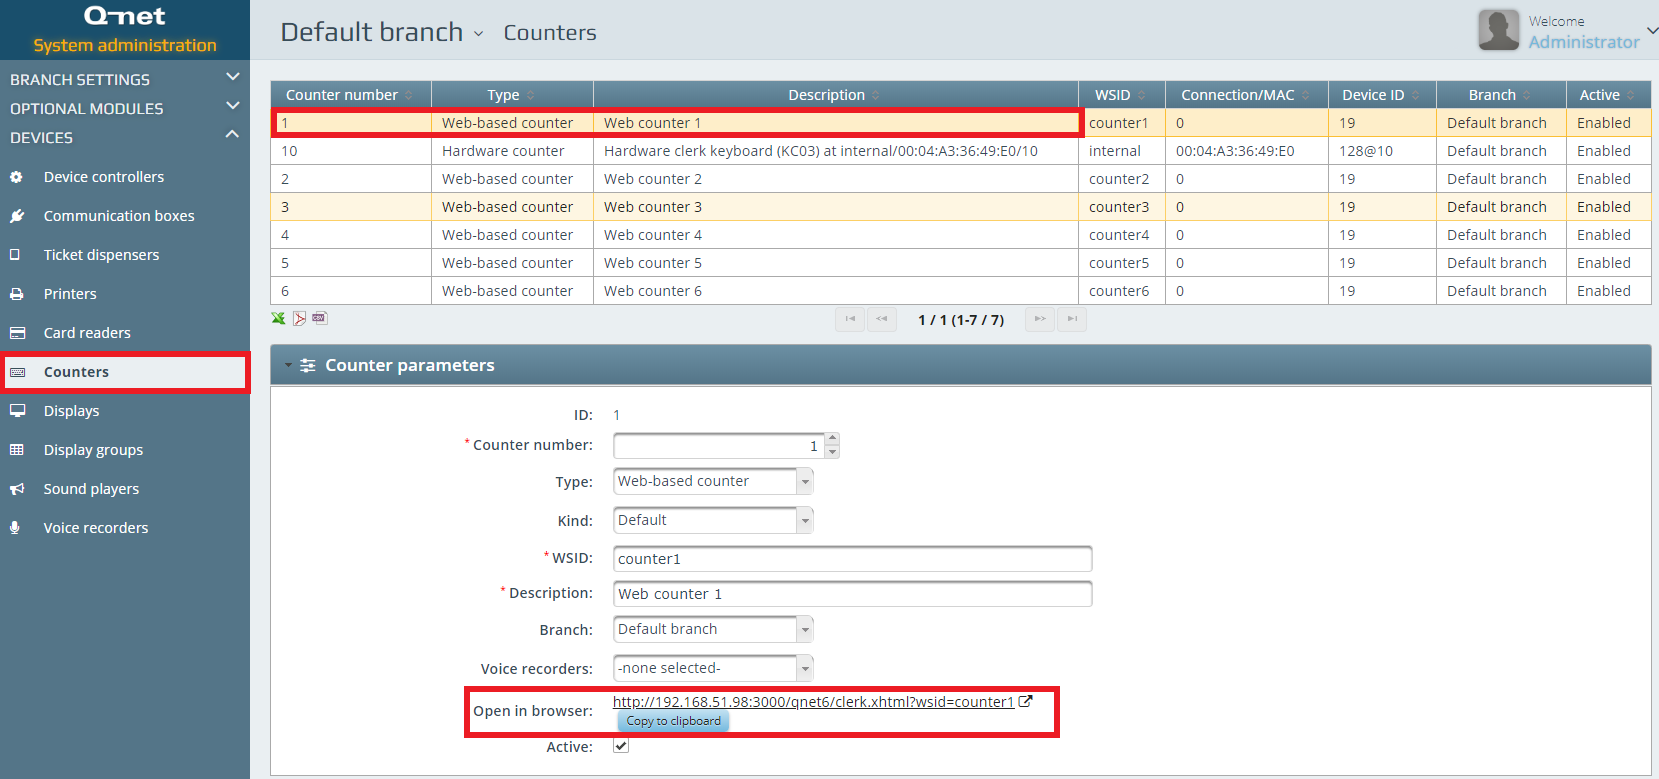
You should get into your branch’s options, then under Counters select the counter and click on it’s link at Open in browser section. After this, you will se a login screen where the user’s credentials are needed.
Successful login will end up in a client calling interface as described below.
In this interface the clerks can do every possible operation with a ticket / customer.
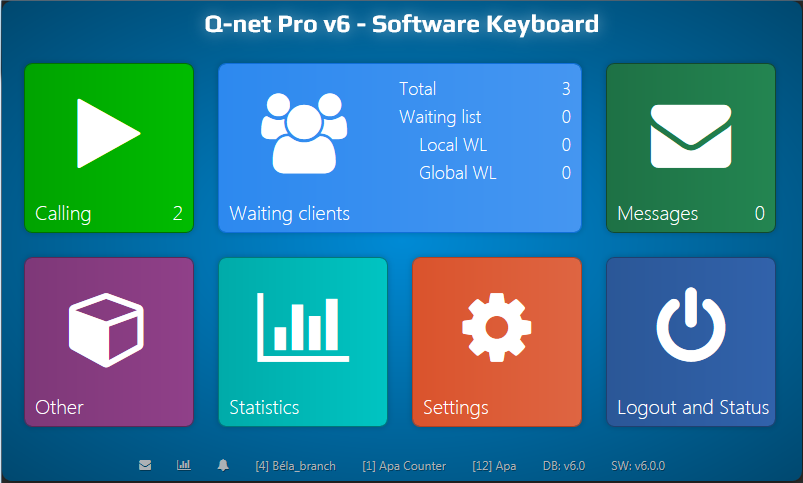
Transaction page
The most important button of the software keyboard is the „green Play” button for Calling the next customer that you find top left.
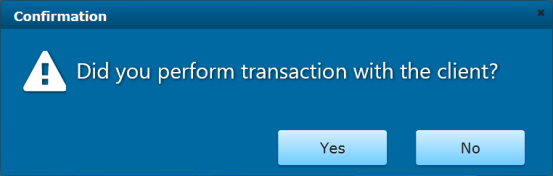
Clicking on the Start button will enable the user to initiate the transaction with the secondary „Start” button. This button is pressed when the client has arrived to the workstation. Transaction automatically starts within the predefined time interval by default if the secondary ’Start’ button is not pressed.
Stop button has a secondary option – pressing ’Stop’ stops the transaction – pressing the dropdown button besides it can close the ticket without transaction or without afterwork – depending on the system setup.
Add button is used when the selected transaction has finished, but the particular customer has to arrange another problem. To keep the statistics precise the clerk should add another service and the new transaction can be started.
Users are able to comment a case with the dedicated Comment button. This will place the users input on the tickets record that can be read by another clerk to whom this customer was forwarded for example.
Waiting list option is used when a transaction needs additional processing: the customer should wait somewhere else and in the meantime the clerk can call other customers. See more details in section B, 16.
The waiting list can be global – in this case it is not connected to a clerk any longer – by service, global and local – in this case it is connected to the original clerk that put him on the waiting list.
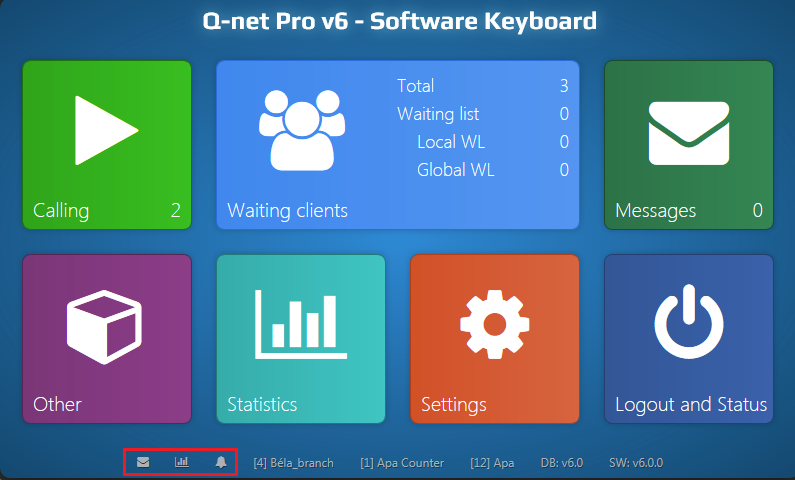
Also the statistics, messages and alarm buttons are available for quick use.
Redirect types
Moving the ticket into the Global waiting list will enable other clerks to call the ticket. Local waitlist is dedicated to the clerk her/himself. There are other two options in the waitlist: Services and Waiting. In example the clerk has received a job for a customer with a known ticket number – s/he is able to call that ticket number directly from the „Waiting” list. „Services” area is able to reflect the load of each service in the branch.
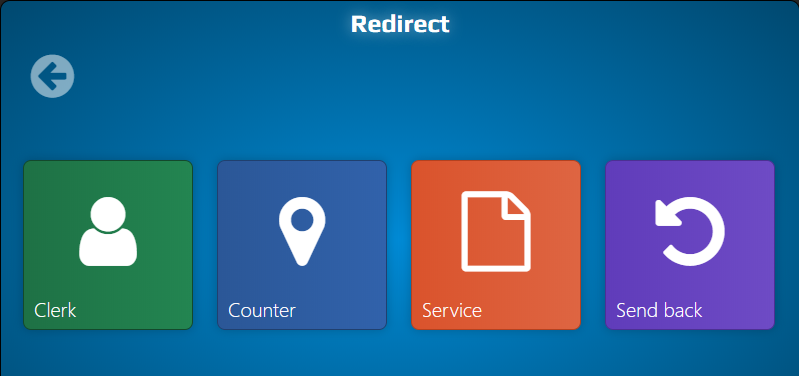
Clients can be „Redirect”-ed to Clerk, Counter or to a specific Service if needed with the help of Redirect button. Redirecting a ticket means that the ticket will be placed into the “queue” of another clerk/counter/service.
The system supports three ways of ticket redirection:
If redirect the ticket to a service, it will be closed on the actual keyboard (if there is no other service to be handled) and can be called by any other clerk, who can arrange this new service.
If redirect a ticket to a counter, the clerk can chose a counter to redirect to if that specific counter can handle that redirected ticket’s service.
If redirect a ticket to a clerk, the initiator clerk can chose another clerk who can handle the ticket’s service.
You can redirect to other counter/clerk only in case the there is a service on the ticket which can be handled by the target counter/clerk.
You can enable the option:
“Allow further actions on the ticket after redirected to service”
in the Central settings -> Advanced setting ->Tickets tab
If enabled, then when a ticket redirected to a service, it won’t be closed immediately on the keyboard, the redirection actually only adds the new service to the ticket, and then the clerk has the possibility to close the ticket (any other clerk can call the ticket by the new service), or can redirect to a selected counter/clerk.
With this option enabled, after doing a transaction by clerk 1, the ticket can be redirected to clerk 2 with a different service.
The system will ask which logged in Clerk, which available Counter or which Service the user wants to redirect the ticket and if there has been any transaction made or not . Either if there has been any transaction made or not – redirected ticket will keep it’s priority – if the global/local setting is not overwritten.
If the clerk would like to send the ticket back to the initiator clerk there is an option for that as Send back.
So, if clerk2 has finished his/her transaction with the client but further actions are needed s/he can send the client back to clerk1 or redirect the customer to another clerk/service/counter. It can be useful in financial scenarios for example in cashier payment.
There is a Recall button as well to recall the upcoming ticket .
If no one is attending for the called ticket number we can mark that one as missing client with the Missing button.
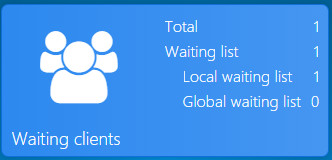
The middle top blue button is the Waiting List. Clerks are able to see how many clients are waiting or able to check the waiting list. Ticket numbers can be called or deleted from the lists and can be moved into different lists.
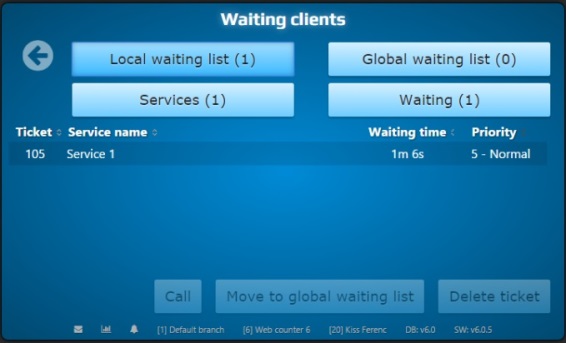
There is a „Waiting” section for the total number of waiting clients and another one for „Services”, where the tellers are able to call clients for a specific service type. Also the global and the local waiting lists can be monitored here.
Main screen features
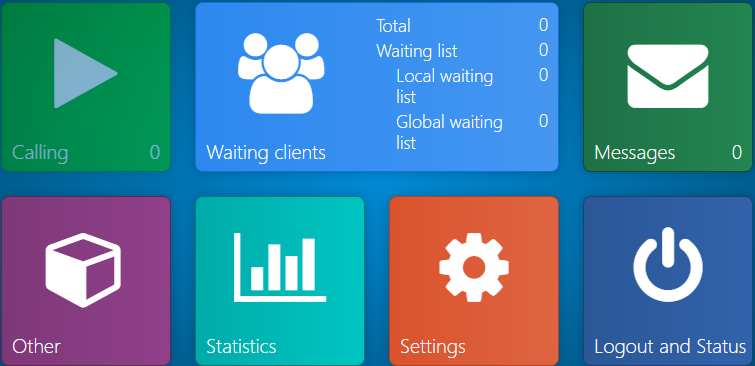
Messages option can be used within the circle of the registered users of the system. It can send instant messages between the logged in clerks. Status of the clerks are marked with green dot for available and red dot for unavailable.
Other option is able to generate a ticket for a client that hasn’t used the ticket dispenser or during the transaction it has turned out that another action must be done still at the same counter. To keep the statistics precise the clerk should add another ticket. The other option is to create an Alarm for a specified reason. This alarm will notify the selected person in the configuration and the ticket dispenser, waiting area display and counters.
Statistics
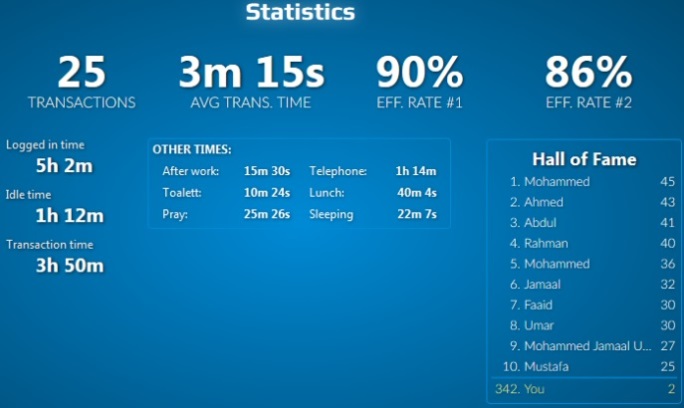
The Statistics button gives the opportunity for the user to see the logged in time / the idle time or total transaction time. Giving information about handled transactions and efficiency rate. This is the section which lets the user know her/his numbers on timescales.
Transaction time: Time spent with transactions
Logged out time: Time spent with logged out status during the day
Logged in time: Time spent with logged in status during the day
Work time: Time period between the first login and last log out
Idle time: Time spent logged in, without doing transactions
ATW time: Time spent with Afterwork status
Eff rate #1: Time spent with logged in status / Time period between the first login and last log out (Logged in time)/(Work time)
Eff rate #2: Time spent with transactions / Time spent with logged in status during the day, without the passive idle time
(Transaction time)/(Logged in time): Without the passive idle time
Transaction time: Time spent with transactions
Settings is the page where the user is able to set the interfaces language and the Auto call feature.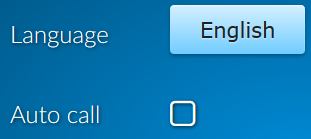
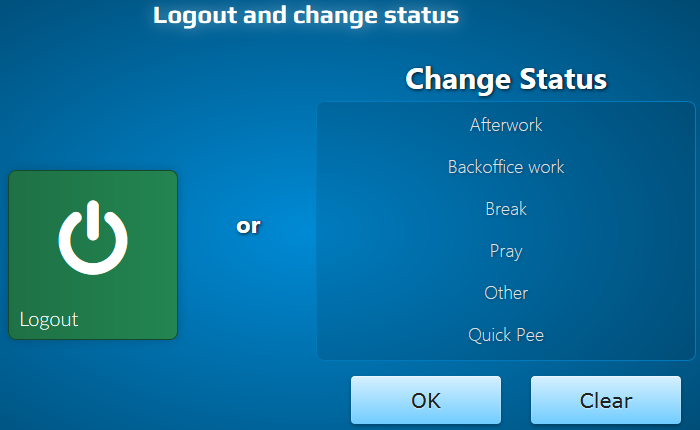
Logout and Status button is pressed when the user has a reason to leave the workplace. Here is the place to mark if the user is leaving for a break, having lunch, praying or simply s/he just signs out.
There is a Back button in the left upper corner in every section – except the Start section.
Desktop Notification
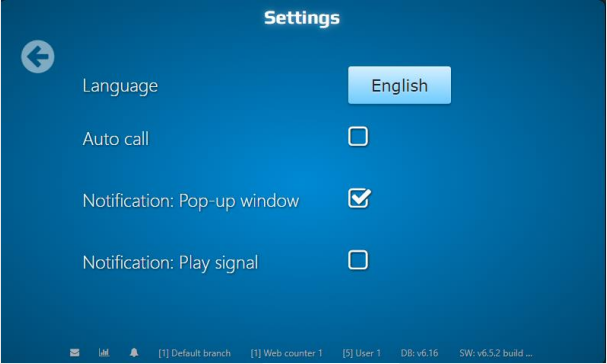
Desktop Pop-up windows notification can be enabled from the settings menu. This option will help the clerk to notice the newly arrived customer. This event only triggers only, when the number of the waiting customer turns 1, from 0. On the bottom right of the screen a notification will appear:

Please note: This feature will work only with HTTPS connection in case of Google Chrome version 62, or higher! The new version of the browser will find this insecure content without the secure connection. This feature is not working with Internet Explorer.